

A few months ago I ordered a couple of really cute prints from this curated online shop. I’m planning a gallery wall for the wallpaper accent wall in the bedroom, and I wanted some fun prints that would fit the Palm Springs/desert/Scandinavian vibe we’re going for in that room. In line with that thinking, I decided to frame everything in brushed gold frames (which read brass in person) to play off some of the other brass accents in the room. I knew I would need an assortment of sizes all in the same finish to accommodate the prints I had planned for, so I started digging online for a more customizable experience than IKEA could provide me. Enter pictureframes.com. They offer a huge assortment of modern, slim frames (just what I needed) in an additionally huge range of color options. As a bonus, the frames were cheaper than any I had ever seen! I’m talking $12 for an 8″x10″ metal frame. I couldn’t believe my eyes, and hastily ordered three in that size. Then they arrived.
So here’s the catch. The frames ship unassembled and, unless you purchase them separately, do not come with glazing (i.e. glass) or backing board. Well, as crafty as I consider myself to be, I didn’t quite understand what to do with these frames, plus I didn’t have the requisite glass and backing. So I headed down the street to Washington Framers Workroom. If you live in the DC area, you have to check them out! I was able to buy the glass and backing board and rent a table where they had all the materials I needed to put everything together. They walked me through the process step-by-step and I walked out confident that I could do it myself in the future.  With my new skills in hand, I ordered this engineering print from Fine Life Co. and a matching frame to fit it’s large size. But, when I went to add “glazing” and backing board to my order, I wasn’t thrilled with the price. I figured, there’s got to be a less expensive option out there somewhere! And I was right. This site offers glass starting at 91¢ and foam mount board starting at 41¢! That’s cents people! I ordered their 2mm clear glass and 3/16 inch regular foam mounting board in the size I needed, and got it for a song! I was honestly super worried that I had ordered a totally inferior product because the prices were so low. When it arrived in the mail the other day, I was so happy to be wrong. Everything was just as it should be, packed tight in layers upon layers of cardboard and bubble wrap. Seriously, I can’t recommend these guys enough! Now I was ready to get to work mounting and framing my lovely print.
The first thing I did was mount the actual print to the 3/16″ foam core board. The print had an edge around it, which would have been a-ok if I were going to include matting, but I wanted the picture to run all the way to the frame edge, so I carefully cut this border off with an x-acto knife. Then all I needed to do was adhere the print to the foam core using double-sided tape. Aligning the print without sticking it in the wrong place was a little tricky, so I would recommend leaving the piece of plastic on the back of the pieces of tape you put on your print, and just peeling them off one at a time. Start at a corner, get that aligned just right, and then peel off the next piece, stick that, etc. etc. 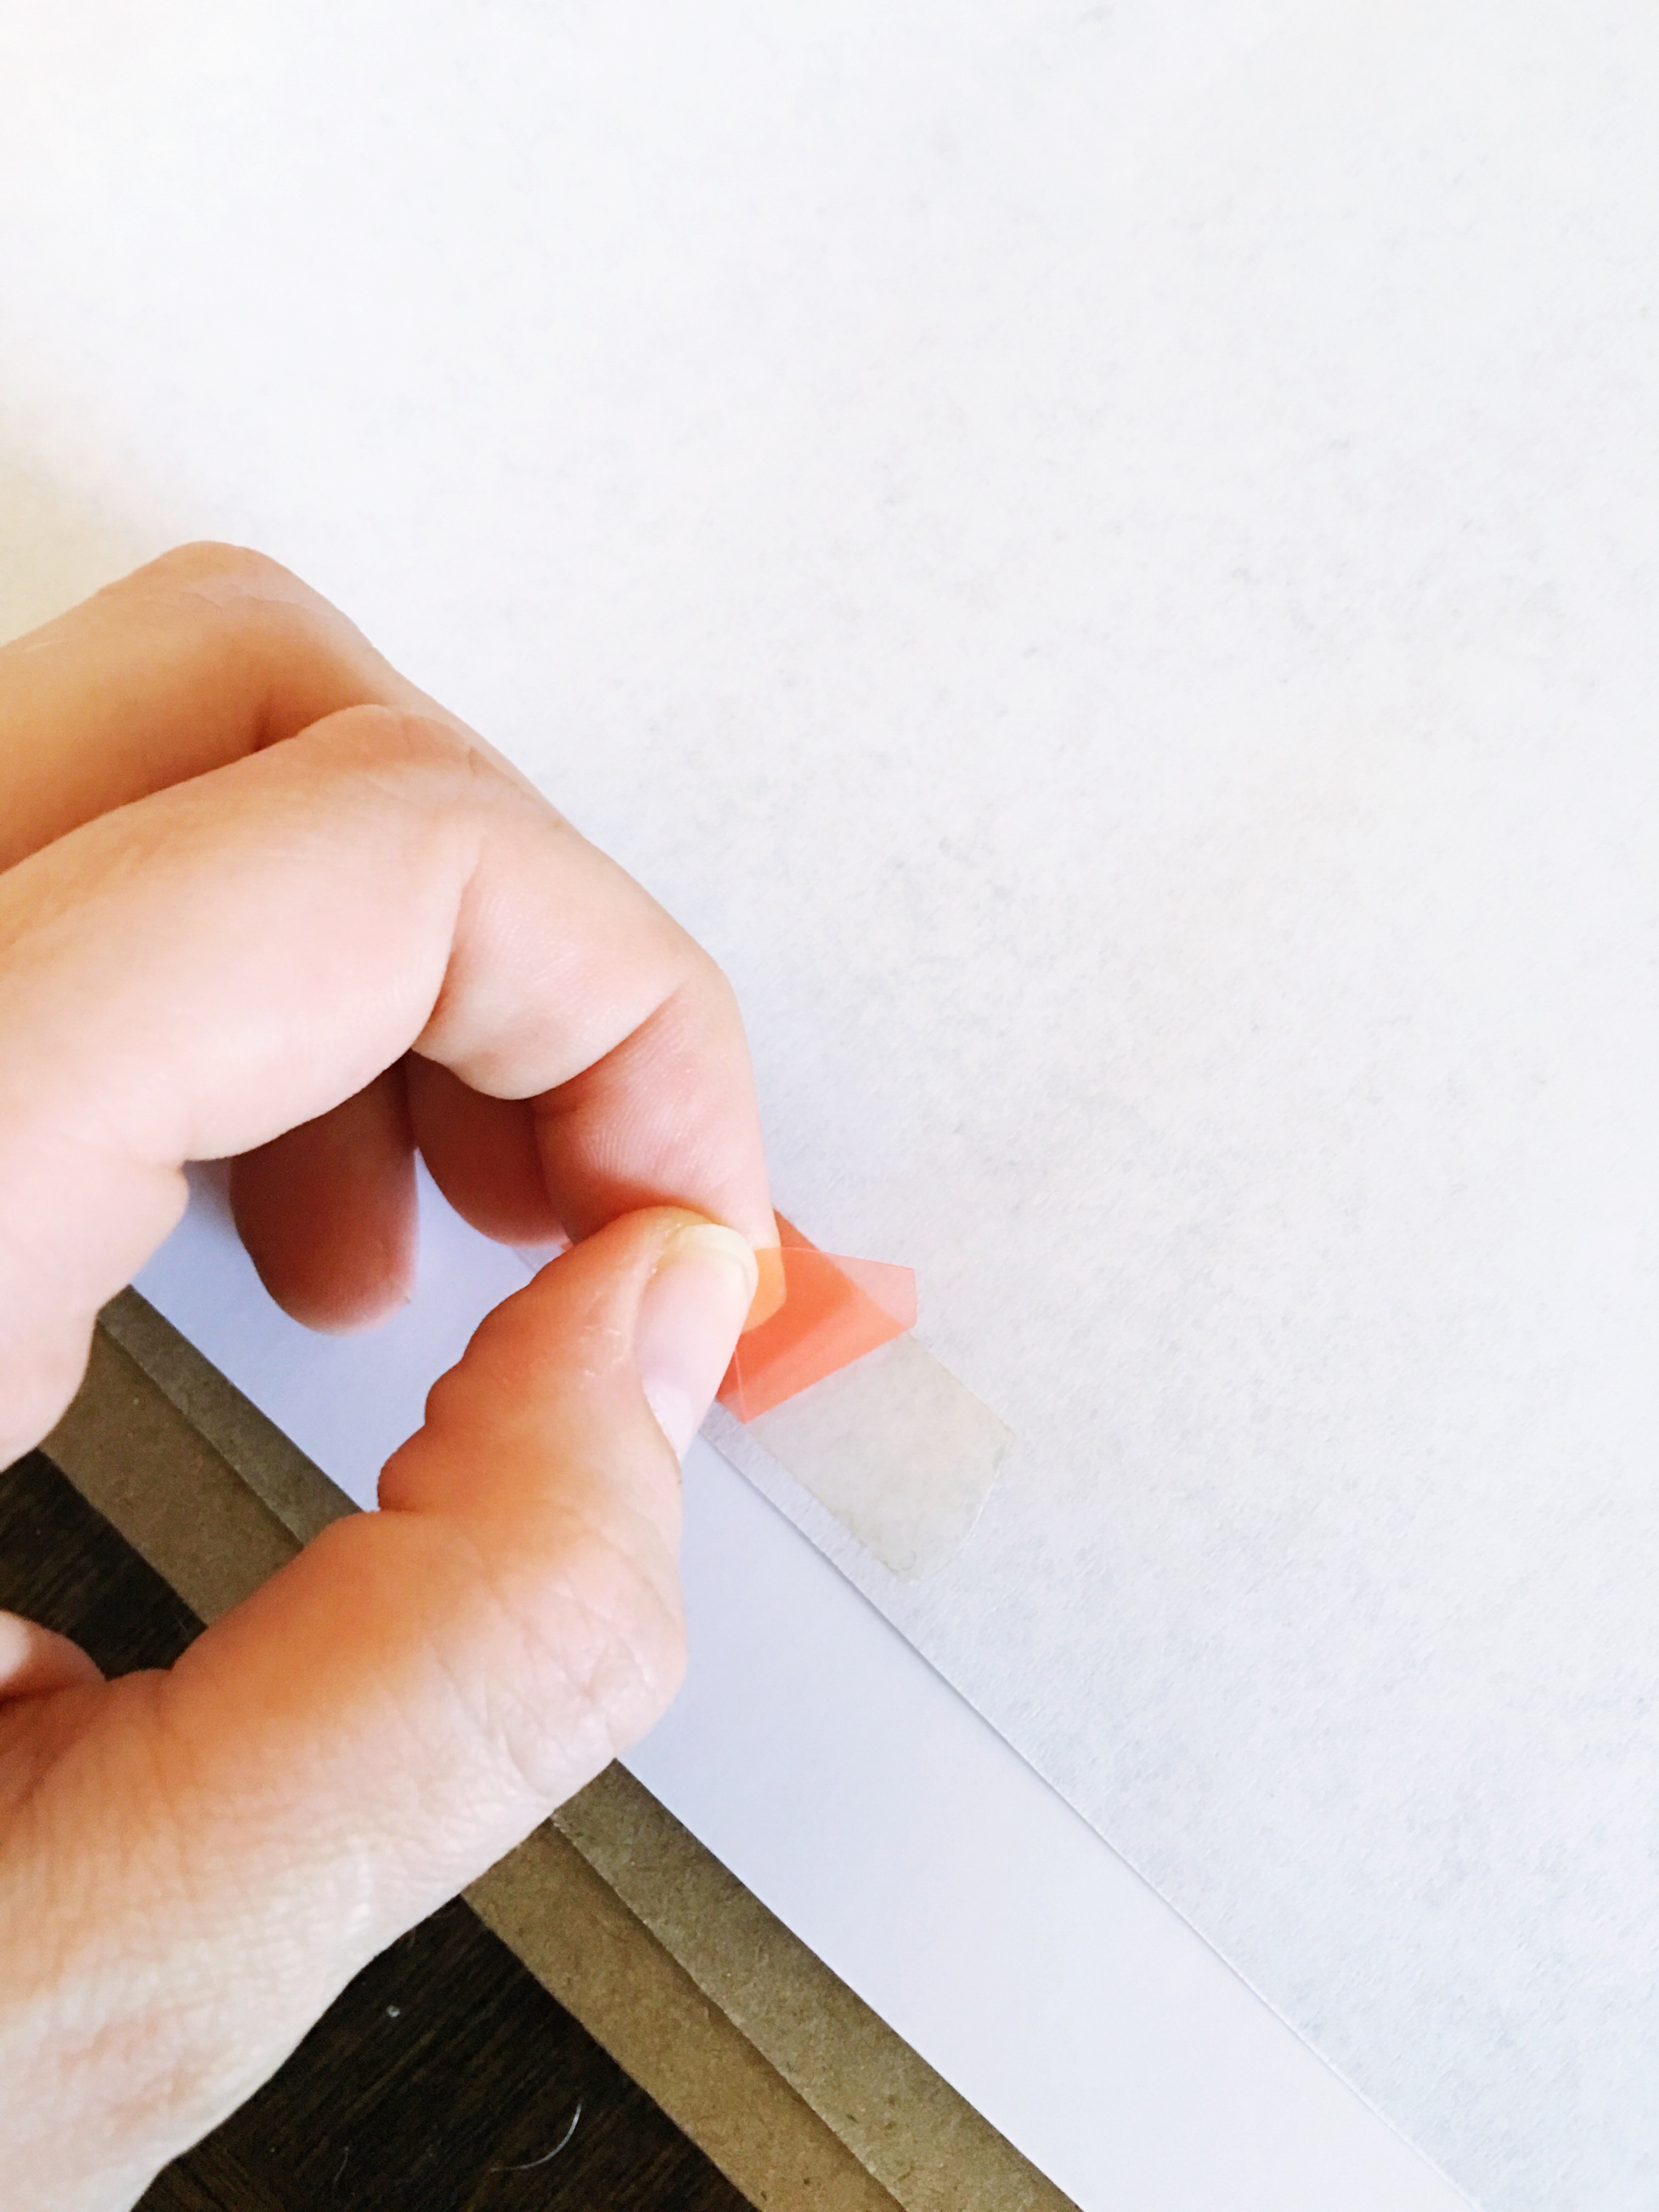 Once your print and mounting board are one, you can start assembling your frame. The frames come with a lovely little instruction sheet, with pictures, but I’ll give you a quick run through of what I did.
Lay out three sides of your frame, with their fronts facing the floor. Take one end of your frame, let’s call it the “top”, and insert the two triangle-shaped pieces (stamped letter side facing down) into the track at one end. Don’t tighten the screws down just yet.  Insert the next set of angles in the other end of the “top” piece. Now you can slide the two side pieces of frame onto the exposed part of the angles at both ends.
  Make sure you have a nice, flush fit and tighten down the screws.
 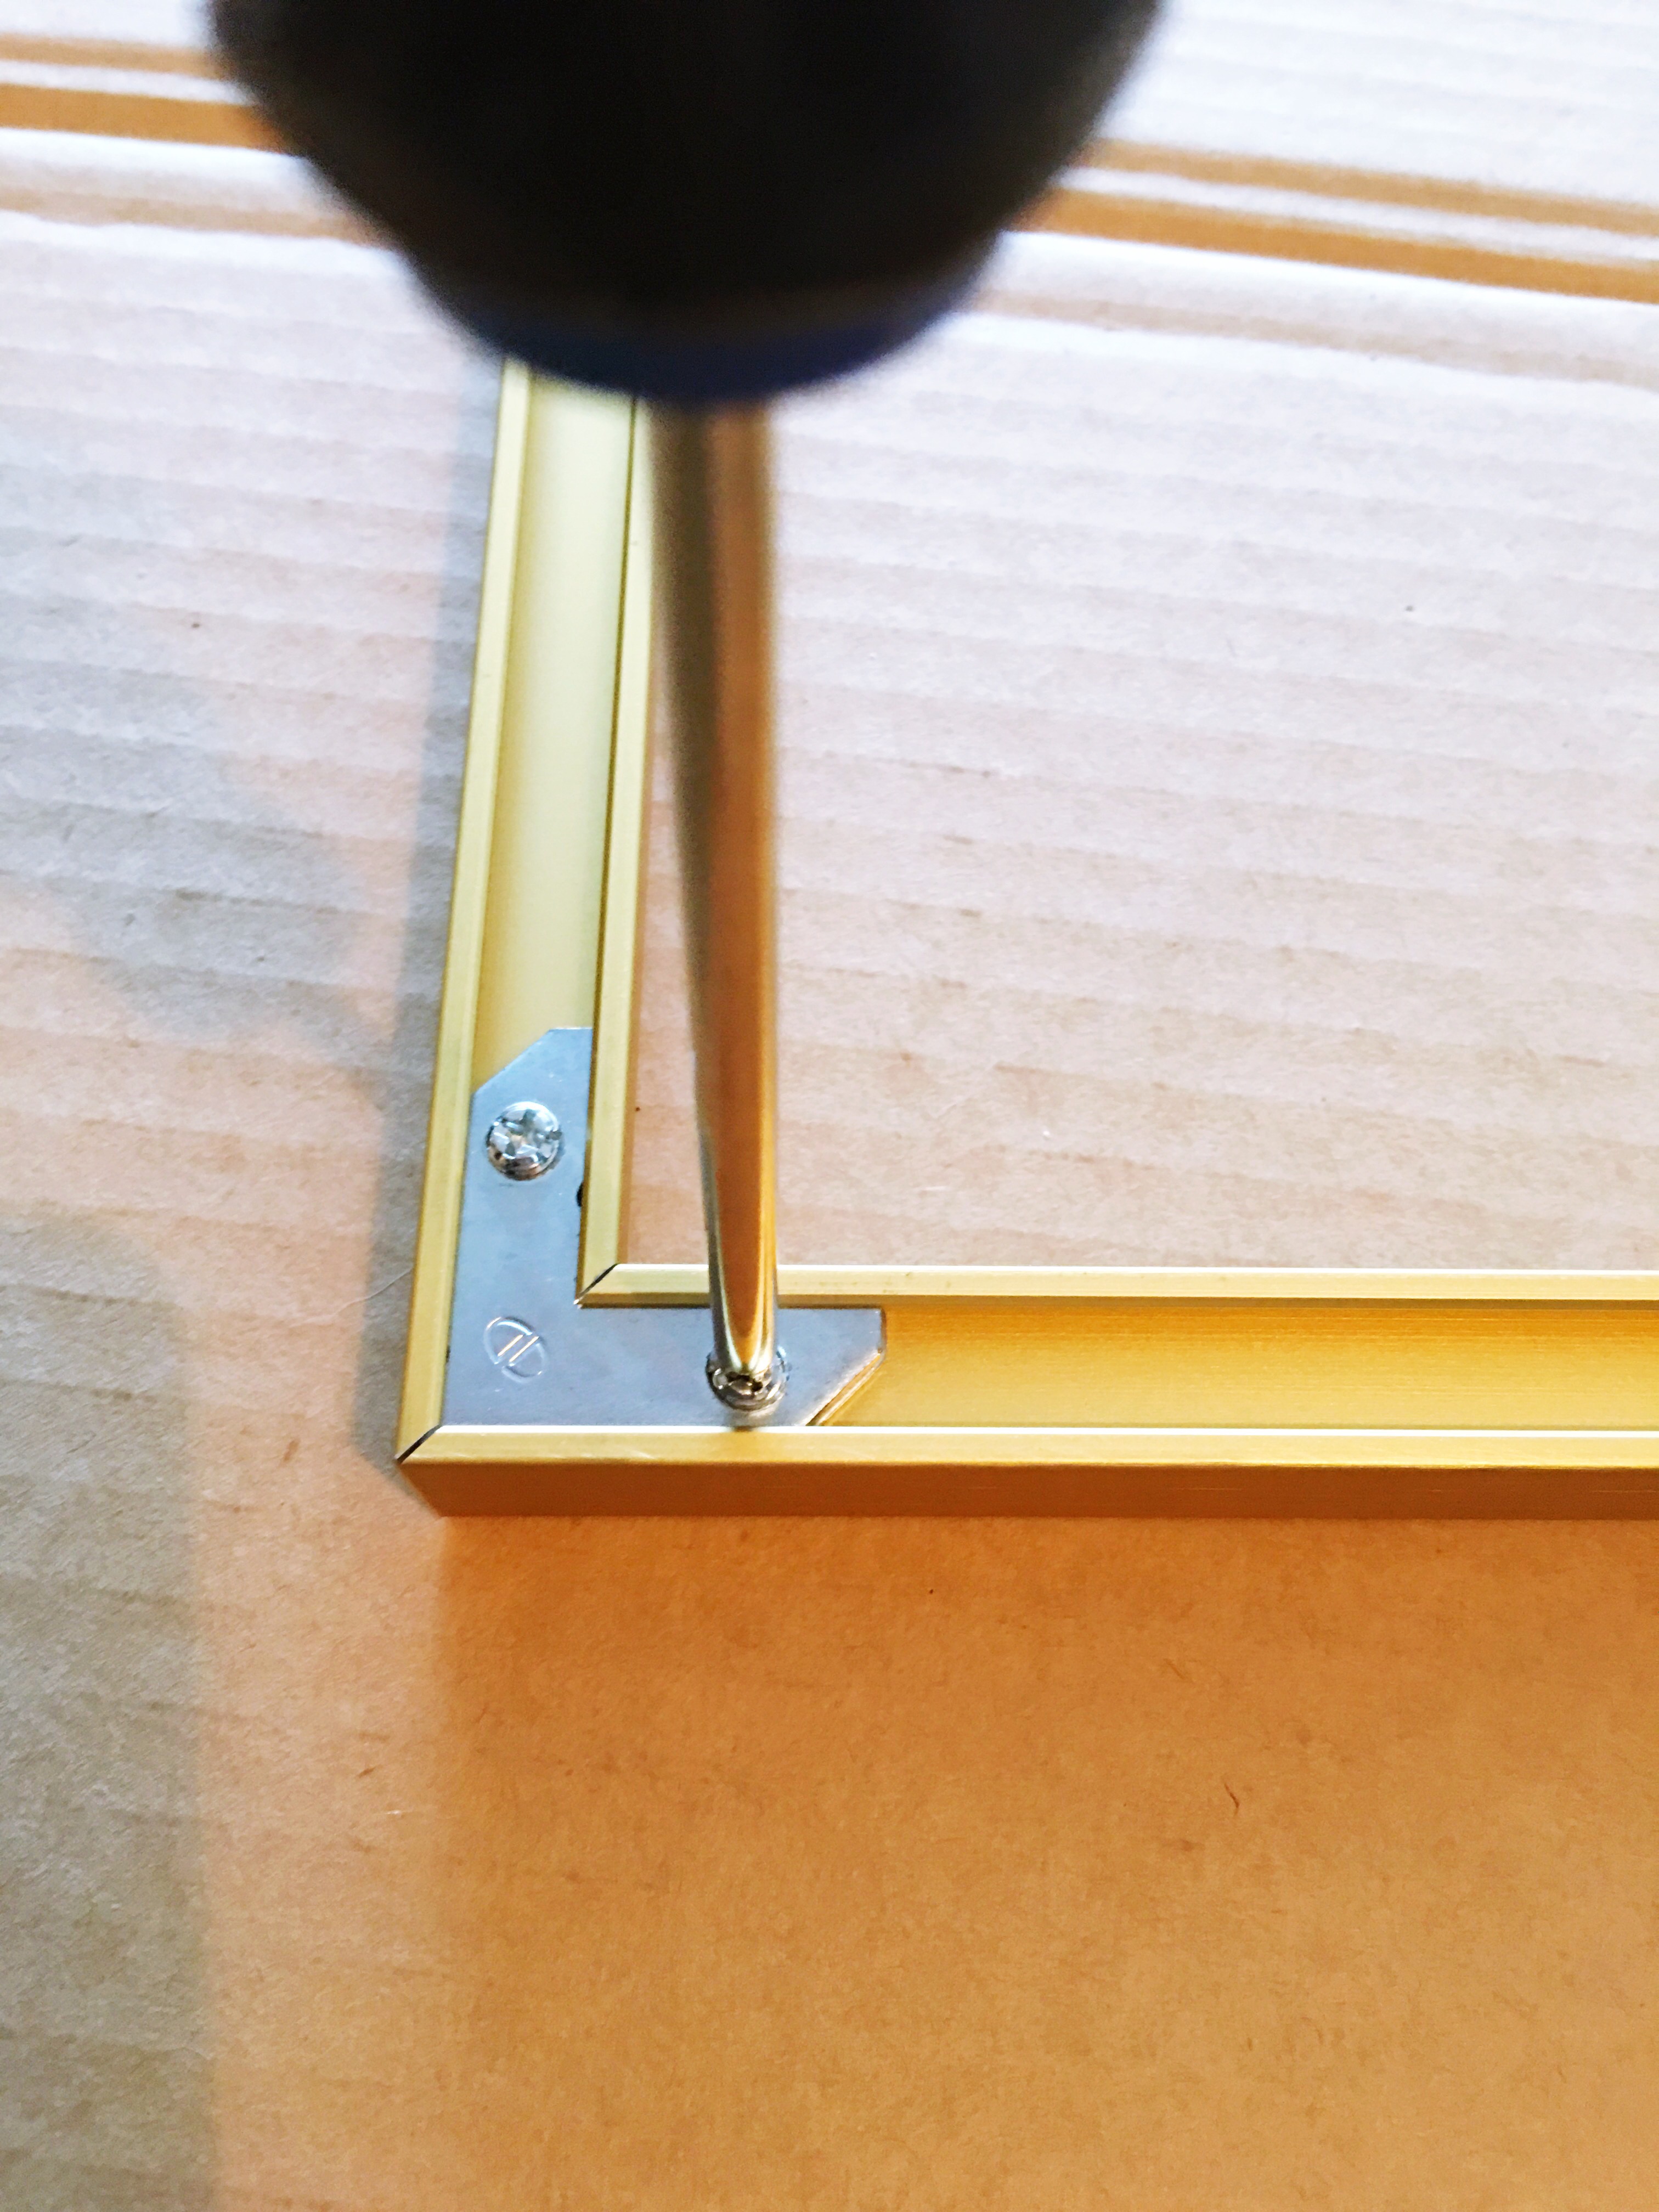 You should now have a three-sided frame.
  Very carefully remove the piece of glass from its paper package and check for dust and spots. The glass I received was very clean and blowing on it lightly removed any stray dust particles. Place the glass on top of the print, creating a sandwich (mounting board, print, glass). Slide the whole sandwich into the track, glass side down, at the open end of your frame.
 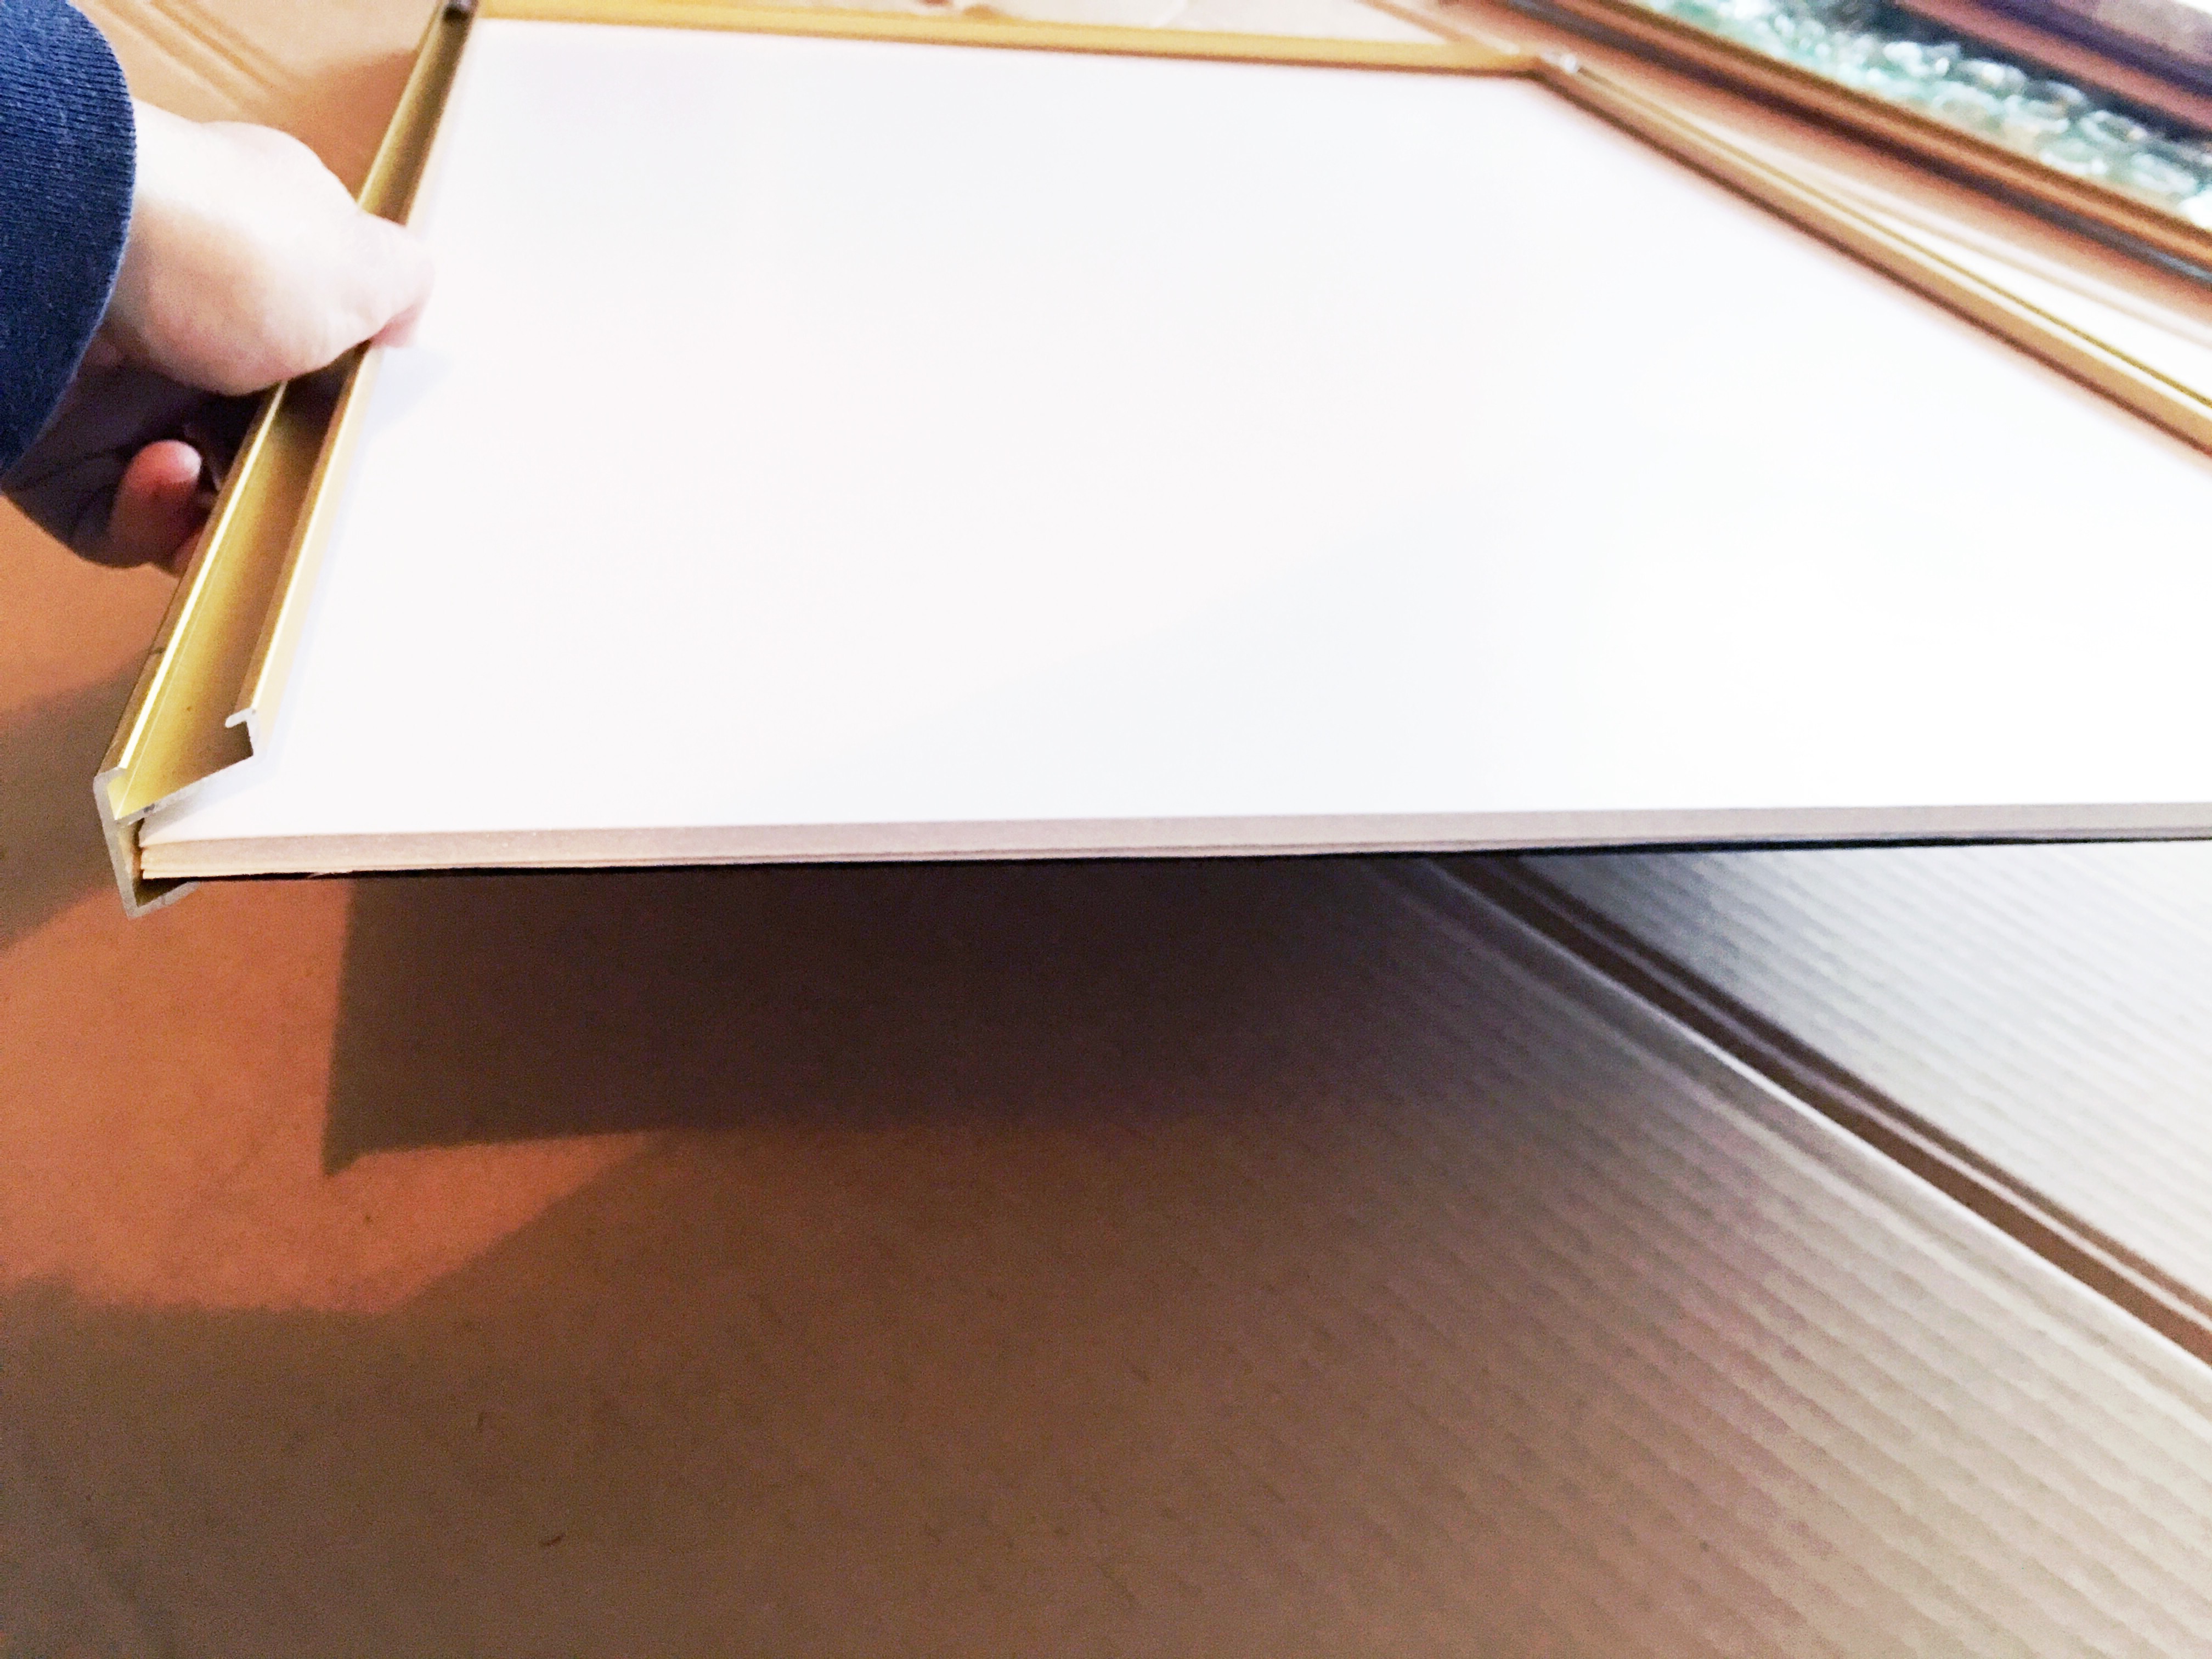 Before attaching the last piece of the frame, slide the hanging hardware into the exposed tracks on either side of the frame. You will tighten these down later.
 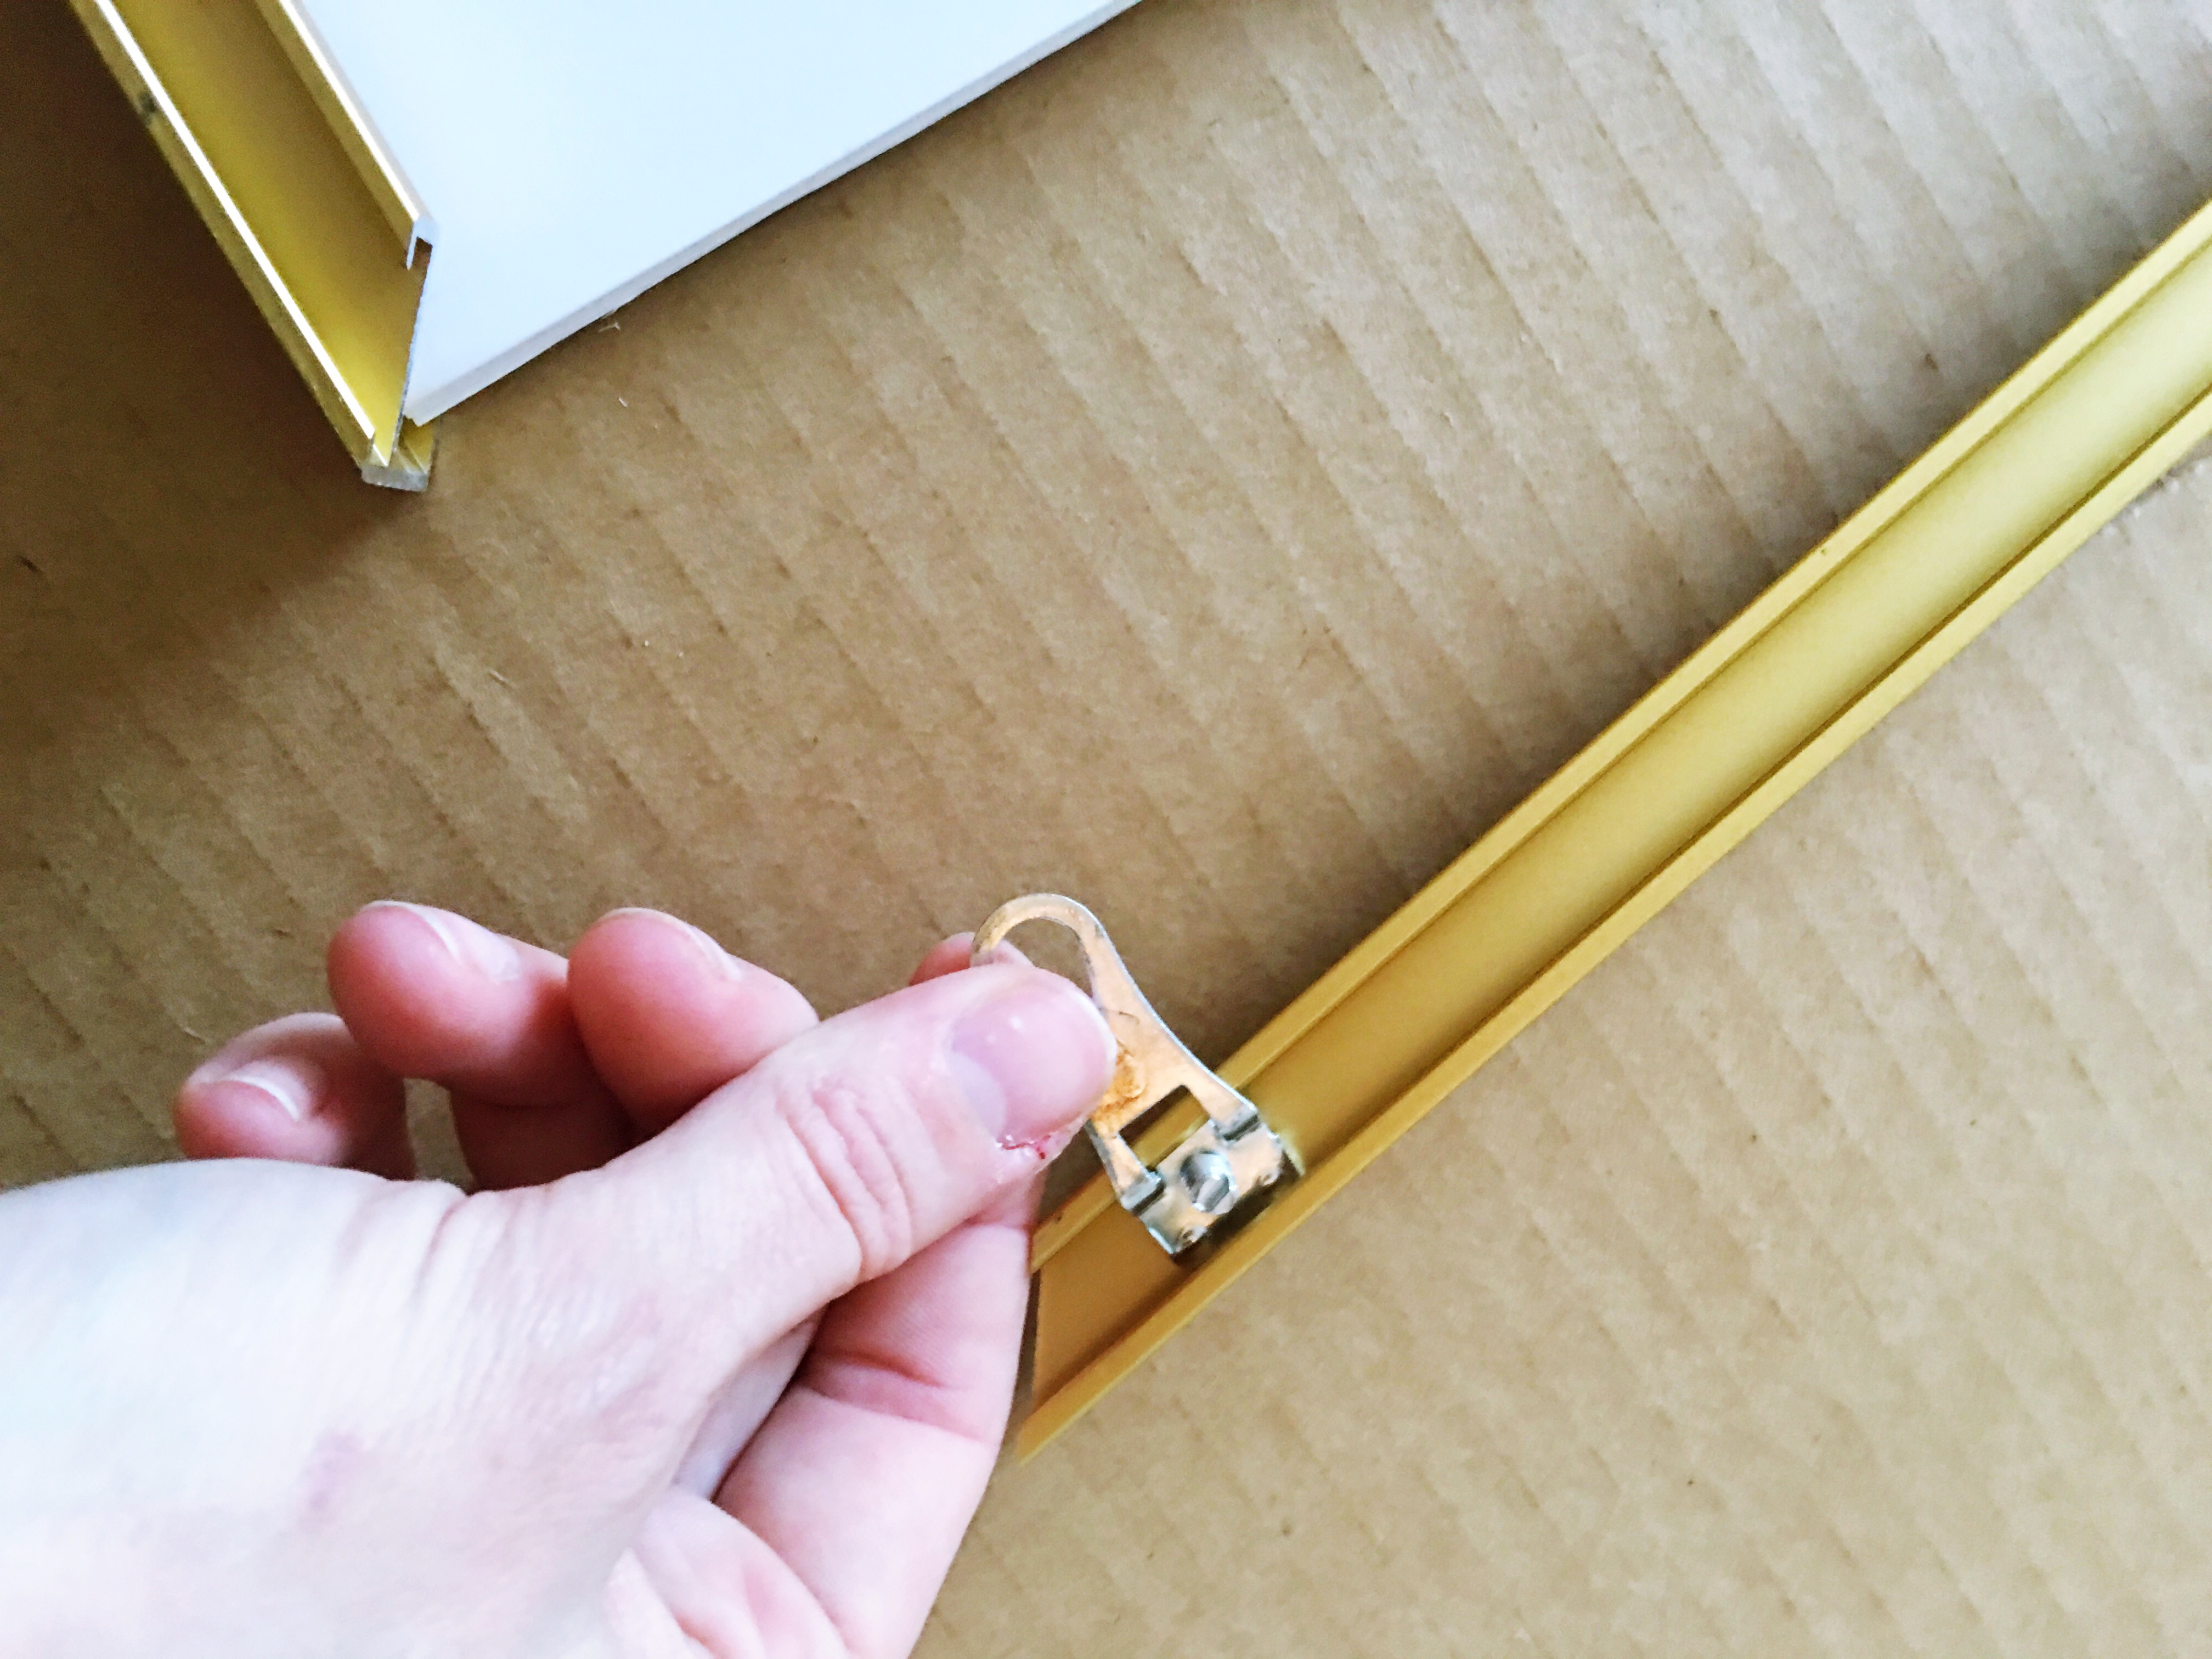 **Note: This picture is just to show how the hanging hardware should slide into the track. My print was landscape, so my hanging hardware had to be attached to the “top” and “bottom” pieces of the frame, instead of the “side” pieces.
Now slide the angle pieces into the ends of the sides of your frame. Slip the “bottom” piece of frame into place and tighten down the screws. 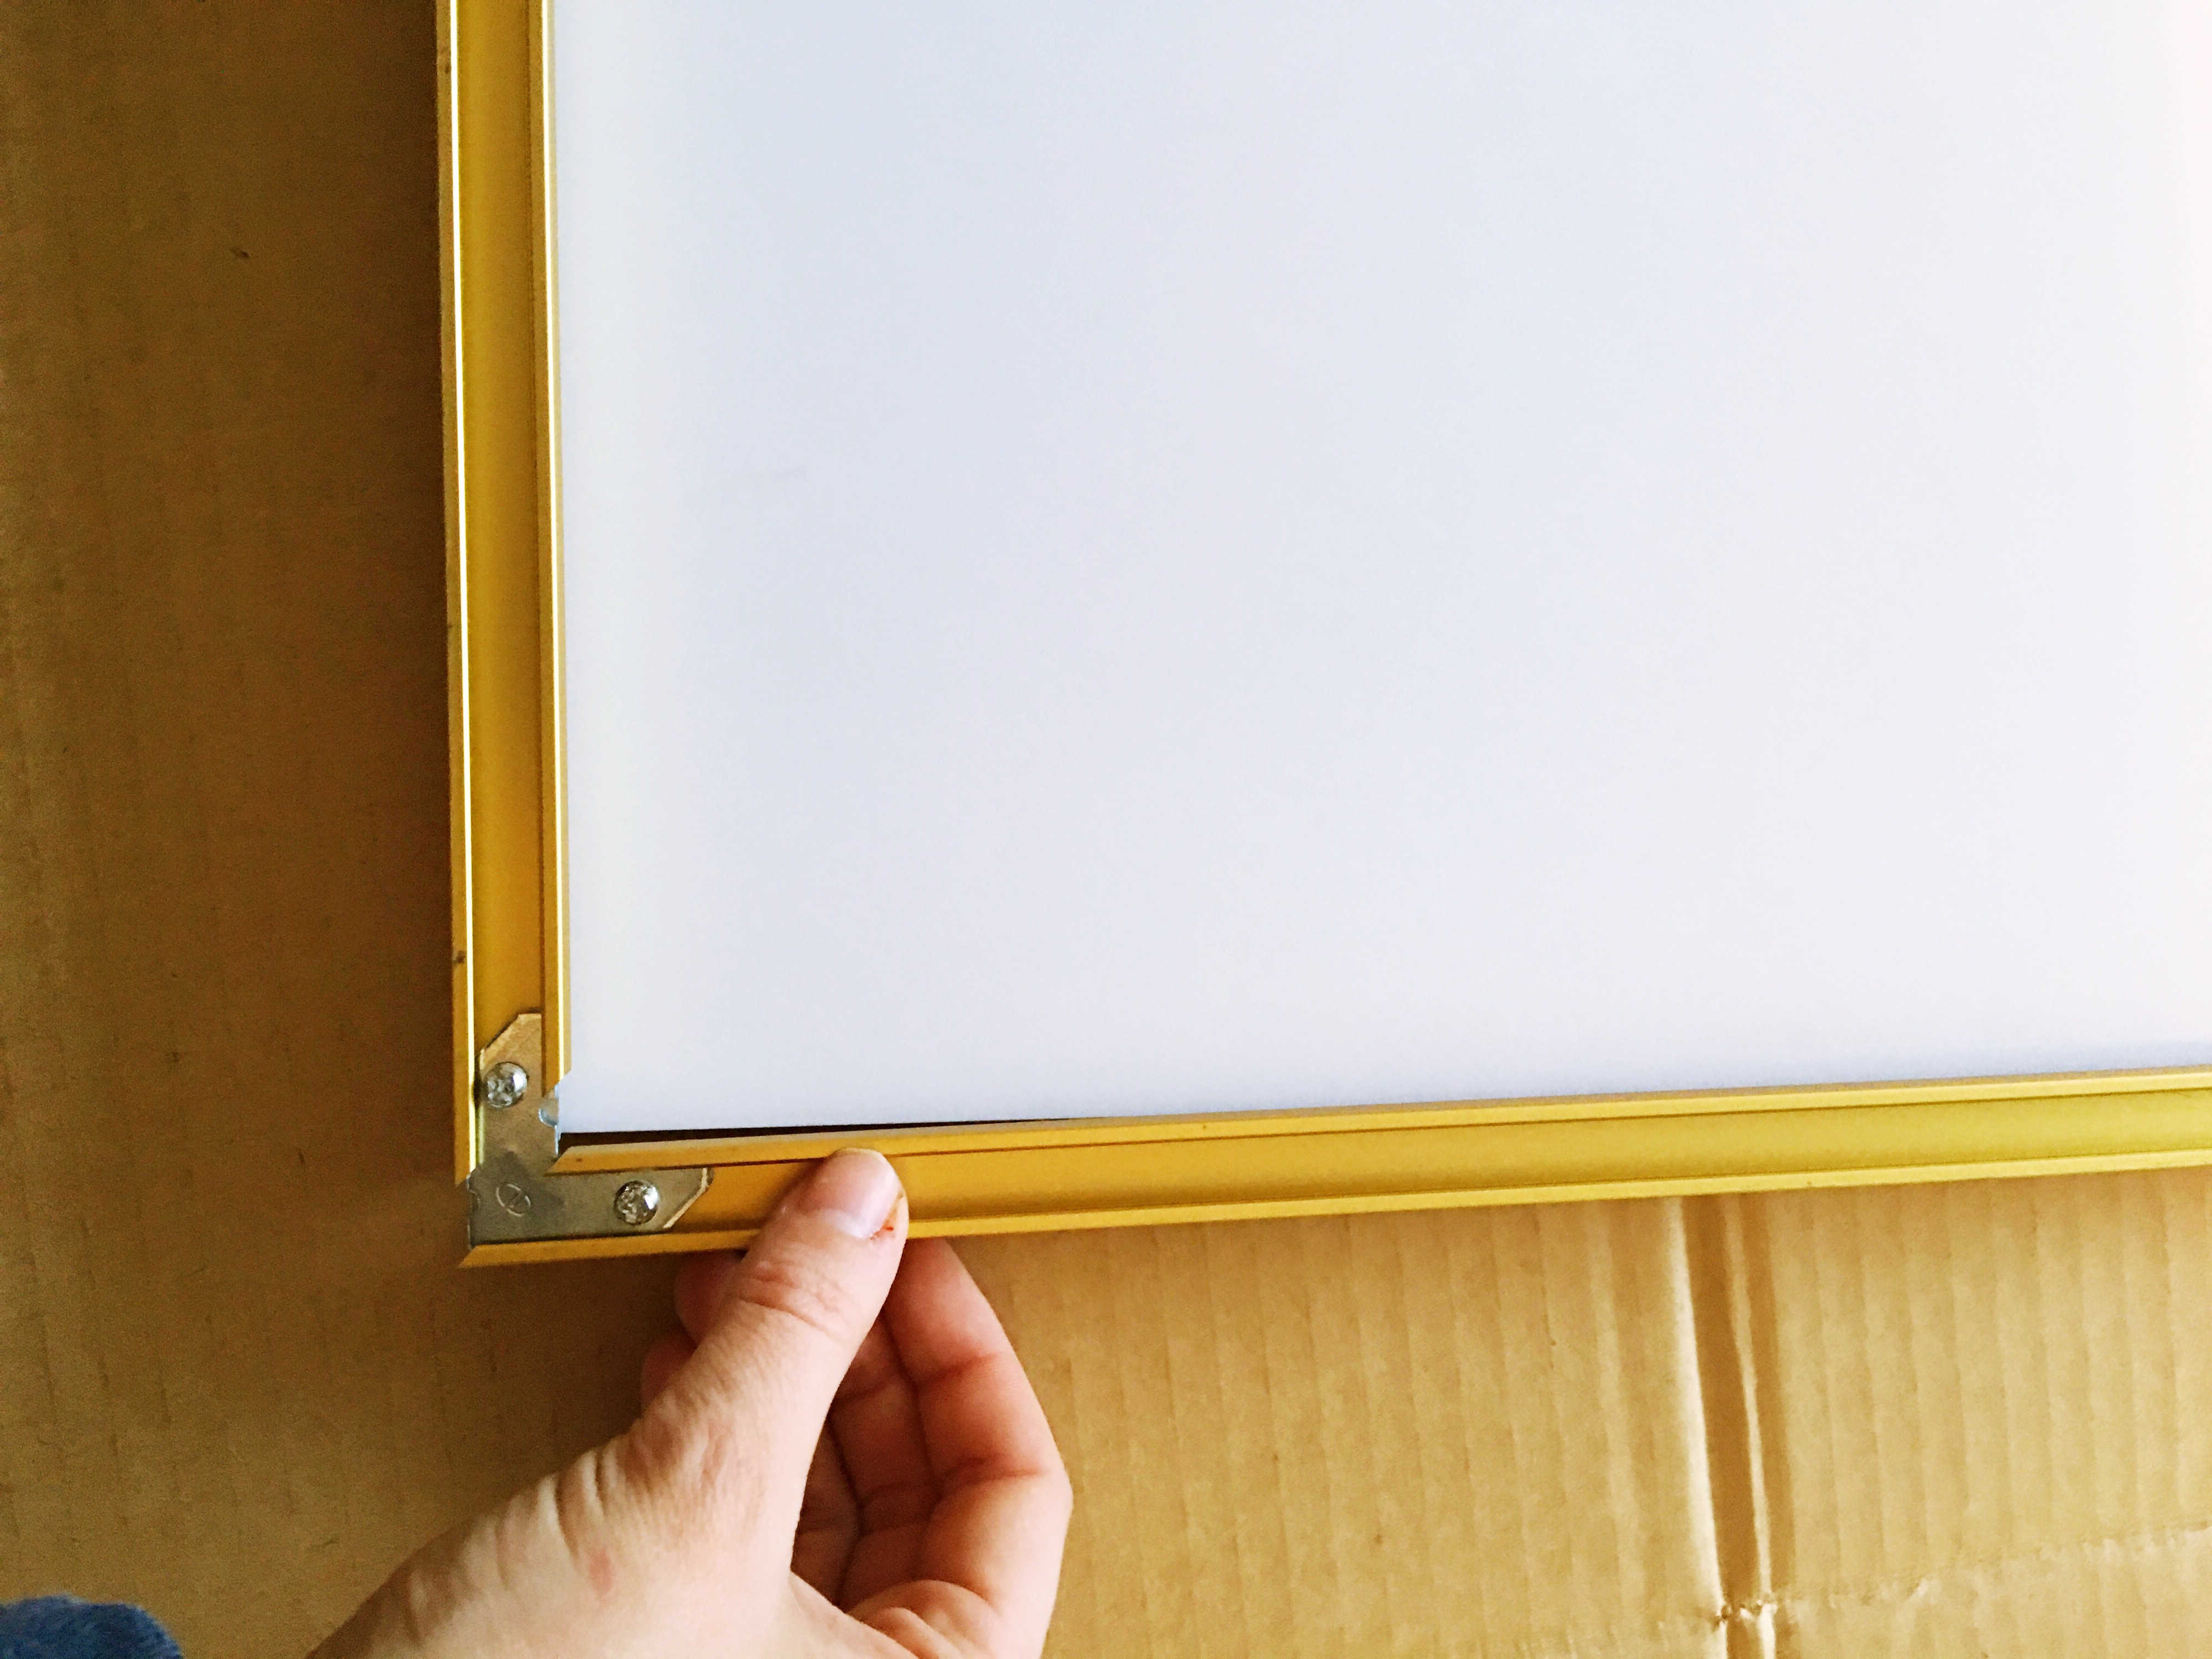 Push the bent pieces of metal under the sides of your frame (between the mounting board and the frame edge). You should have 2 for each side. This presses everything to the front of the frame and keeps it in place.
 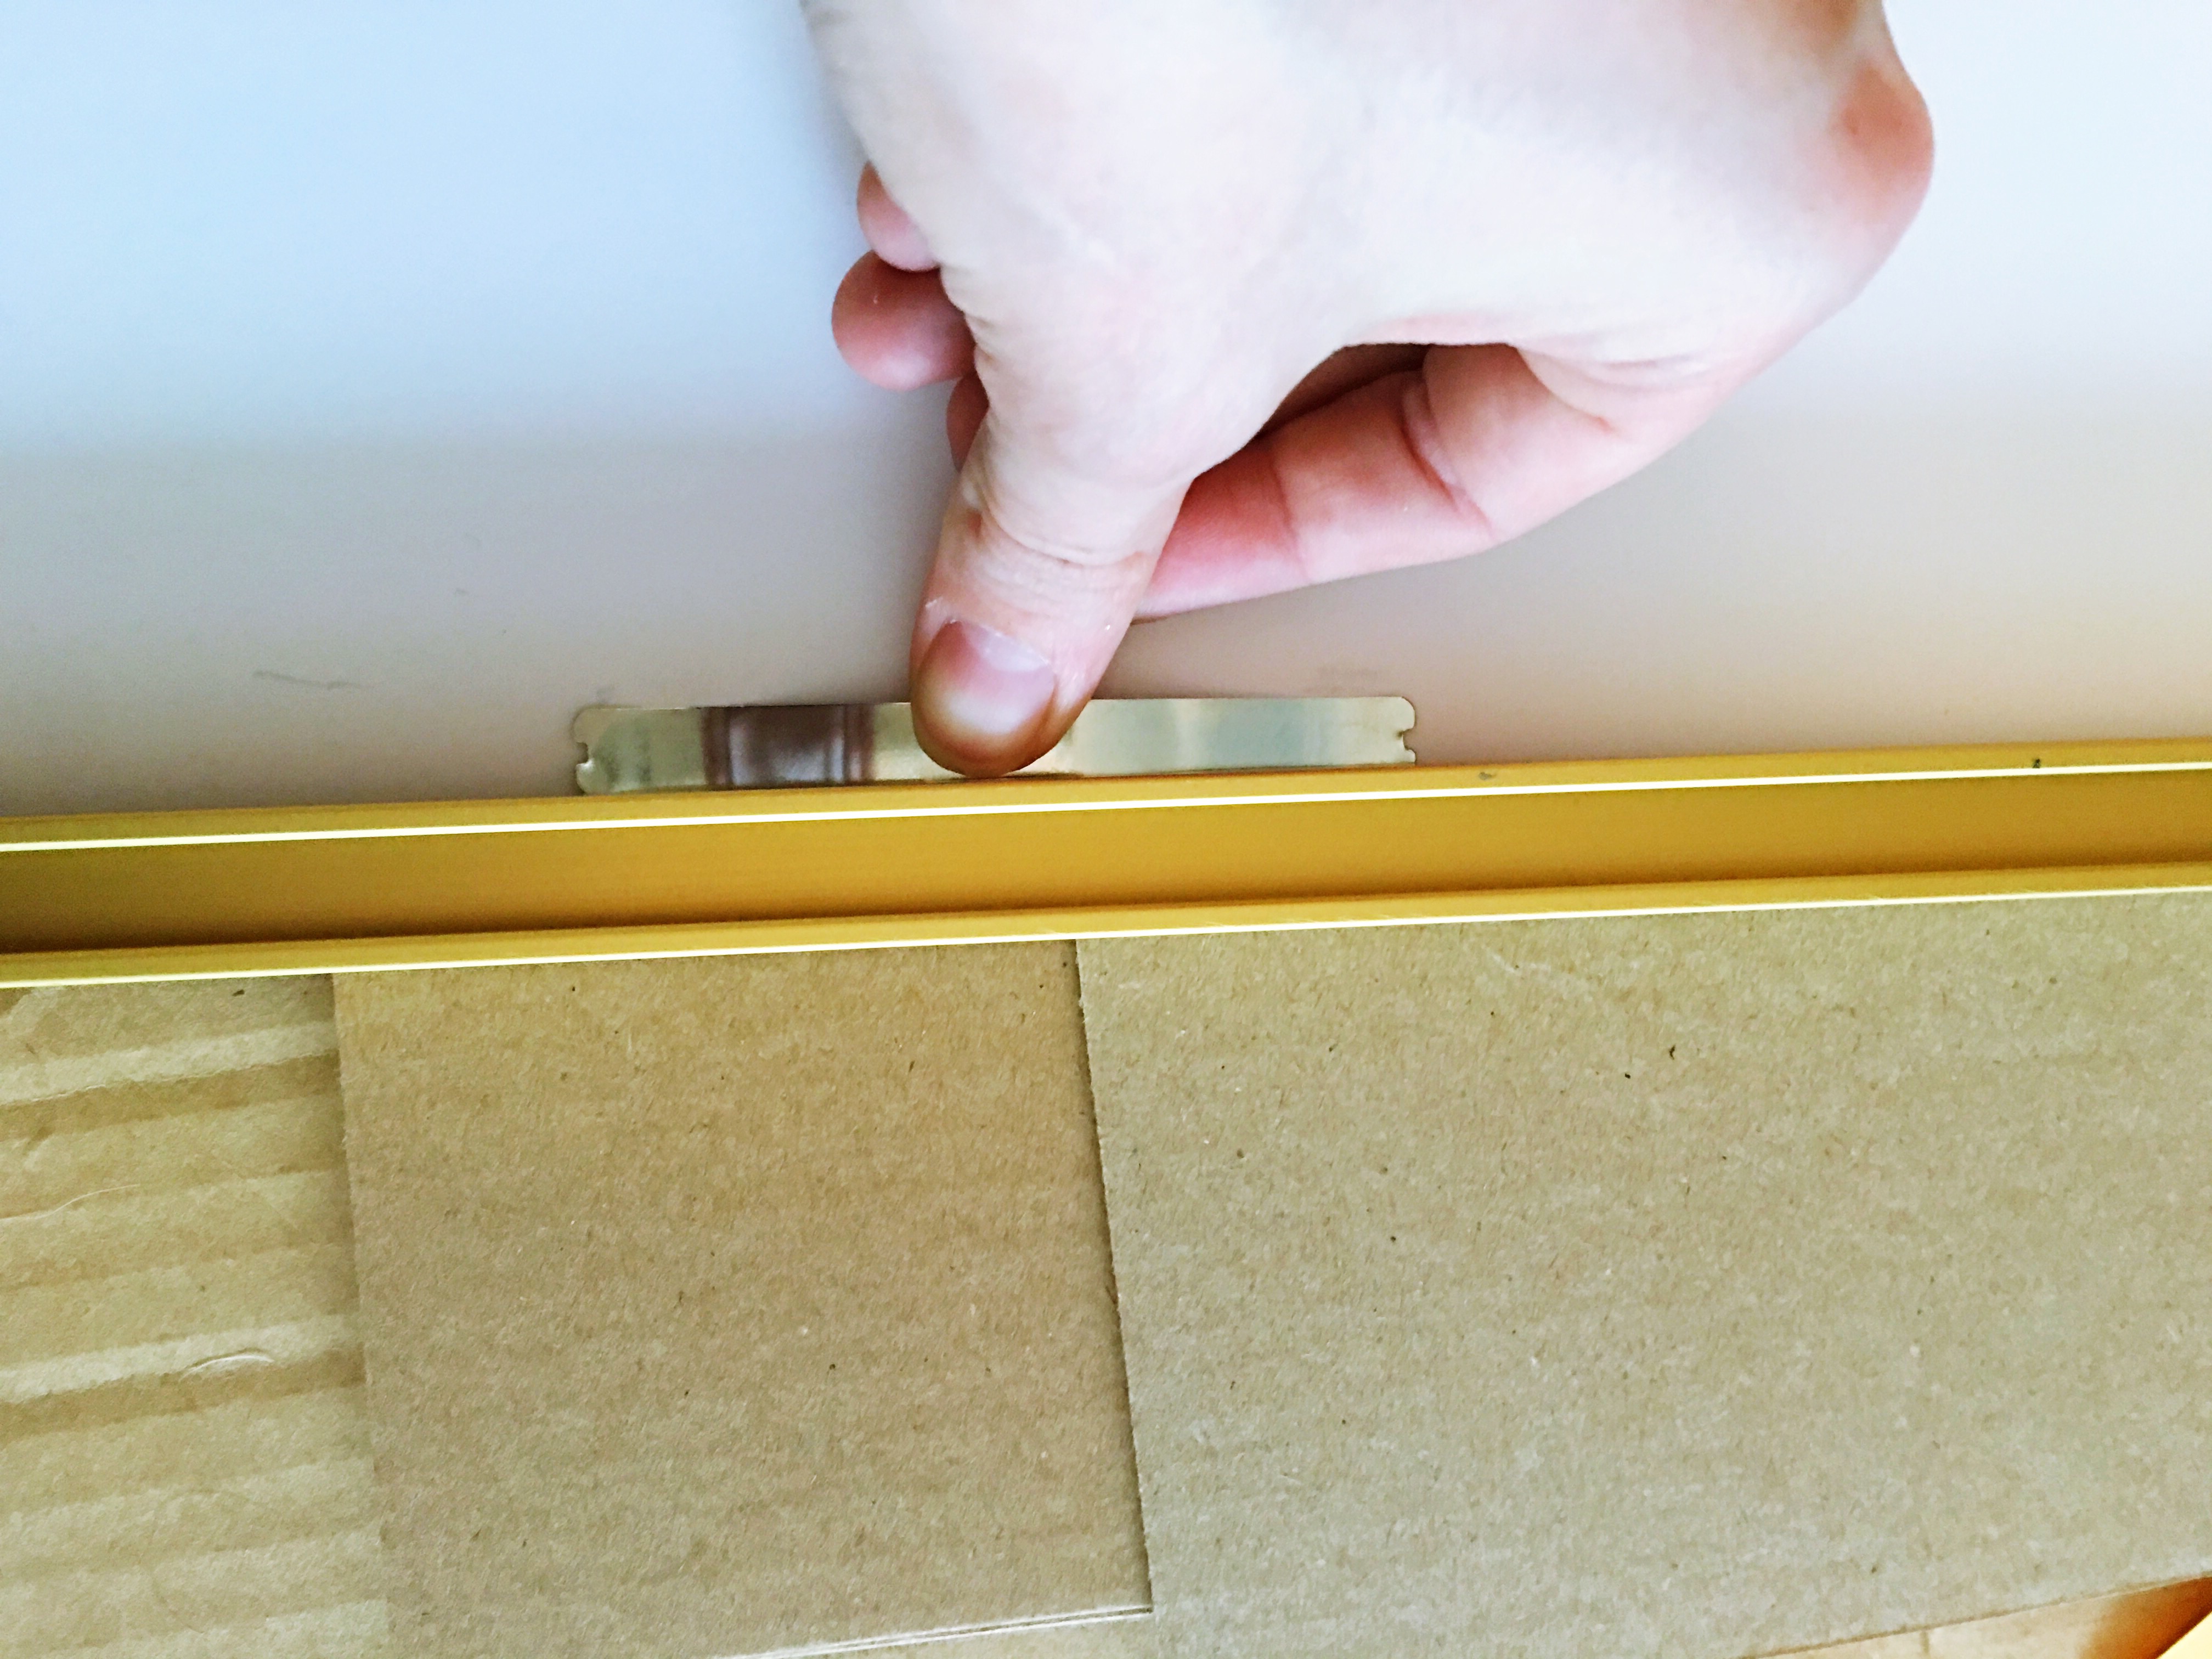 Slide the hanging hardware on either side to about 1/3 down from the top of your frame and tighten down the screws to secure.
 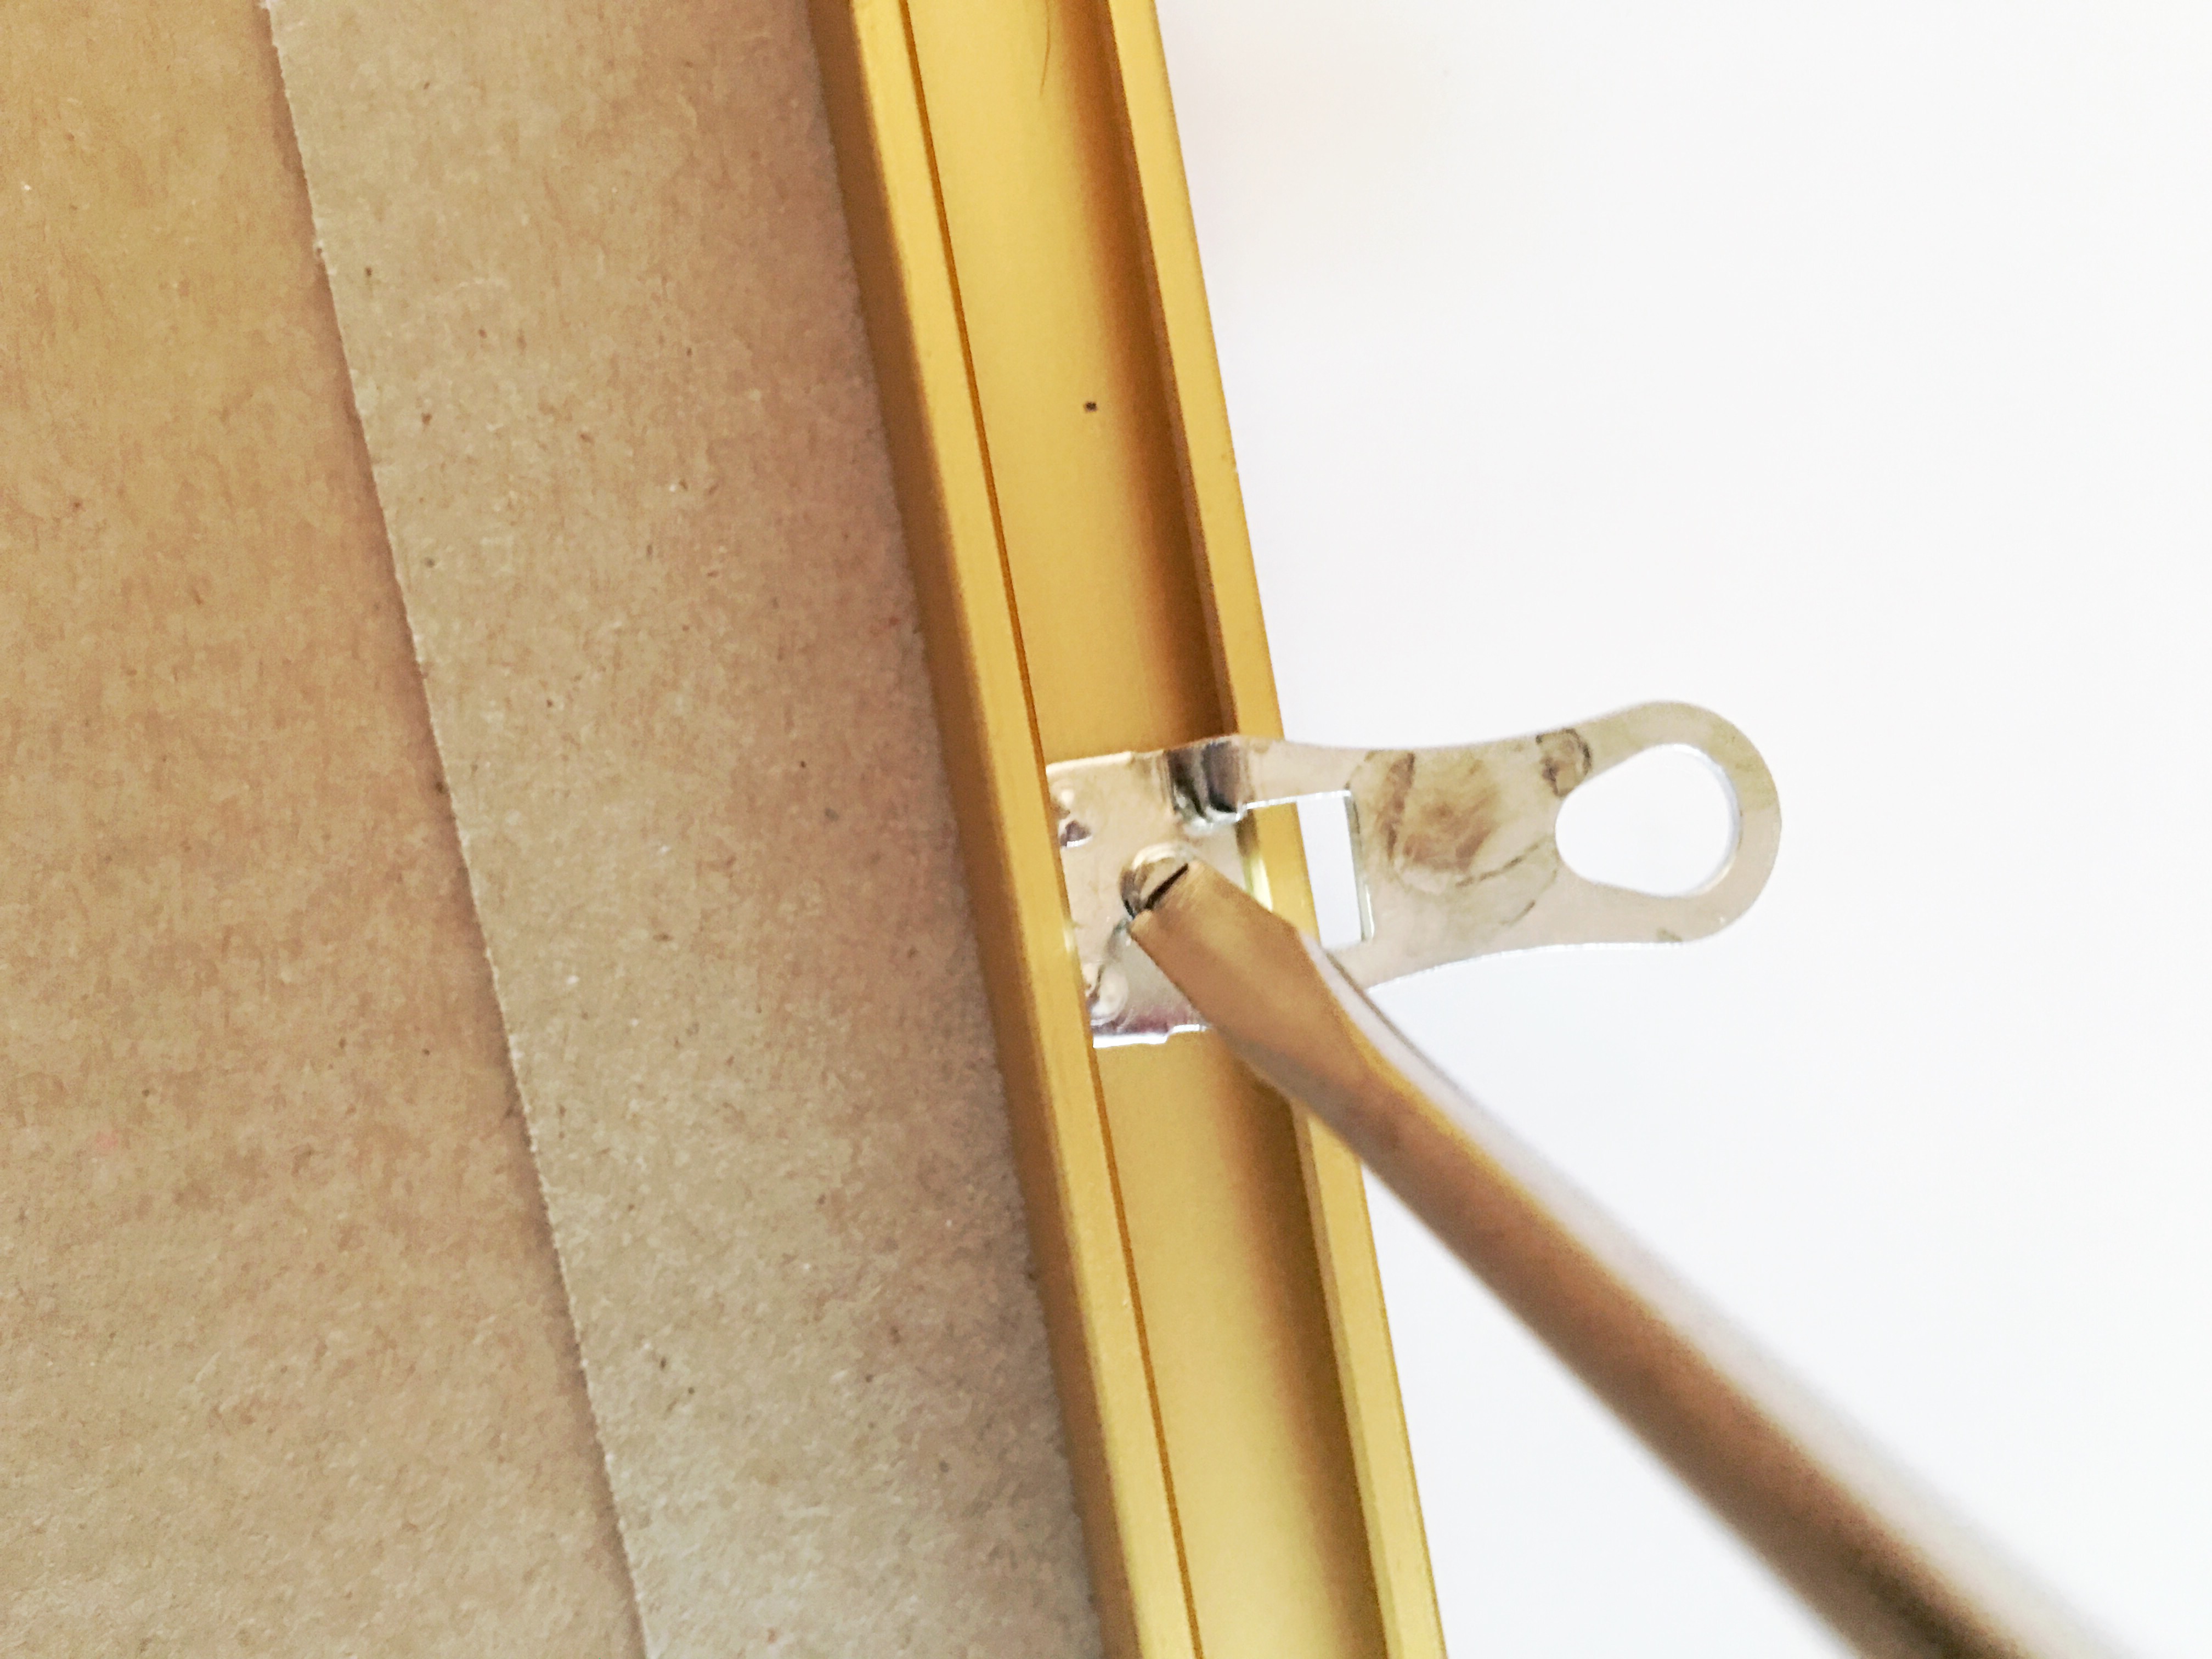 Wrap the hanging wire through the loop twice on one side of the frame and twist the wires together to secure. I used a pair of needle-nose pliers to crimp the wire together to ensure there was no slack.
  Stretch the wire across to the opposite loop and repeat. You want the wire to be pretty taut. This will make hanging easier. Trim any excess wire with wire cutters.
 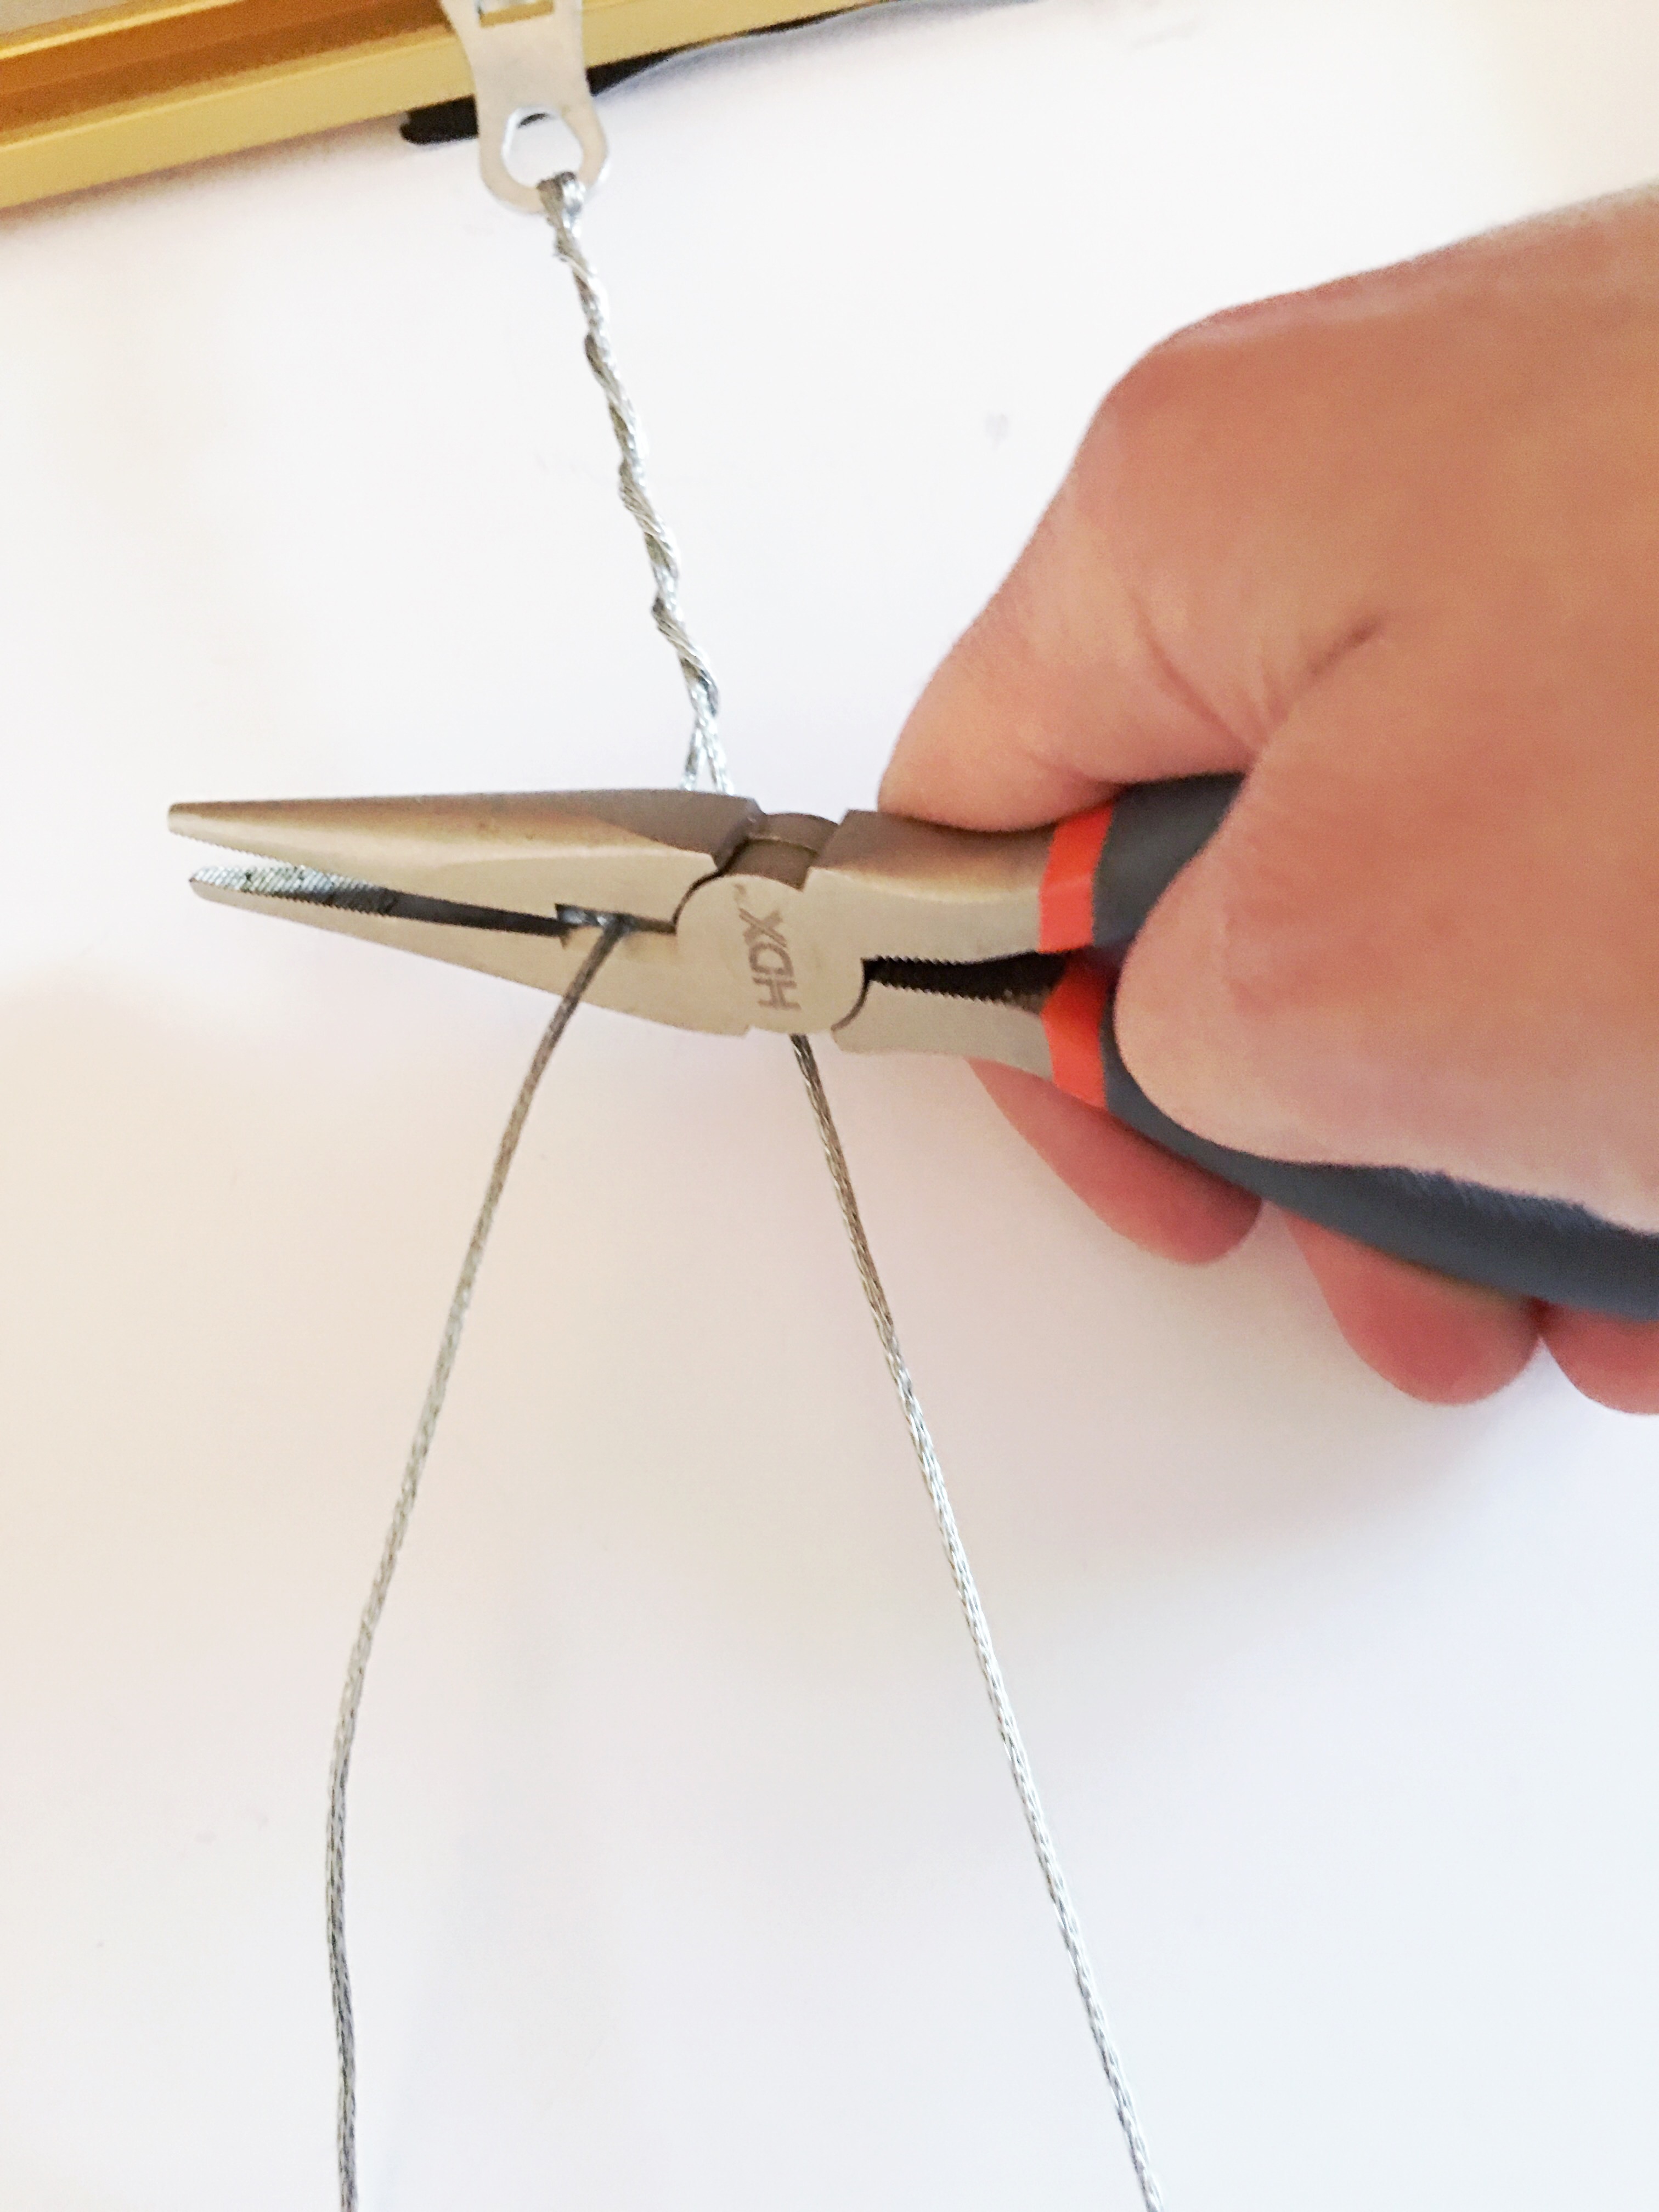 Now flip it over and admire your work!
  If this project seems a little intimidating, it’s not! I tried to explain it the simplest way I could, but the directions that come with the frames are very clear and there is a Customer Care number if you have any questions (they are super sweet and happy to help!).
So what do you think? Would you take this on? The whole project cost less than $30, which is ridiculous in the framing world. It really does pay to do this yourself! Feel free to comment and ask me any questions, and let me know if you found this helpful!
In framing heaven – Cassie
