

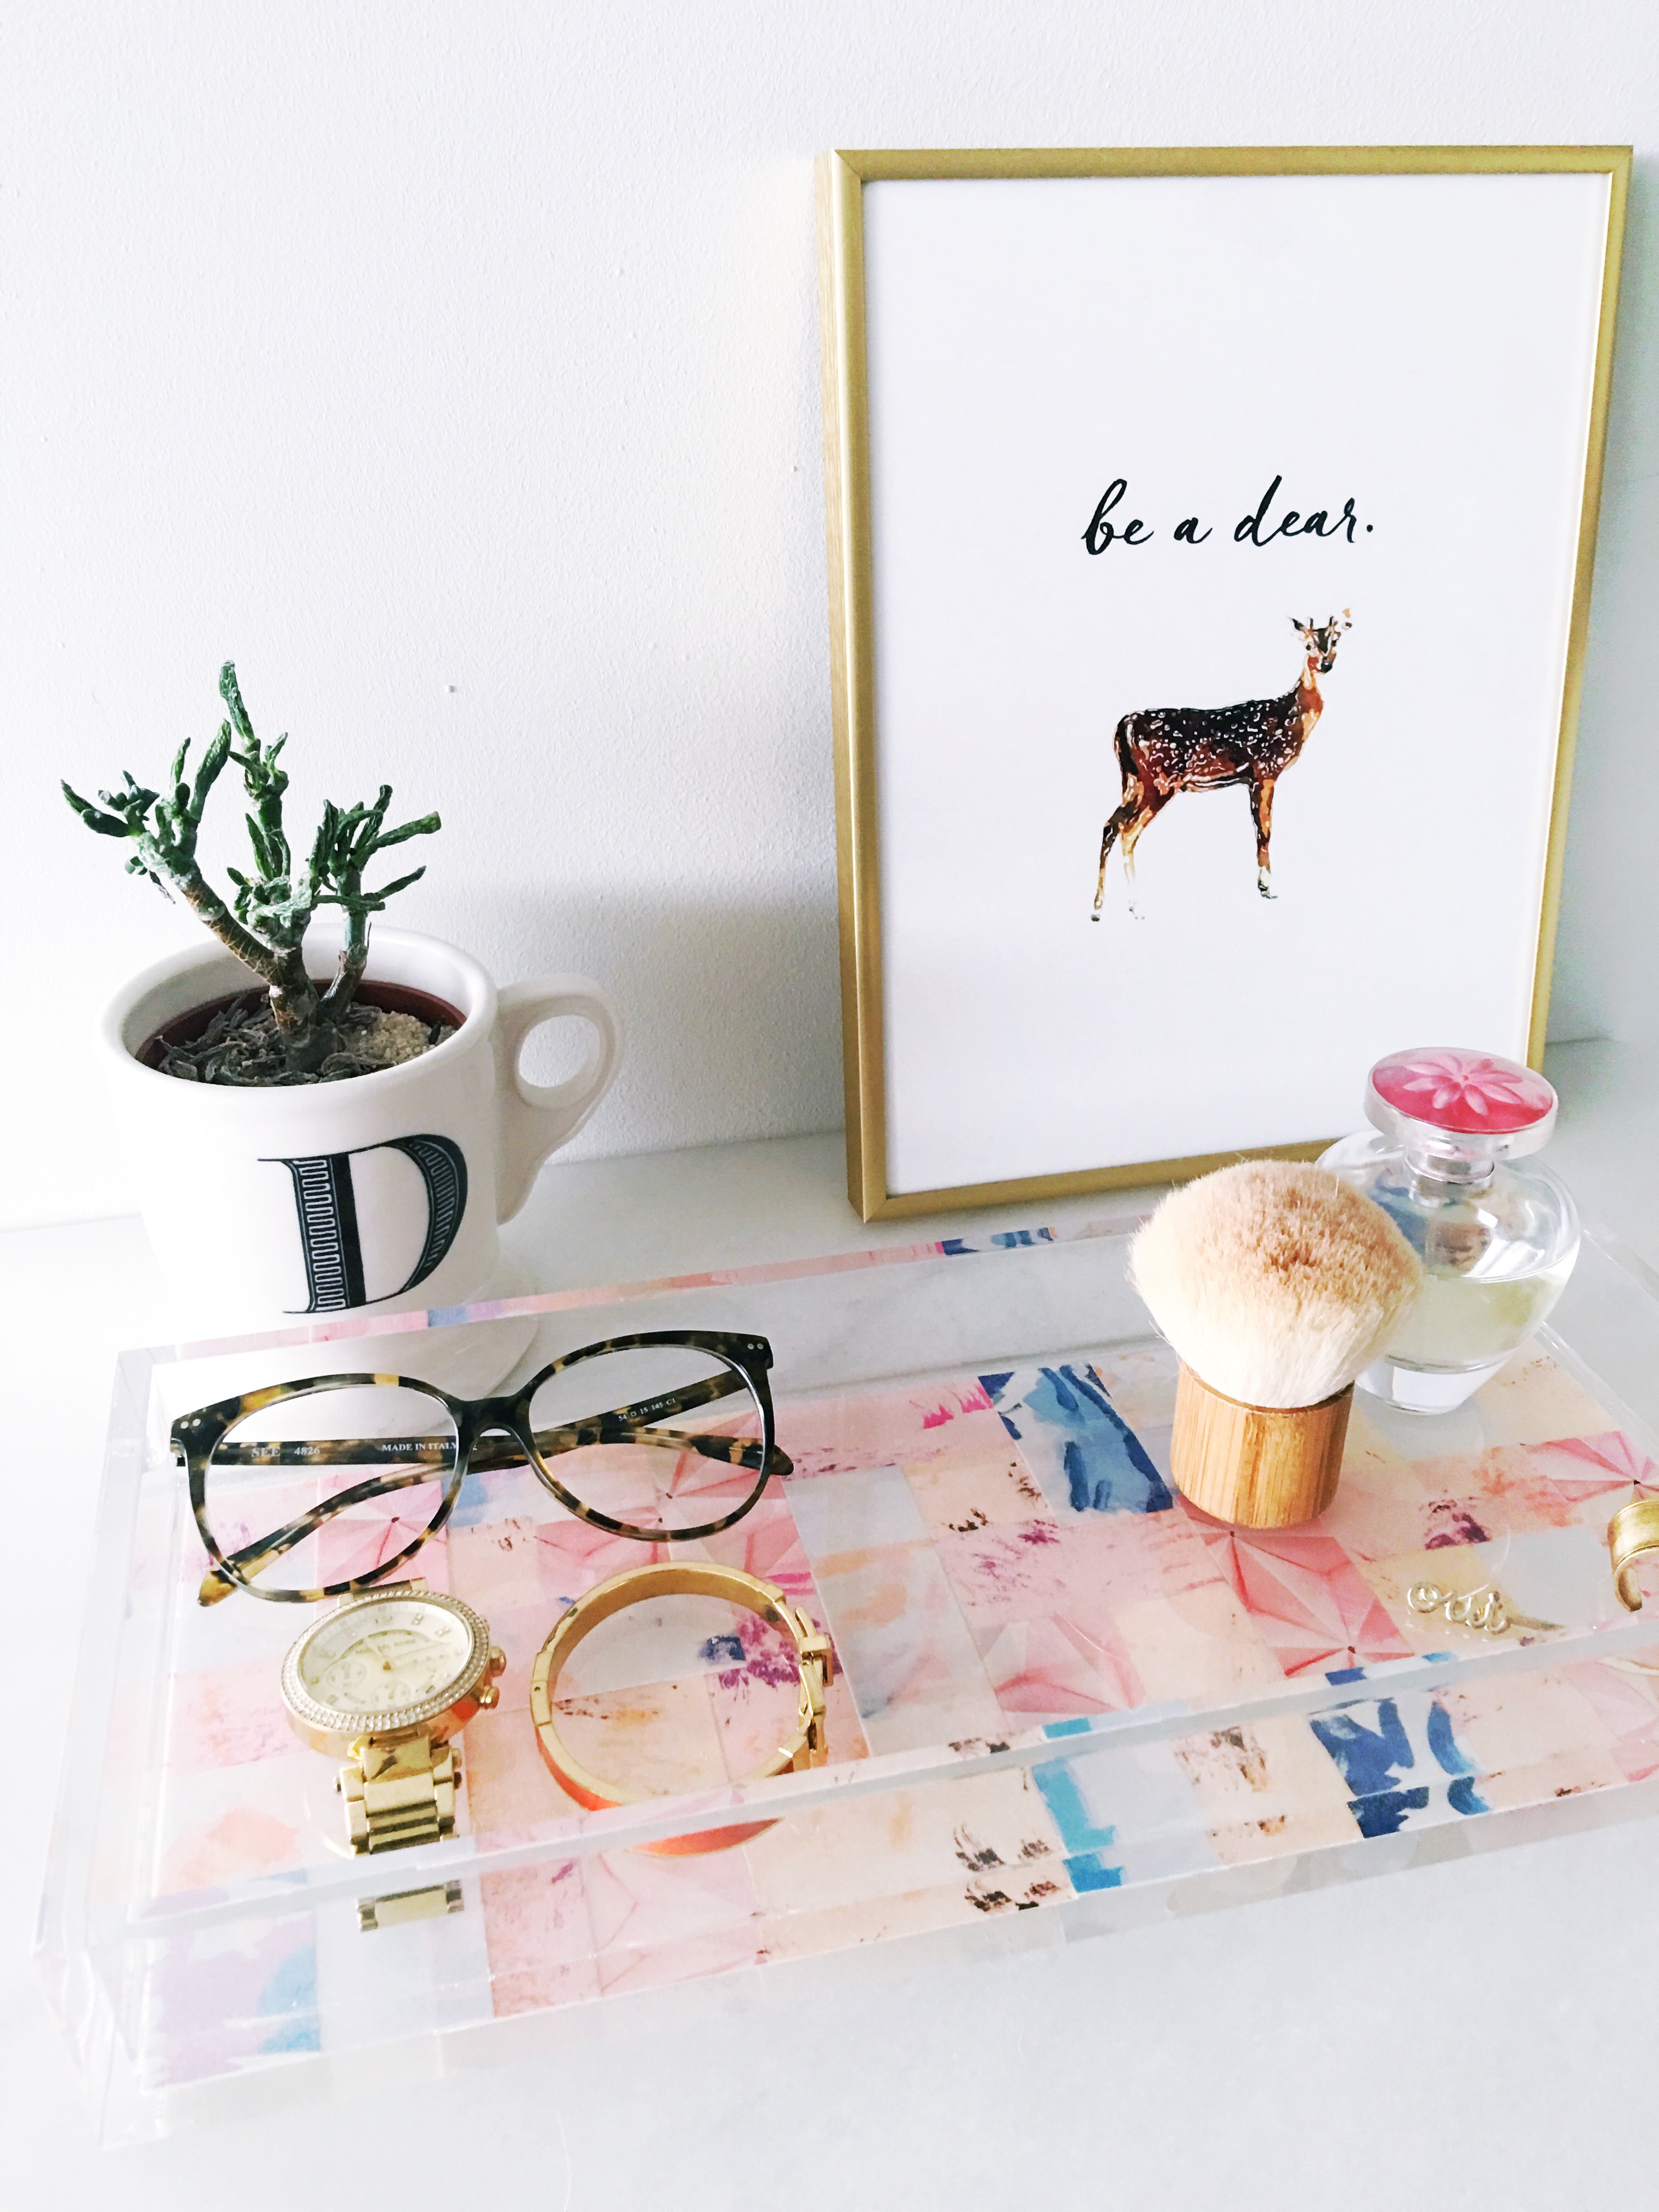
Recently I’ve shared that I’m working on redecorating my bedroom. Although the project is progressing at a glacial pace, I try to do small projects here and there when I have time. One of the changes I’ll be making is adding a vanity desk and chair that will sit against the wallpaper accent wall. Any furniture brought in will be neutral in color, as we will also be painting the majority of our walls pink, yay! With all of the major pieces in the space sticking to a wood/black/white scheme, I want to bring color and pattern in with a few new accessories. On the vanity I really want to have space for a mirror, some sort of jewelry storage for the pieces I wear the most often, and a tray to hold my prettiest things; (makeup and other beauty accessories will be organized and concealed within drawers).
With this goal in mind, I recently purchased an acrylic tray that I thought would be the perfect size for a select few things. Now, as much as I love an acrylic tray, I actually have quite a few of them throughout my home. A large one sits on my coffee table, there are a couple on my desk and I exclusively use them for organizing kitchen drawers. Since this tray will serve a more decorative function than anything else, I wanted to find a way to add a little something special to it. I considered lettering, painting, spray painting and adding fabric, but on a fateful trip to the craft store, I spotted a crystal resin kit. As I read and retread the instructions looking for reasons I wouldn’t be able to pull this off, I couldn’t find any. In fact, it seemed ridiculously simple. So I bought it and brought it home and promptly realized I still needed to find something to do to the tray first, before I poured in the resin. Enter Artifact Uprising. Have you guys used this service yet? It’s so good. Basically, you upload picture files from your phone, computer or Instagram account, and they print the photos on high quality paper for a very low cost. You can get a photo book, a guest book, framed prints or a set of 25 5″ square prints. I had used their service once before and ordered the square print set, and was so happy with the results, so they sent me a coupon for another free set of 25 prints. I knew there had to be a way to take advantage of this outrageous coupon and complete my tray project at the same time. So I went on a hunt for images to have printed.
I wasn’t looking for anything in particular, really. I just started looking for images with certain colors and lots of texture. One of my favorite blogs, Design Love Fest, has quite an expansive selection of free downloadable wallpapers, which are all hand drawn and fabulous, and I was able to find everything I needed right within those archives. Thanks DLF! So I uploaded my choices to Artifact Uprising, and a few days later I had my prints back in my hands. I was ready to make this thing happen! Here’s what I did.
Crystal Resin Collage Tray
Materials Needed:
1 acrylic tray (I used this one)
1 16oz. crystal resin kit (I used this one but I’ve heard great things about this brand as well)
1 Artifact Uprising Square Print Set (or other colorful, patterned paper of your choice)
paper trimmer
super glue
2 straight-sided glass measuring containers (at least 2 cup volume)
2 stir sticks or tongue depressors
Step 1: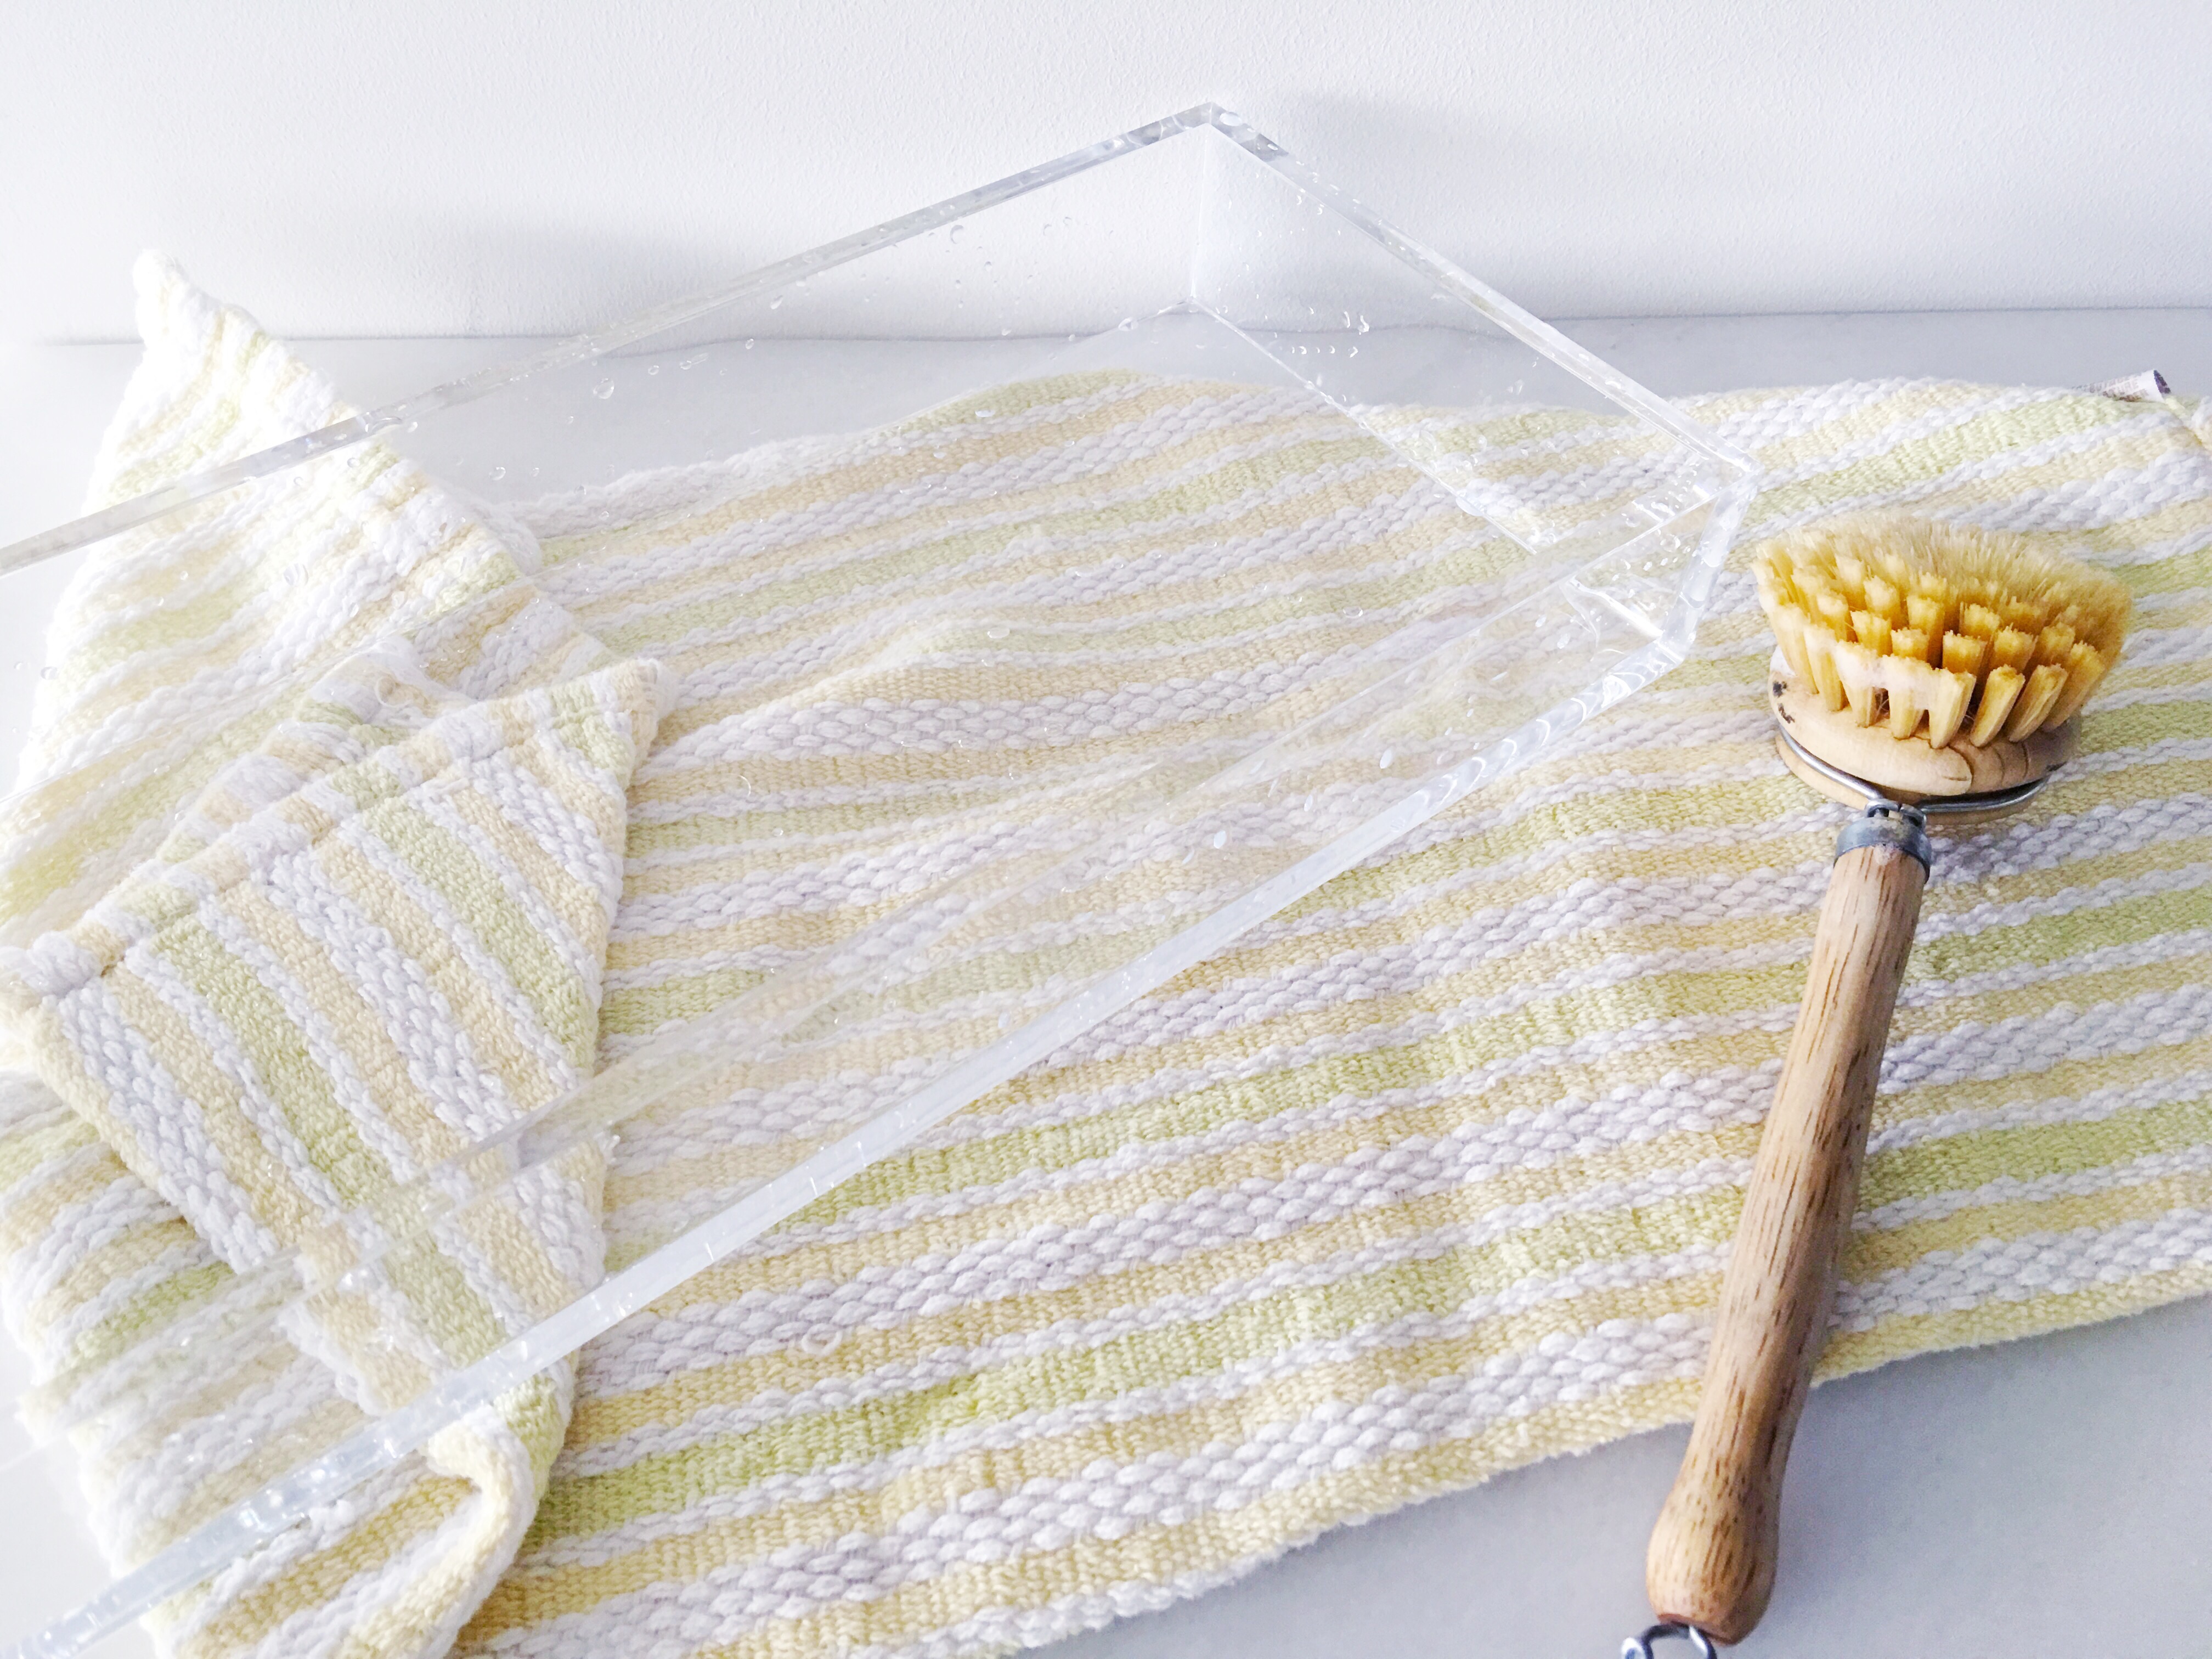 Wash your tray with warm soap and water and dry with a cloth, making sure no dust or fuzz is left behind.
Step 2: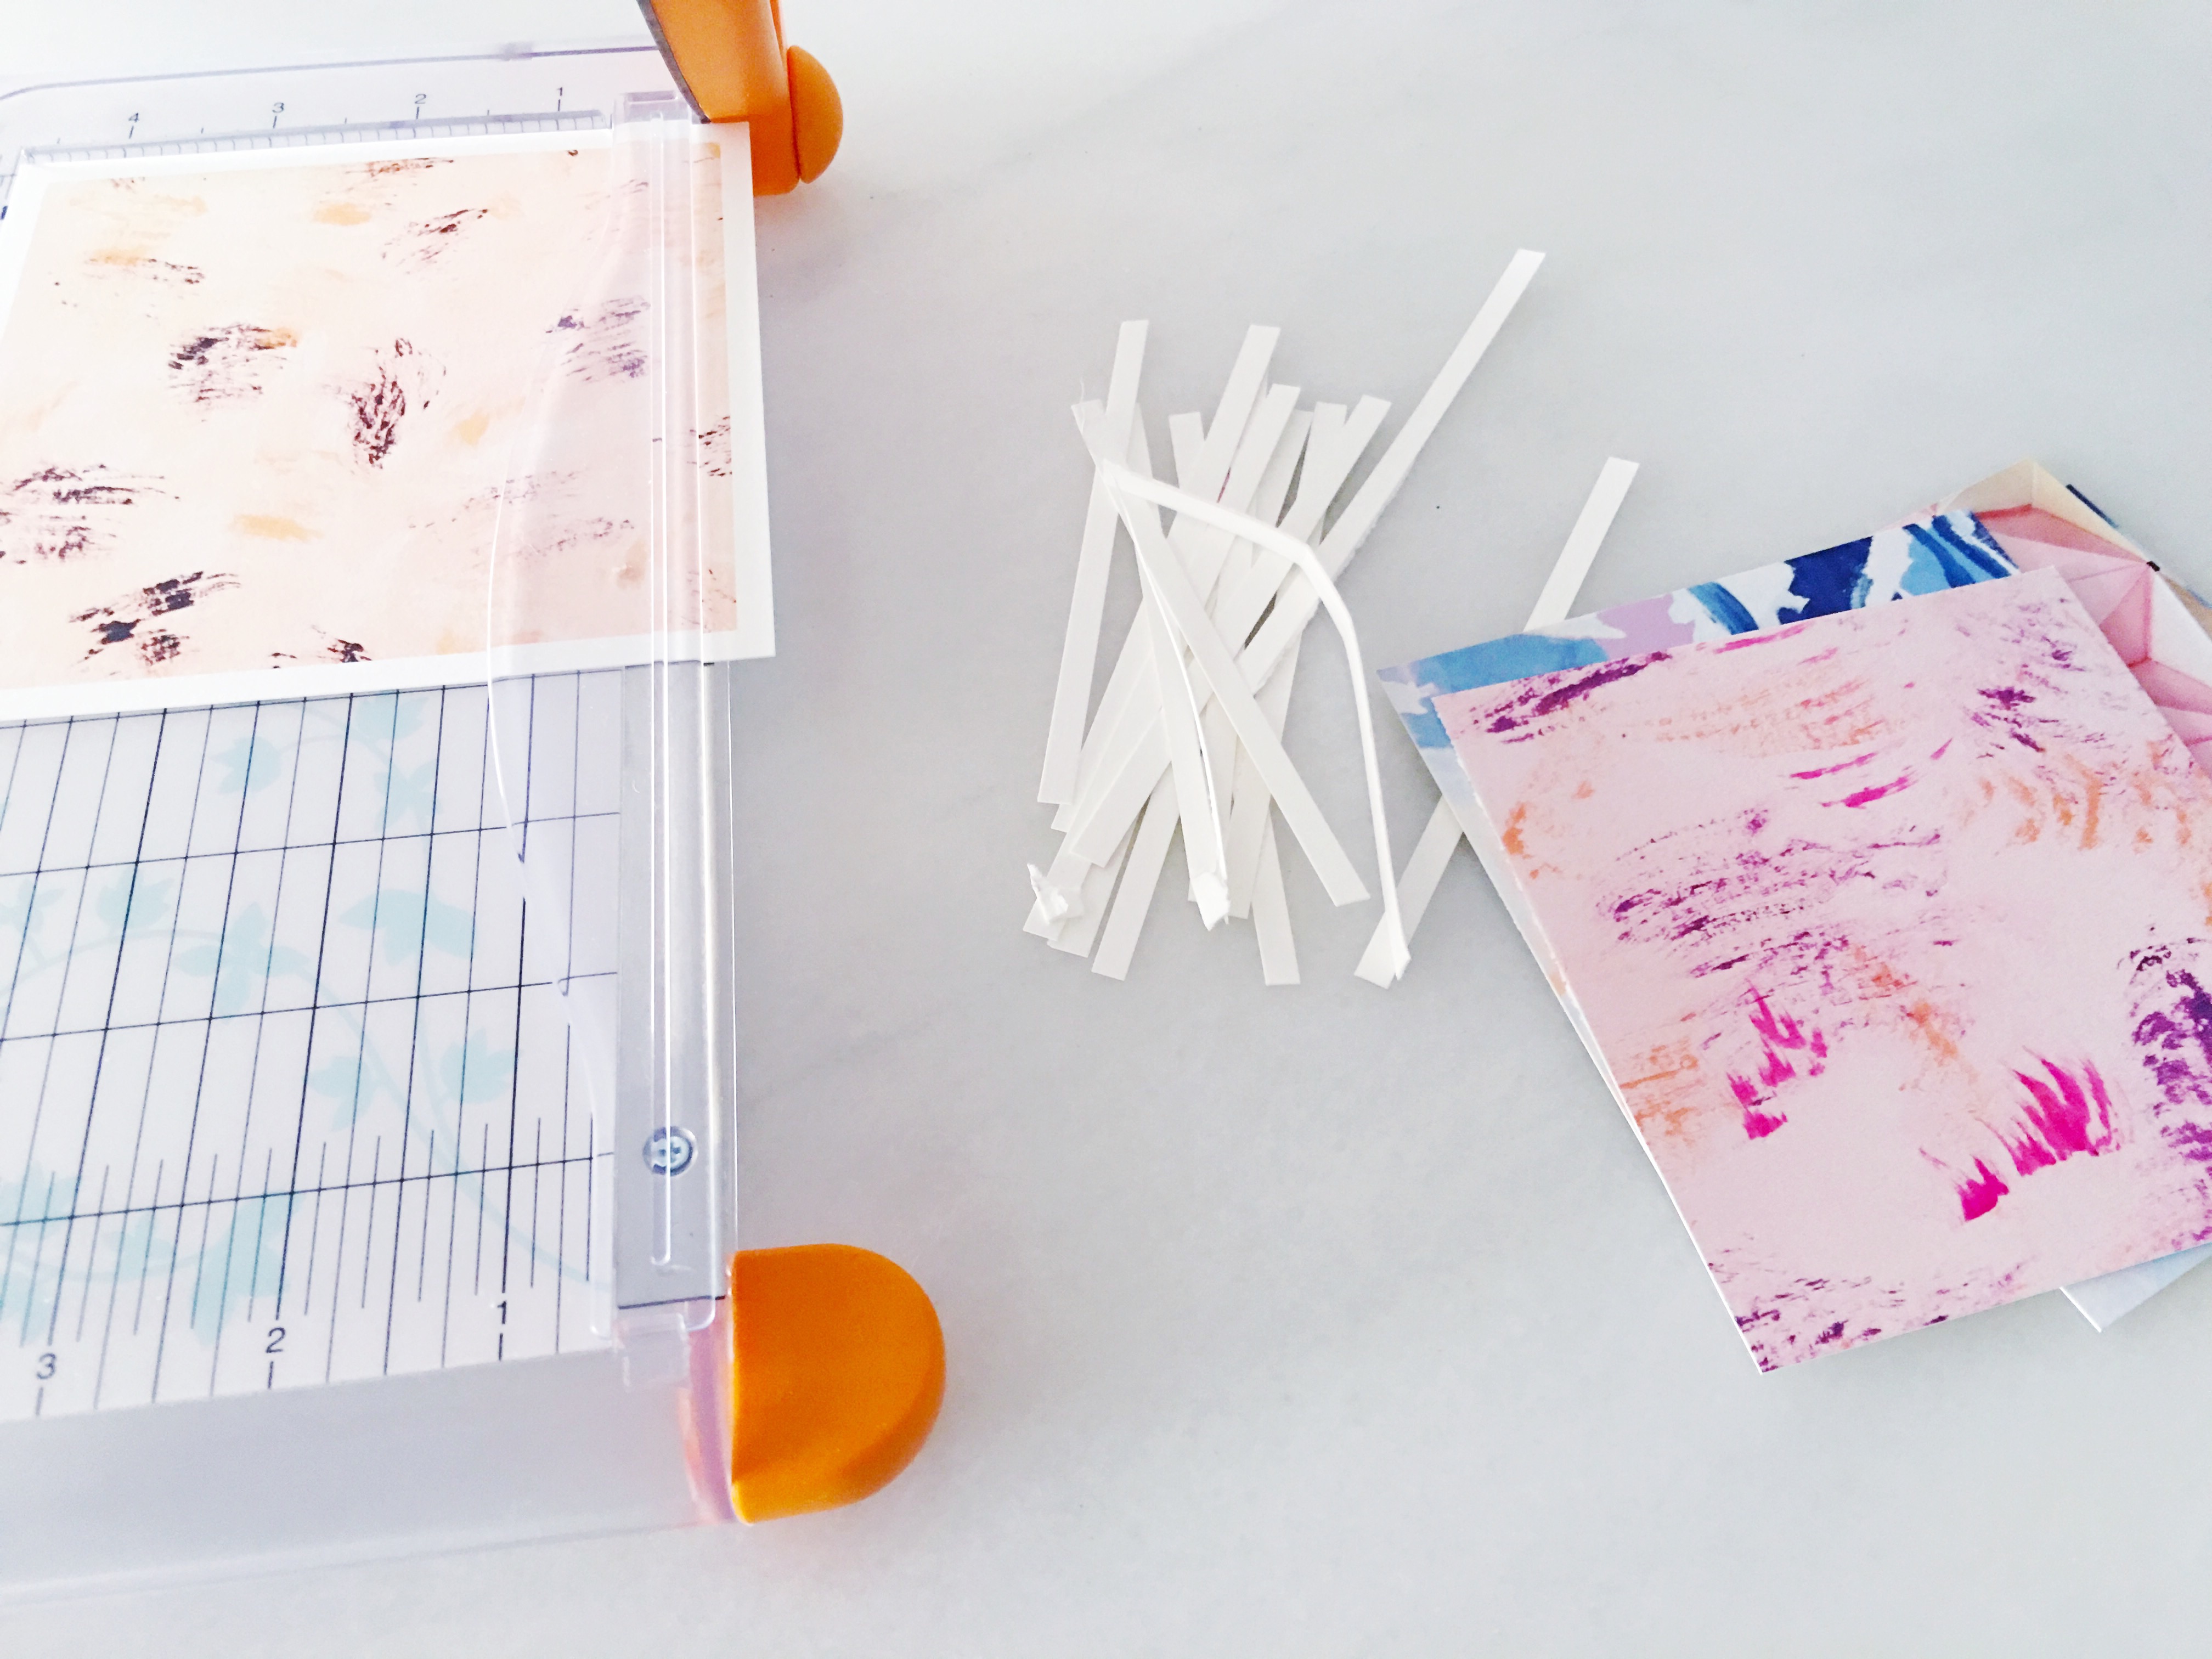 Trim the white border off of the prints you have chosen to work with. I needed 5 prints to fill in the bottom of my tray.
Step 3:  Measure the width of your prints. This measurement should be equal to the height as well.
Step 4: Divide your measurement in half and cut all of your prints to this dimension. You should now have 10 rectangles.
Step 5: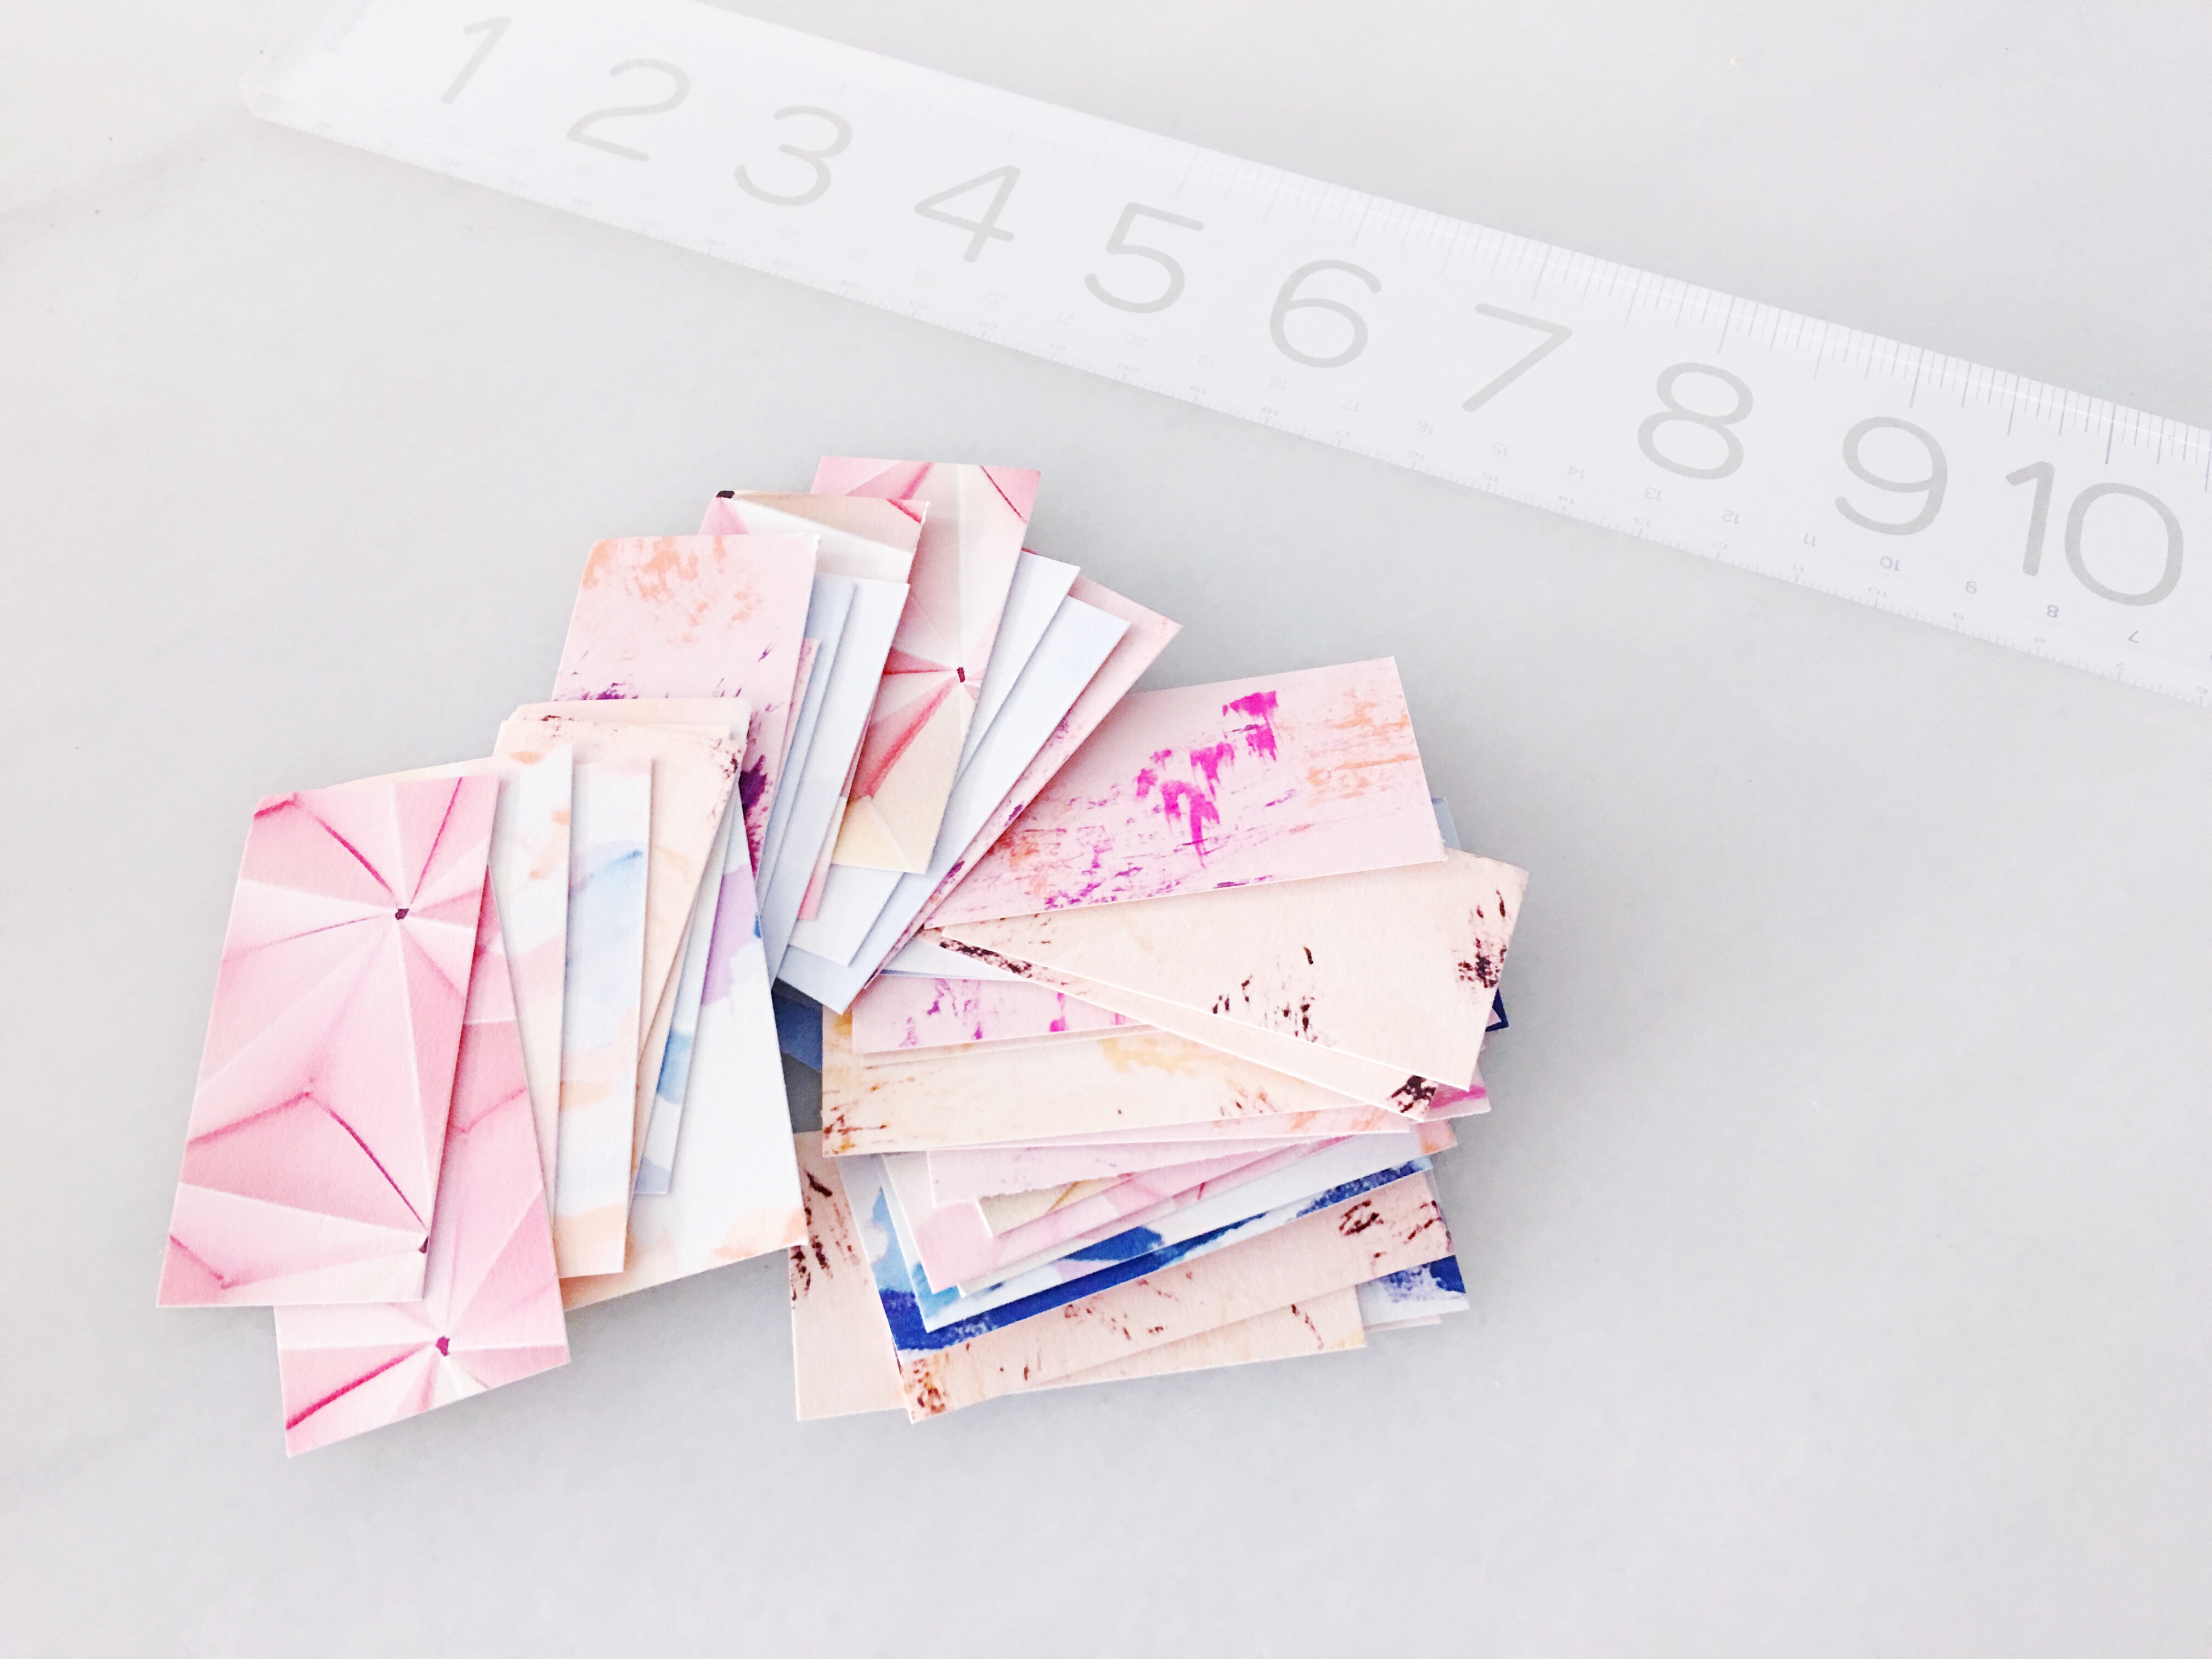 Continue measuring and halving your prints until you have 40 small rectangles.
Step 6: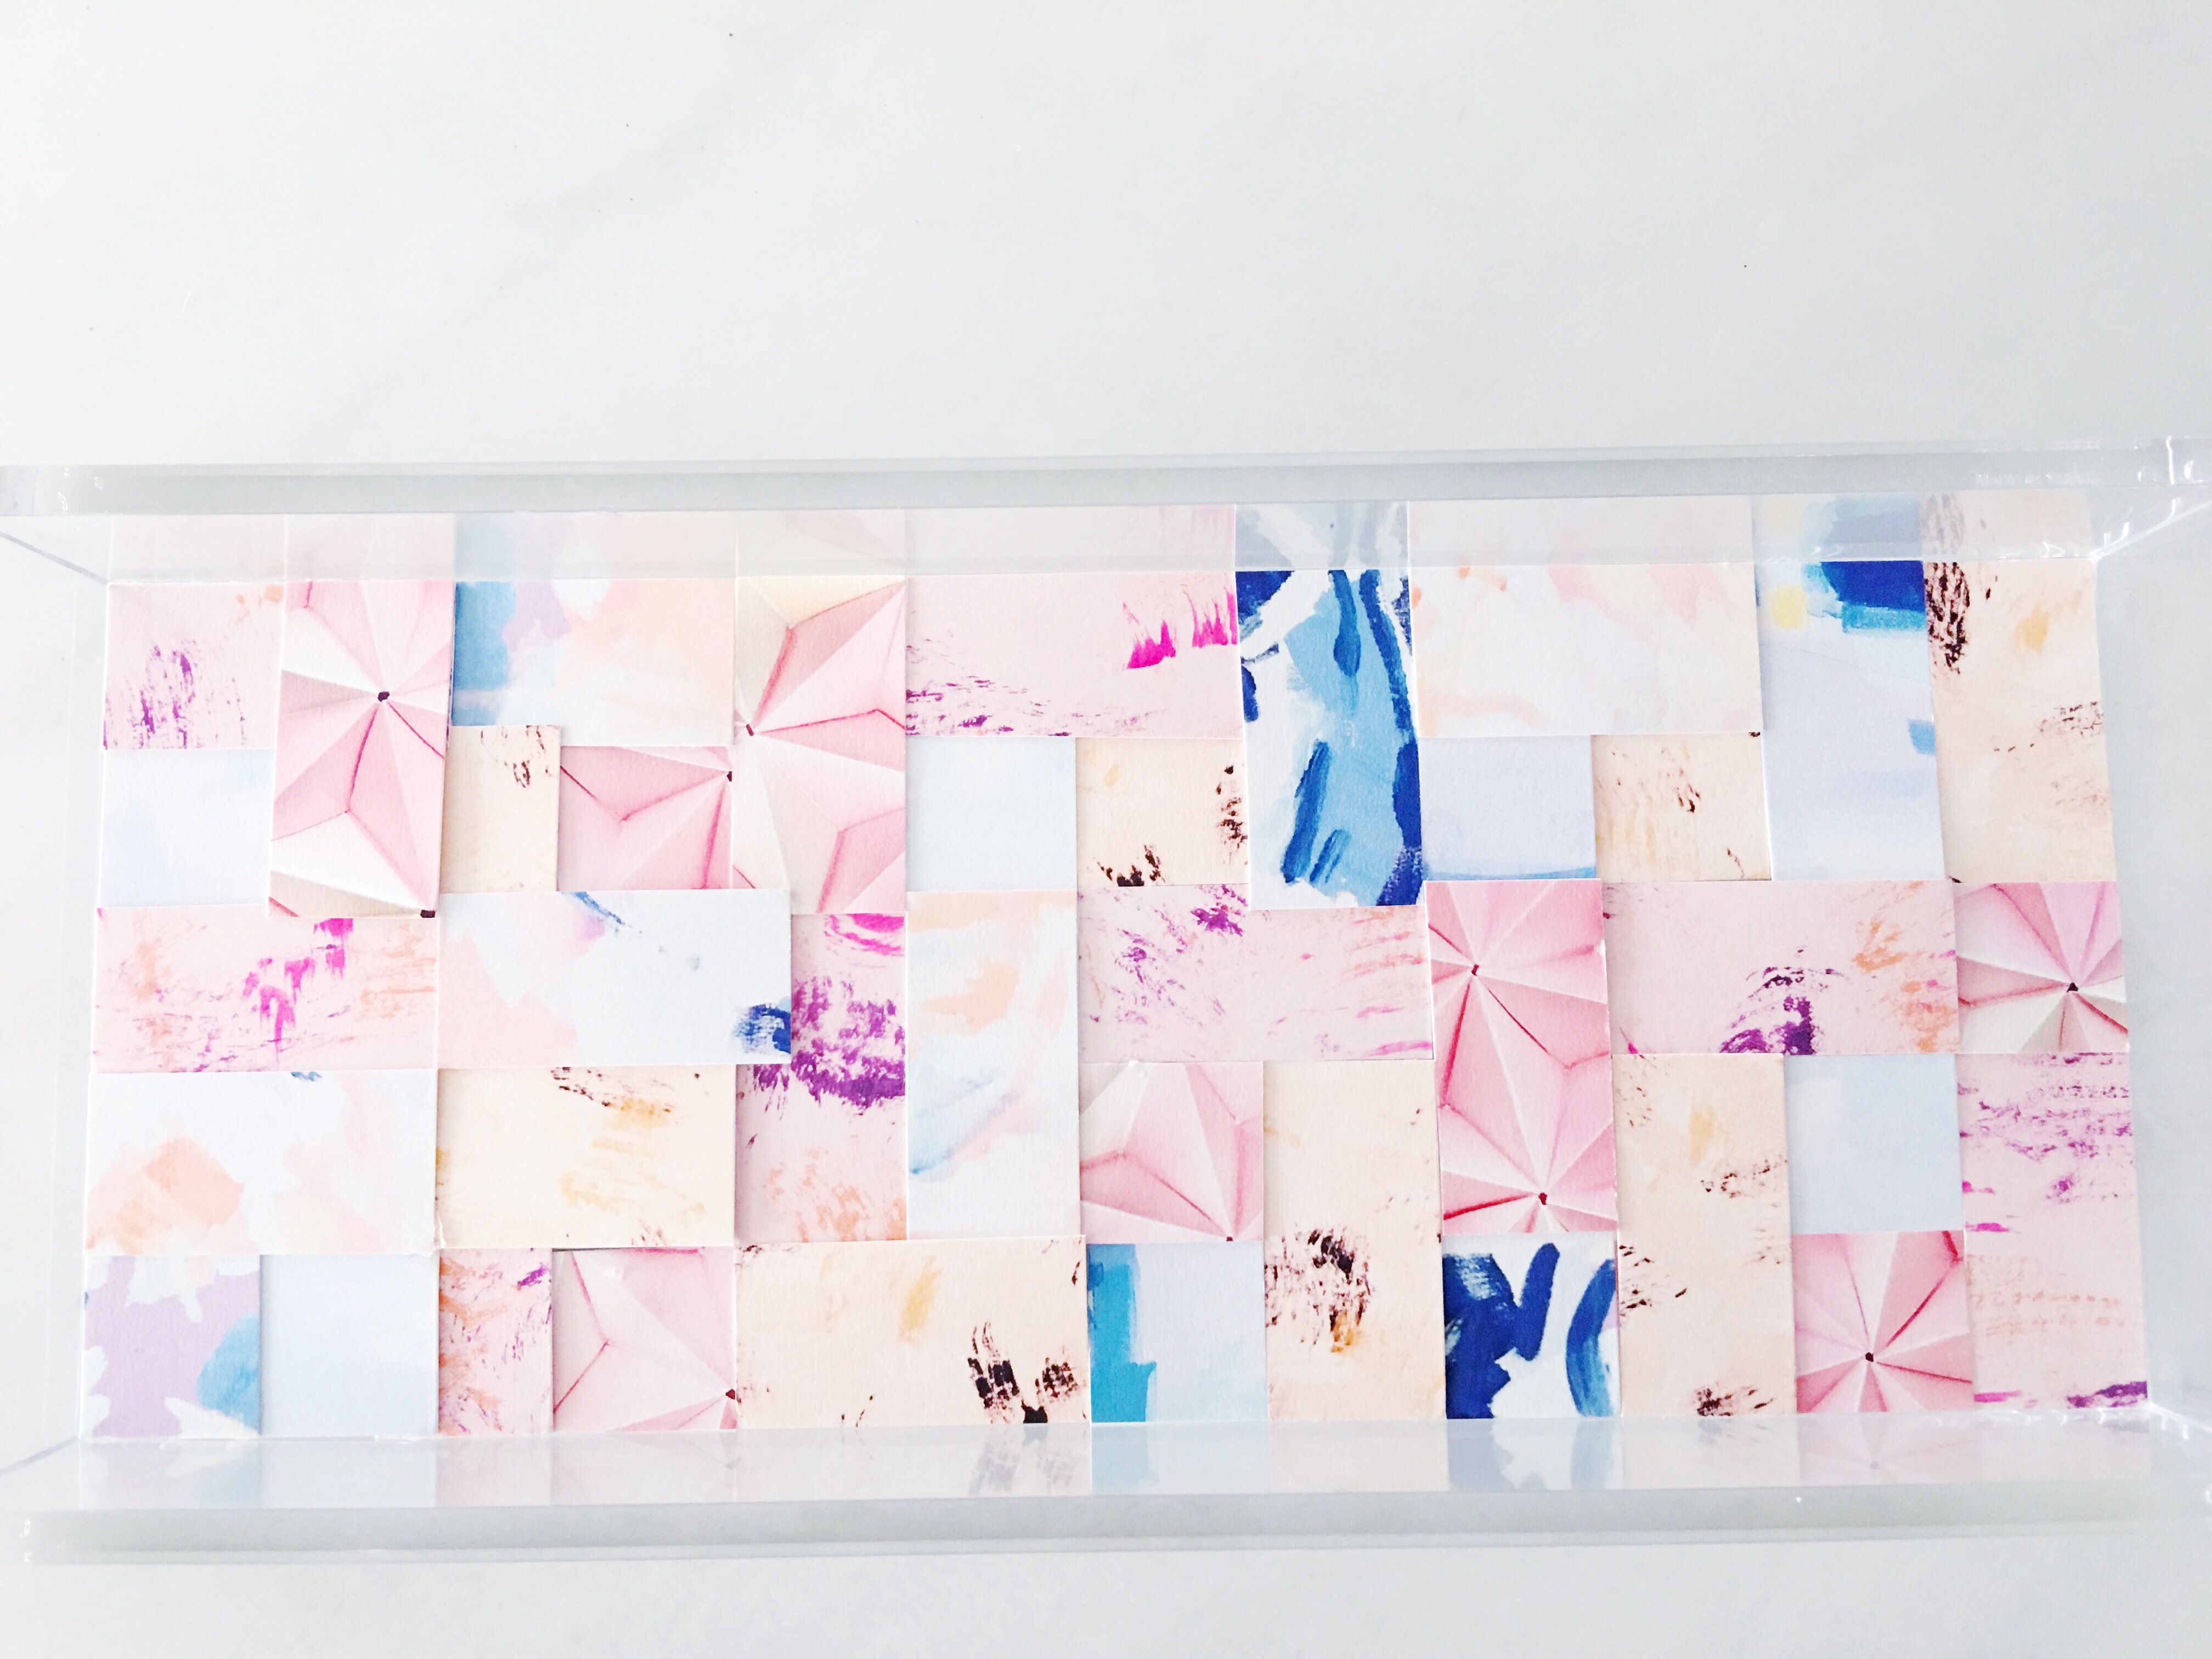 Arrange your pieces on the bottom of your tray until you’re happy with the design. Then super glue in place, overlapping as needed to cover the surface completely.
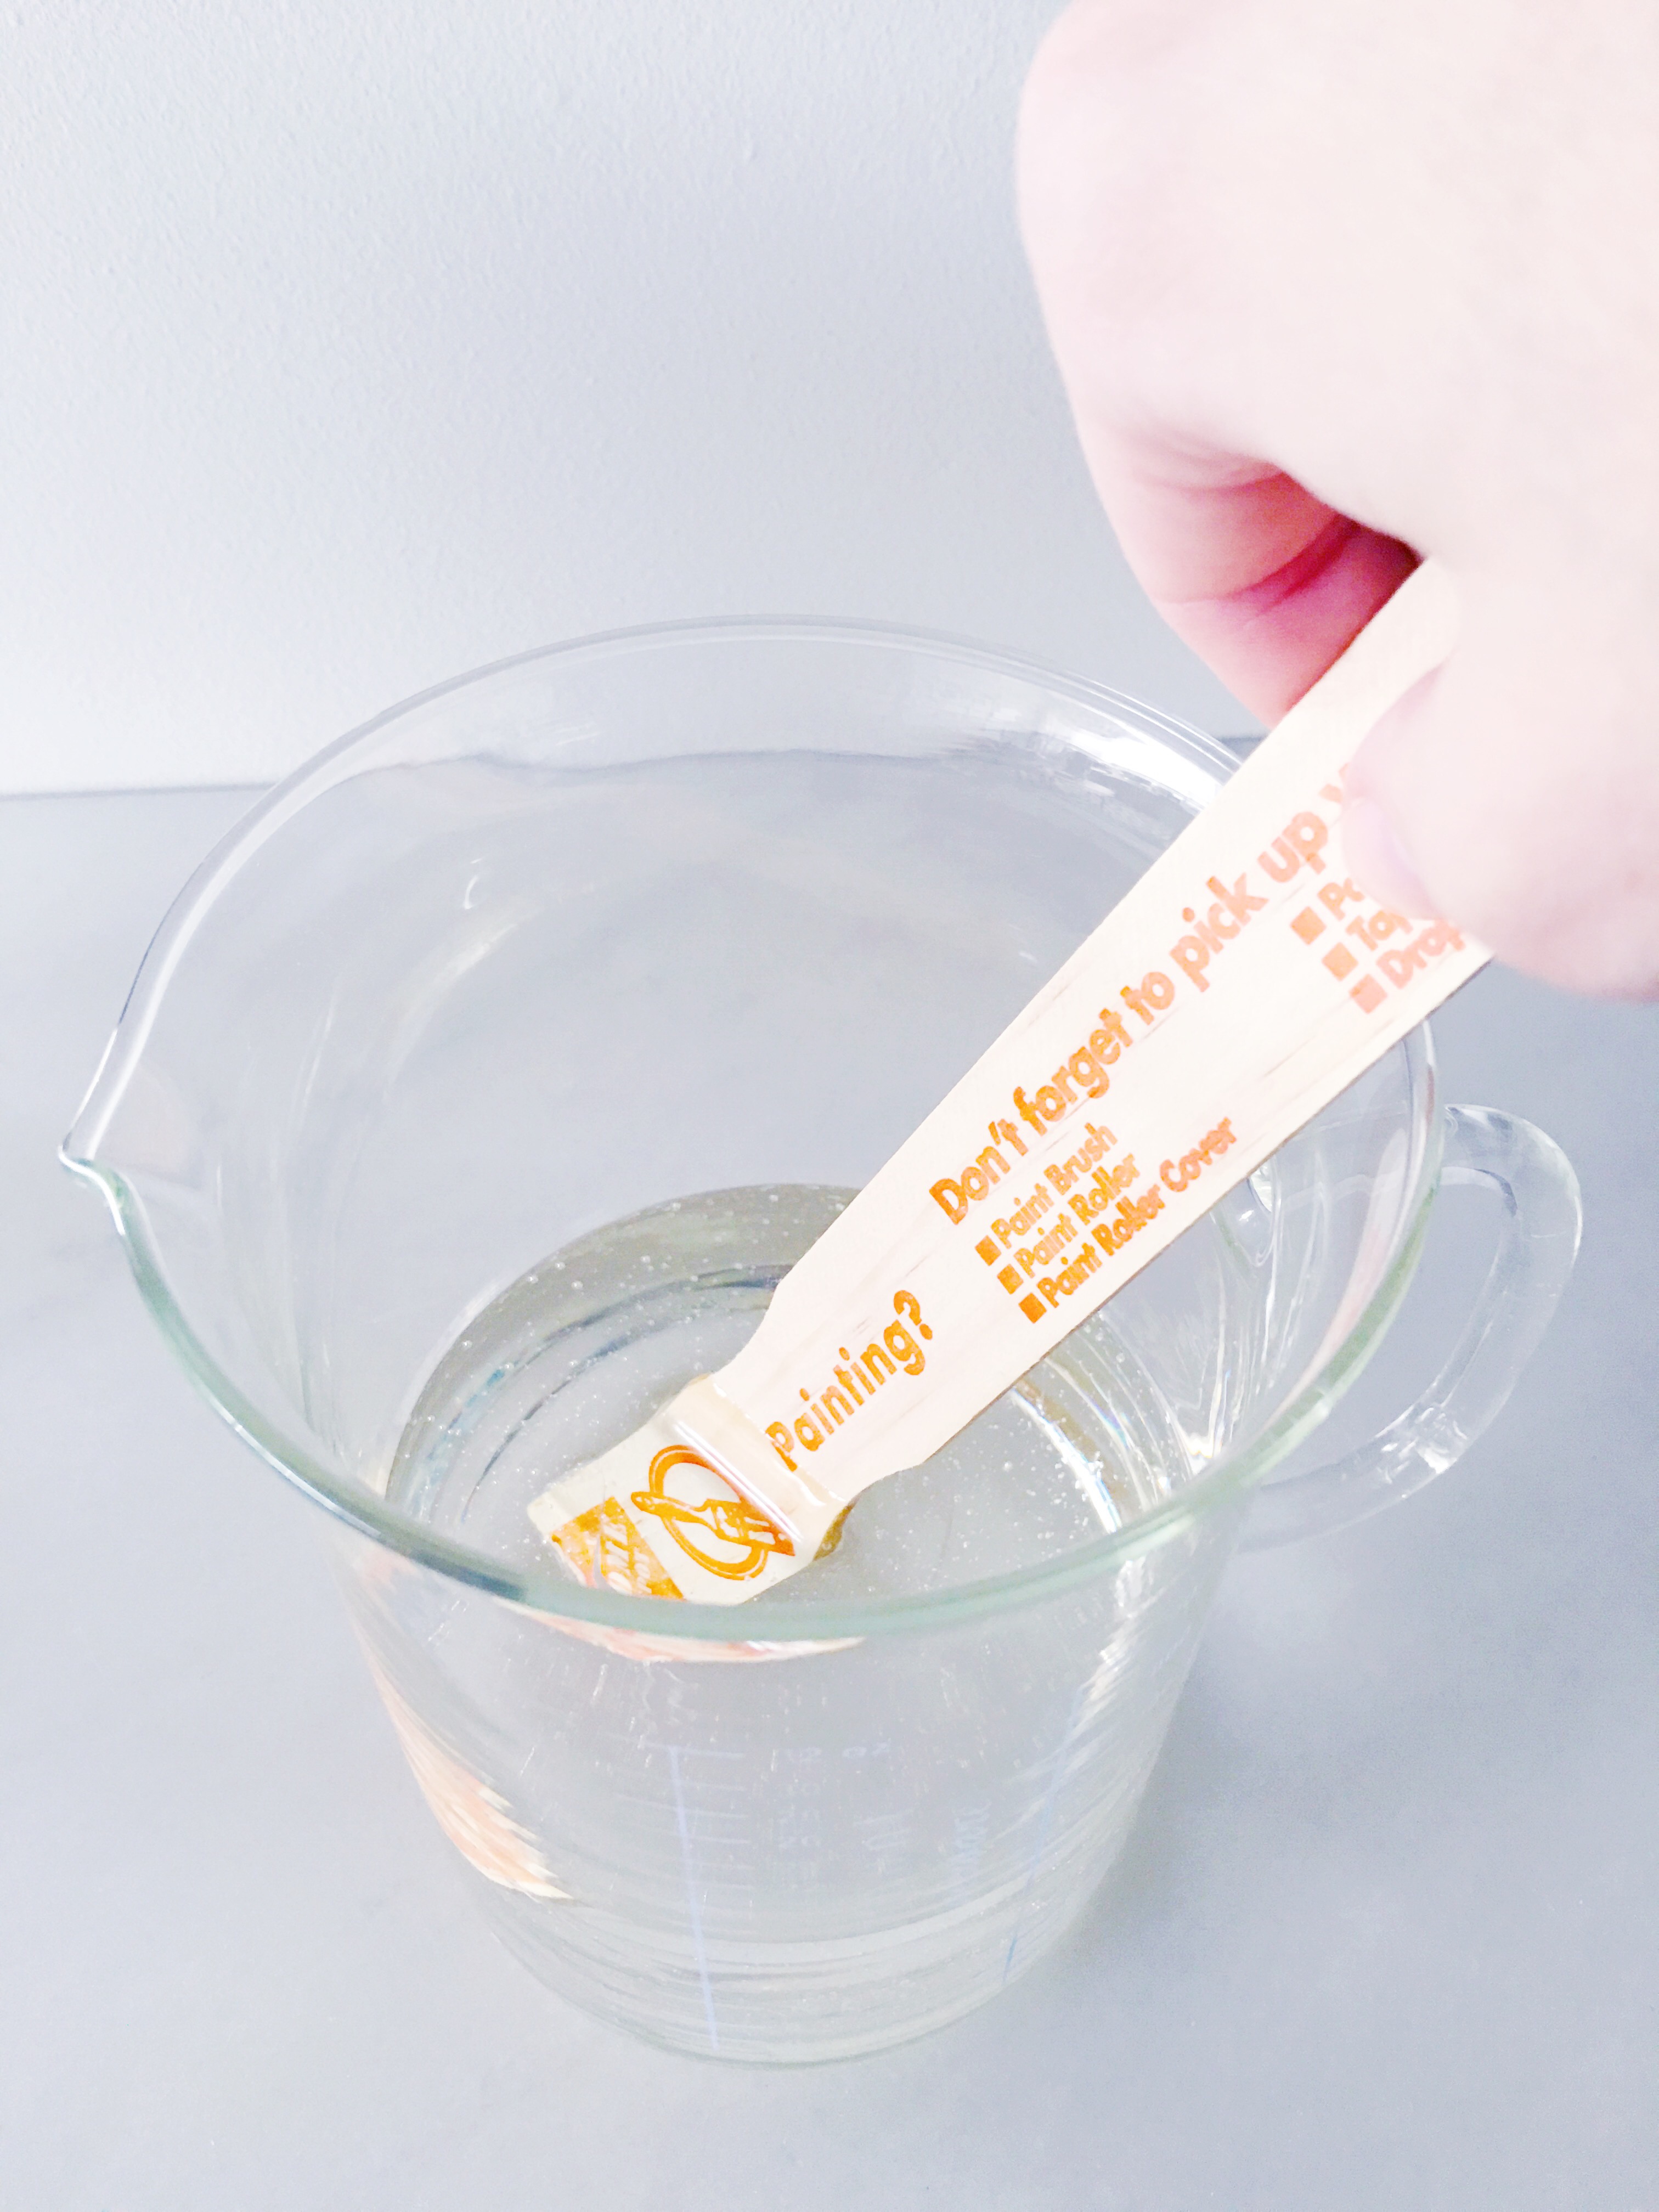
Step 7: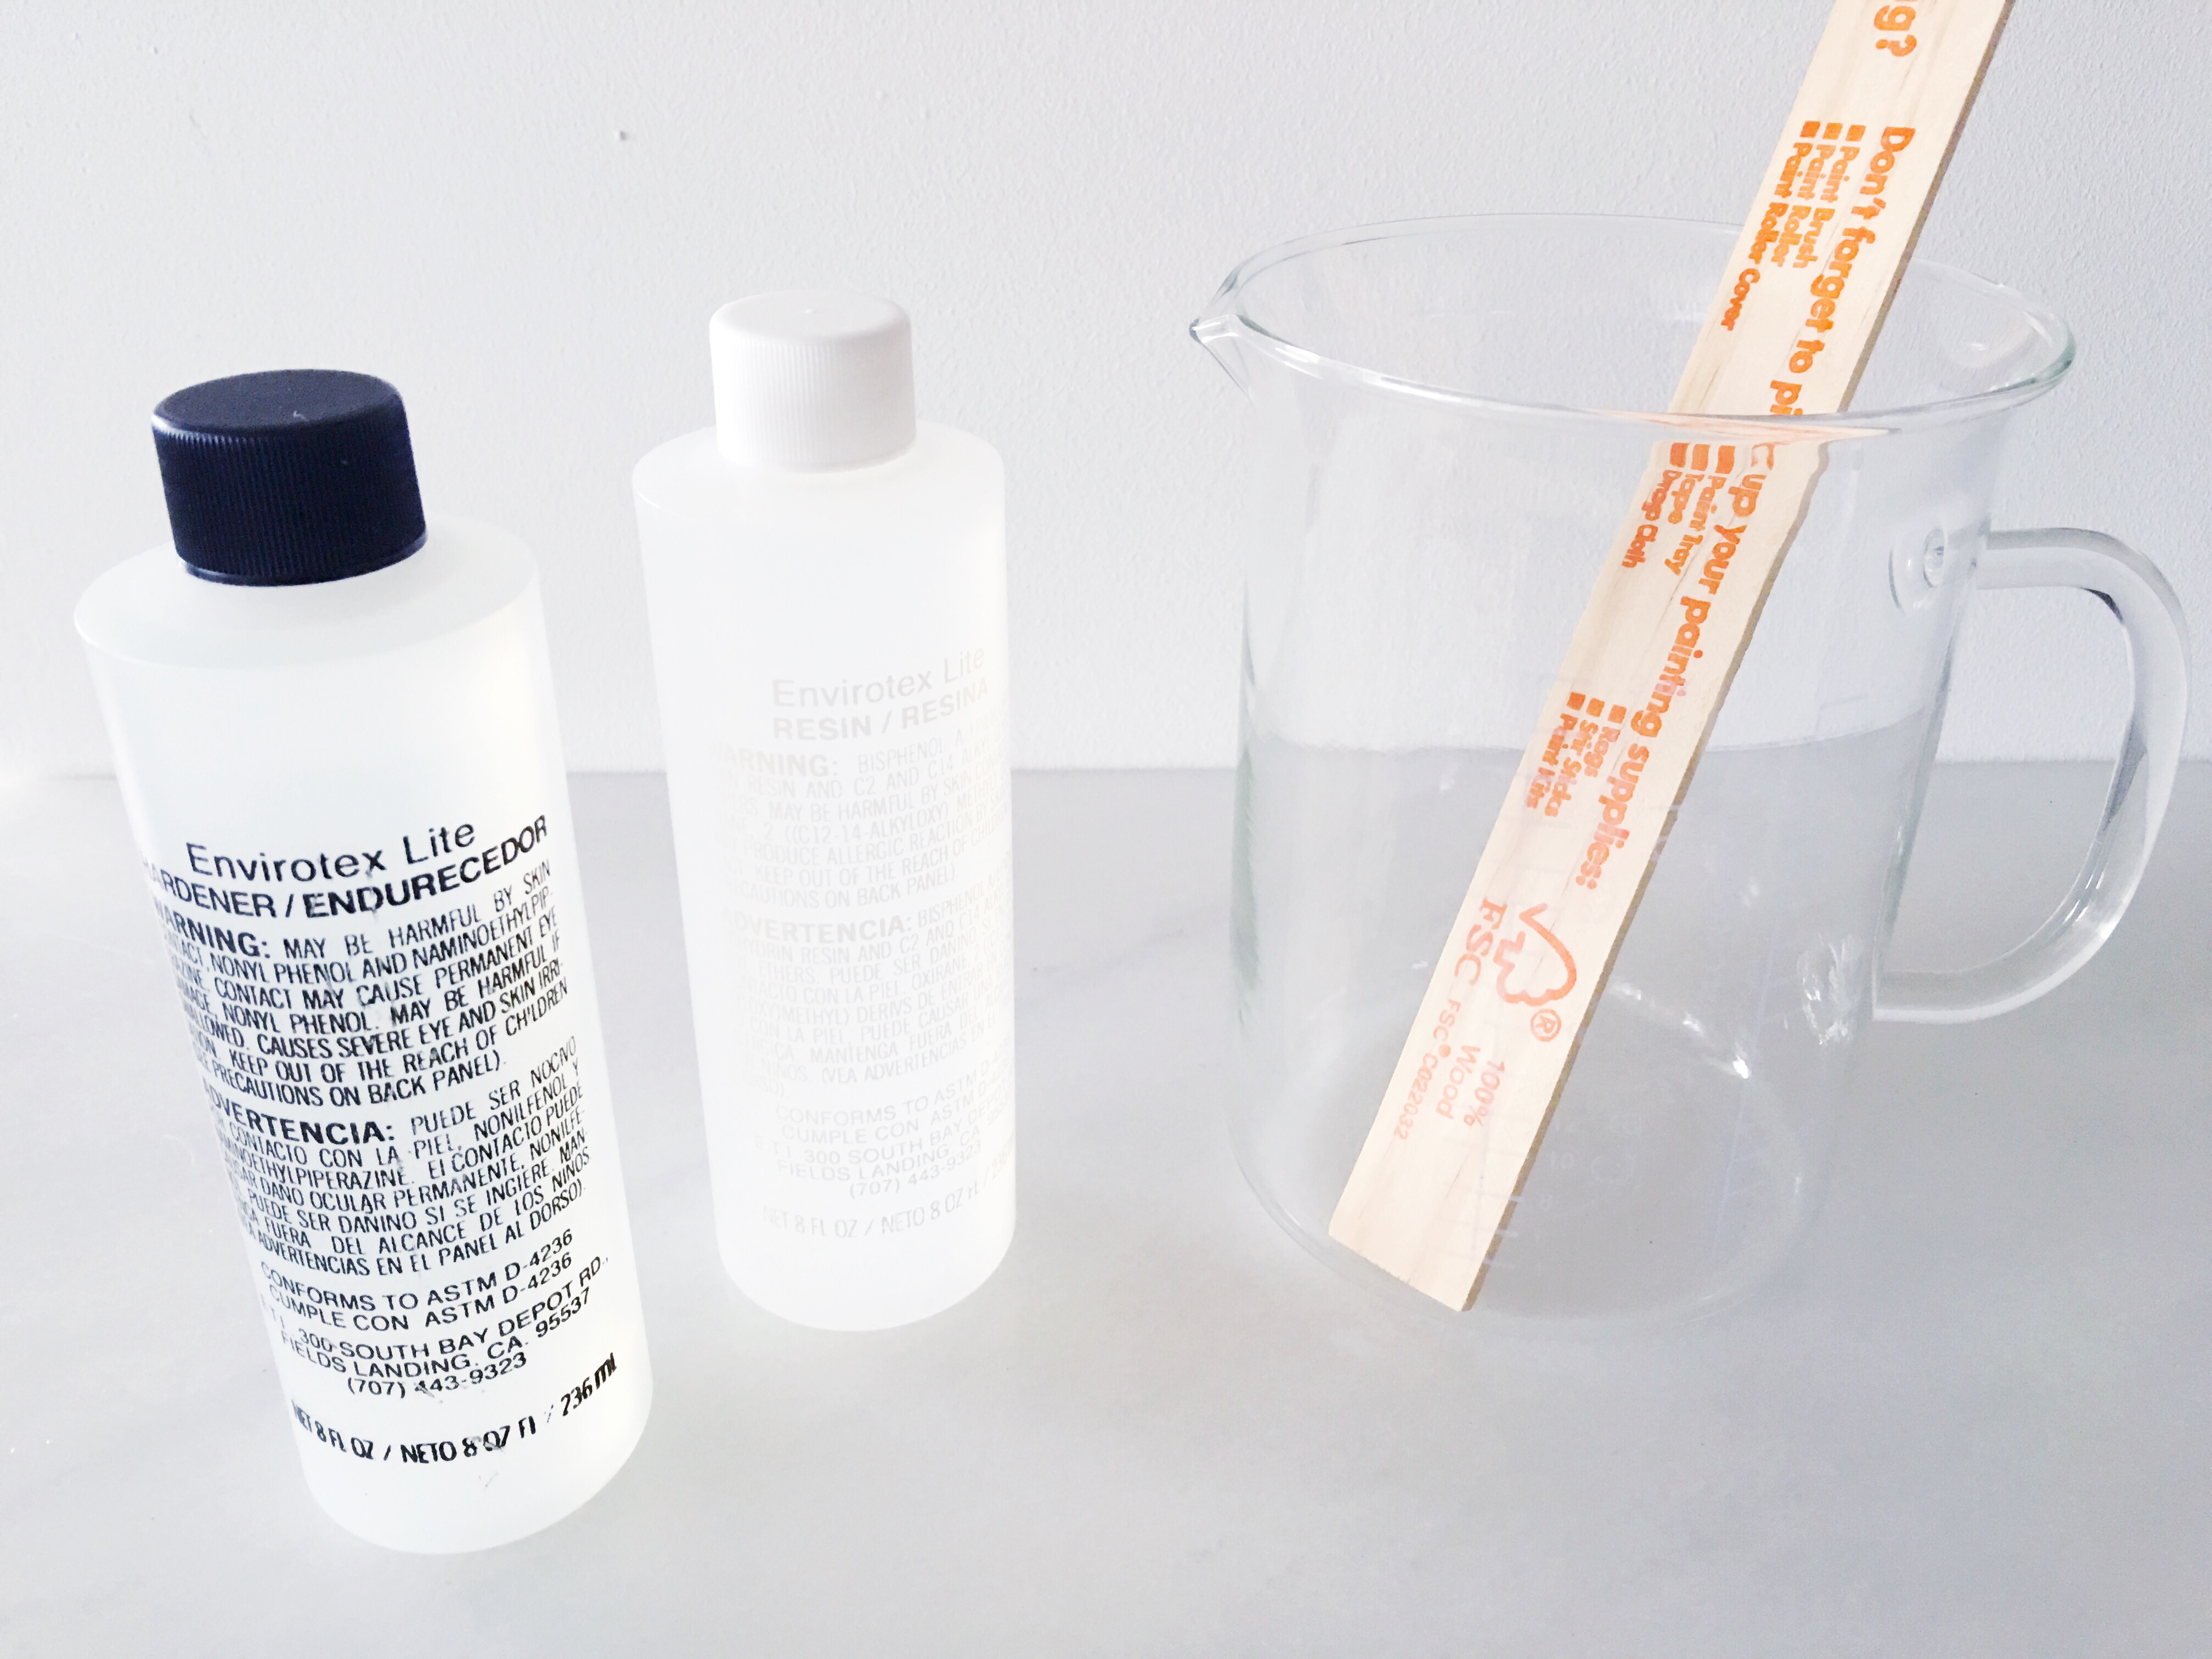 Following the user instructions included with your kit, mix together your resin. It’s very important to mix the resin thoroughly and completely. If you skimp on this step you will wind up with soft areas on your finished surface, which would pretty much render your finished tray useless (not good).
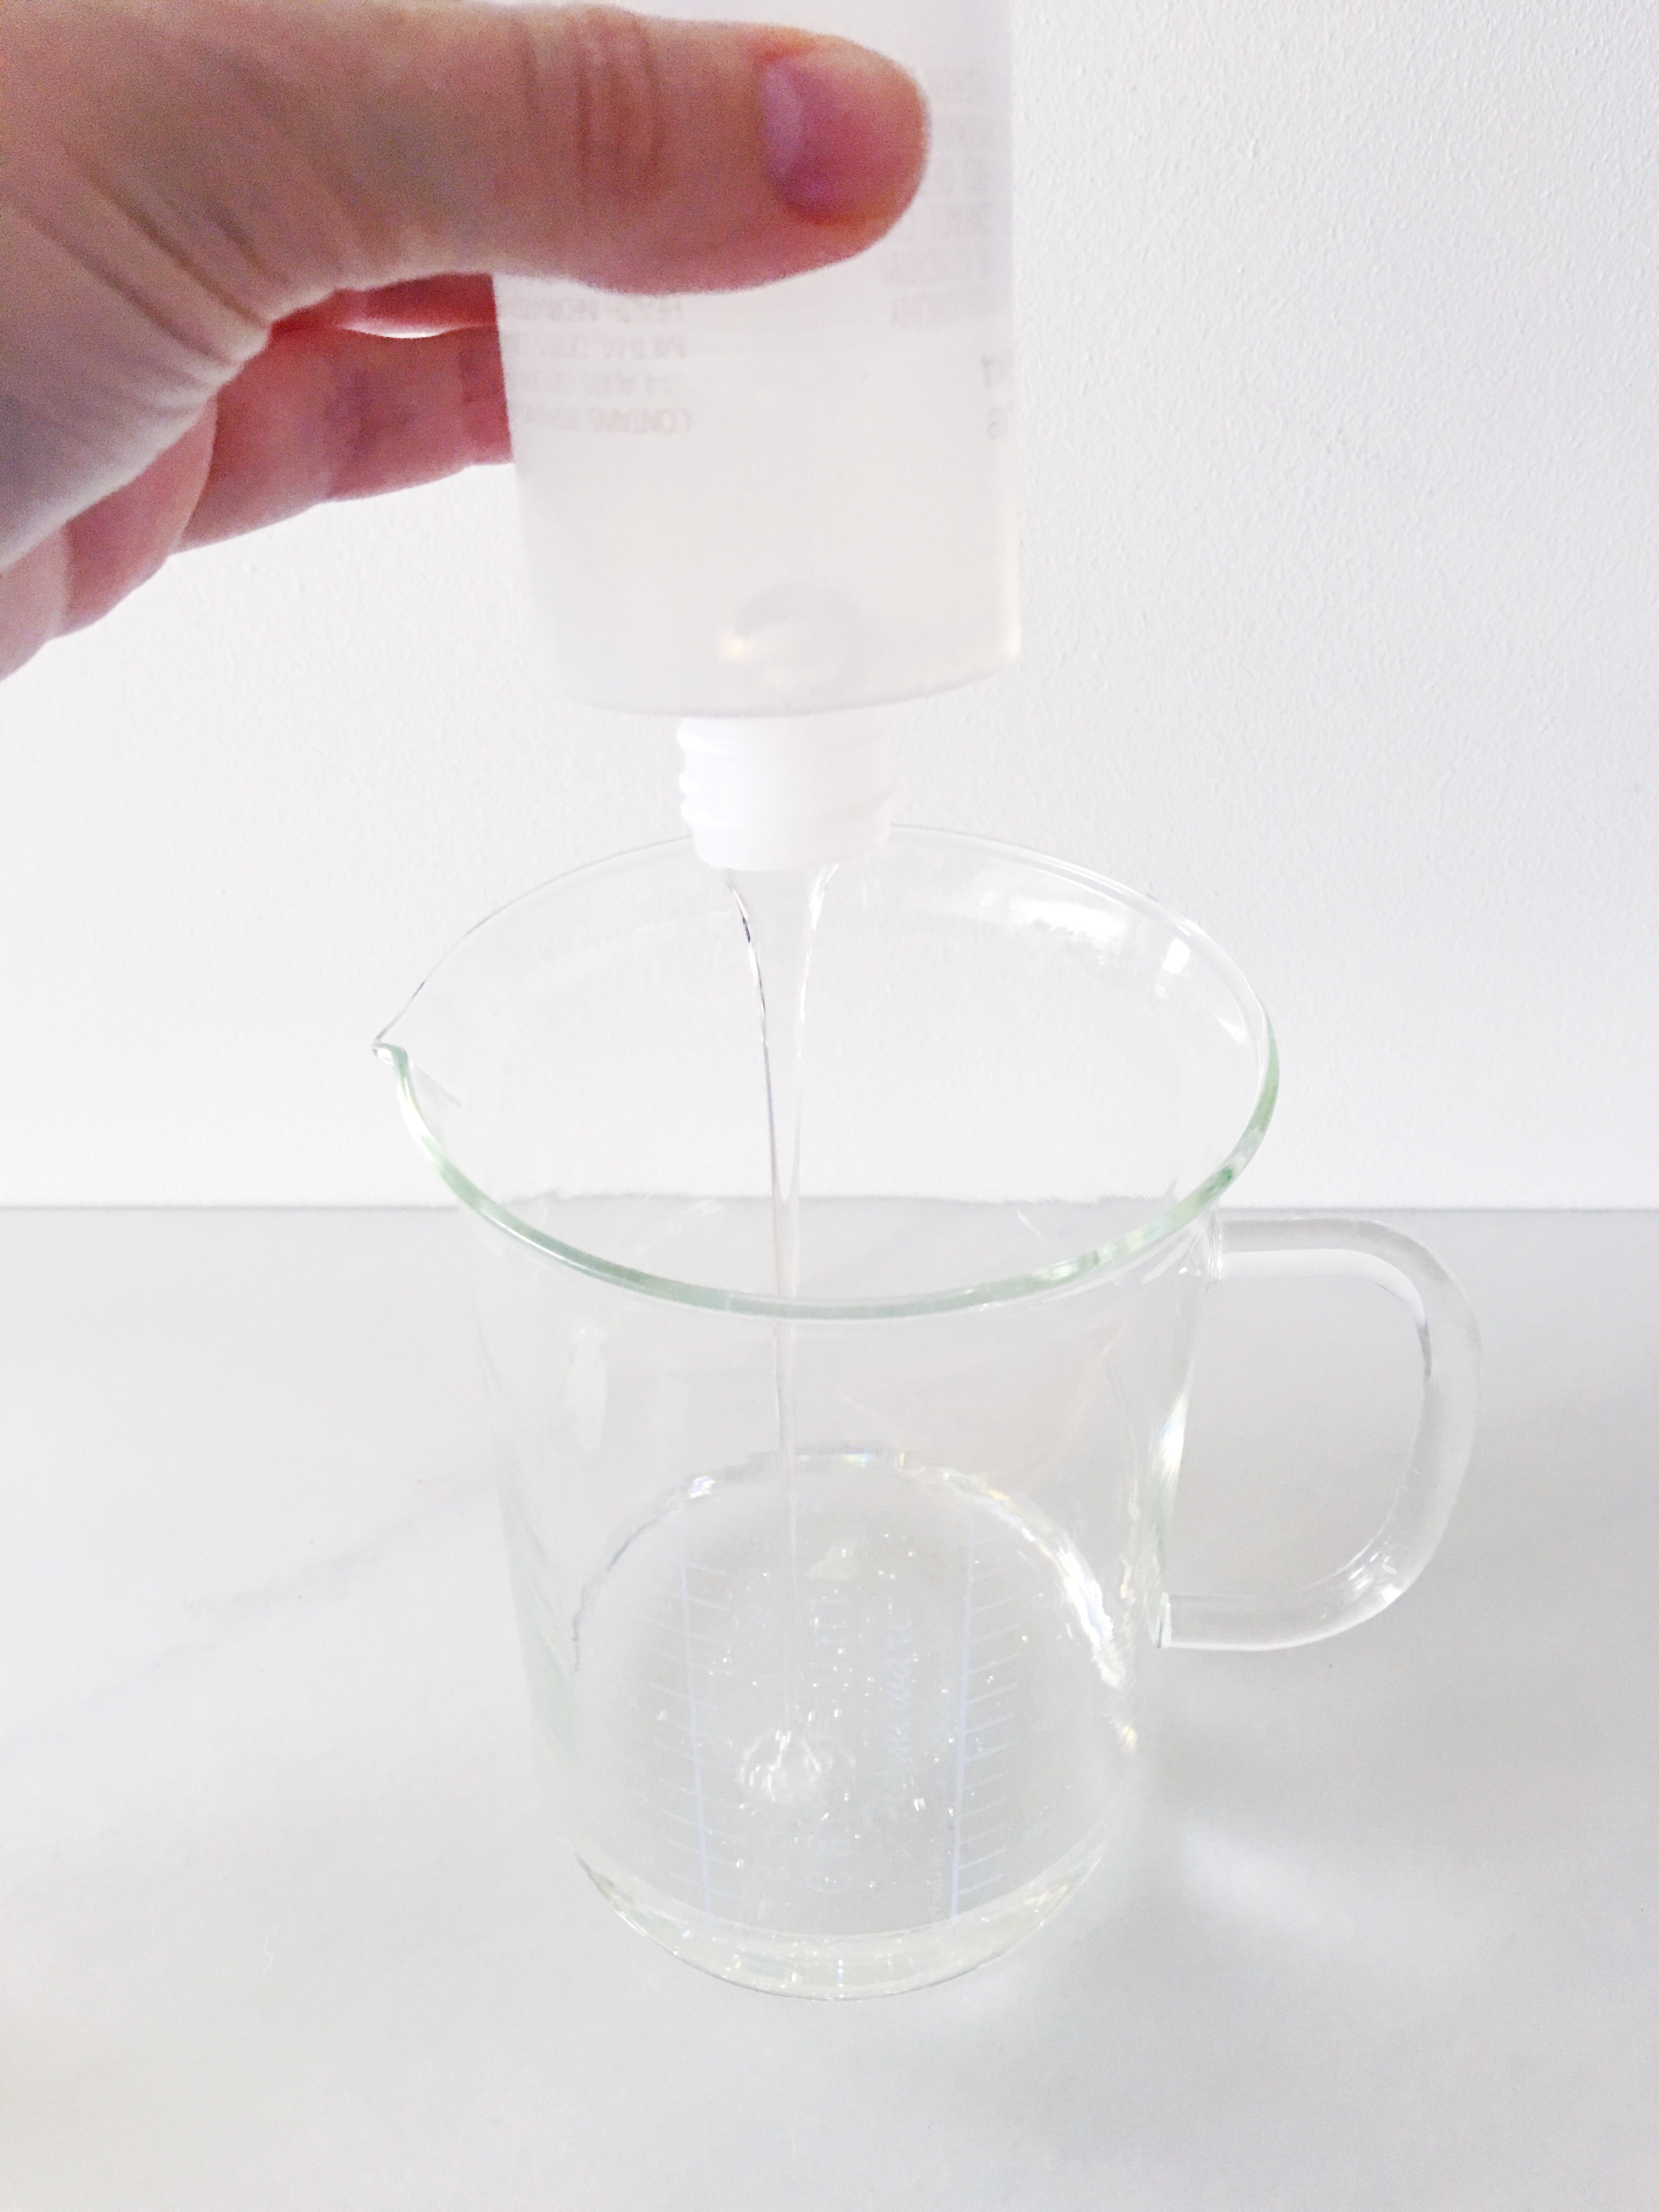
 Step 8:
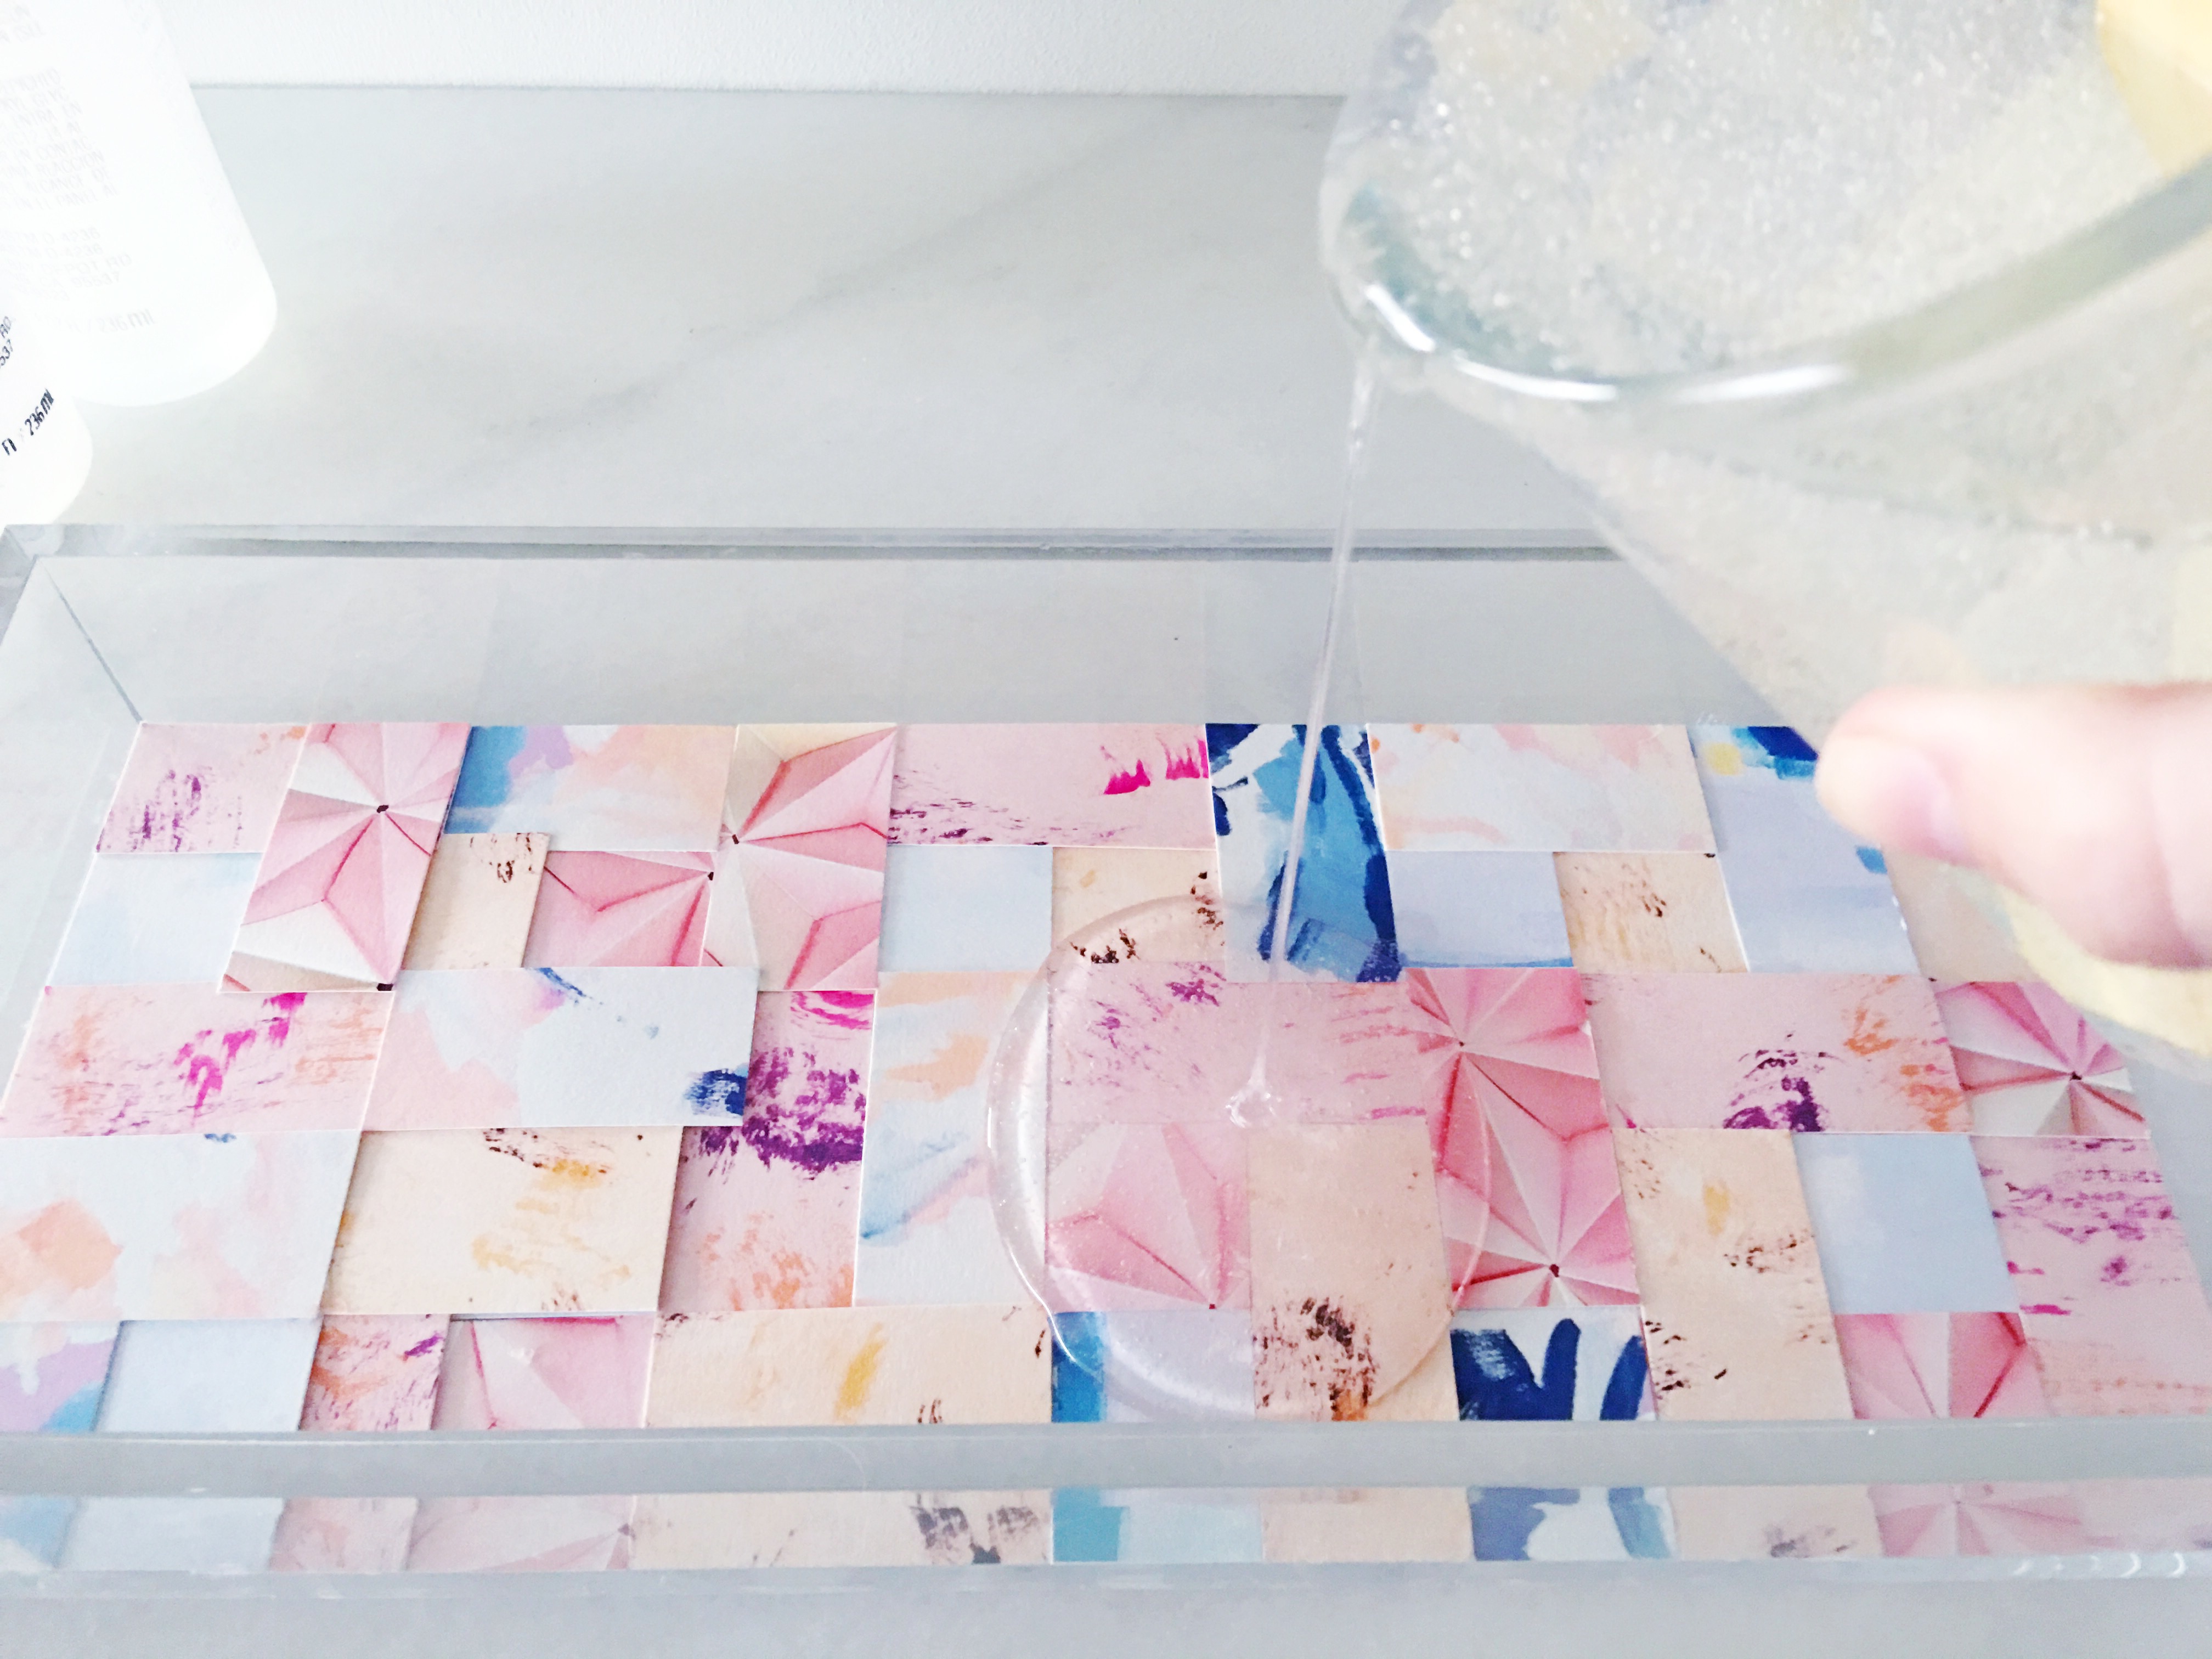 Pour the resin into your tray in a steady stream, with your tray placed on a completely level surface. My kit contained 2 cups/16 oz. of resin once mixed, and I used all of it. I ended up with about a 1 cm. layer of resin, which was perfect.
Step 9: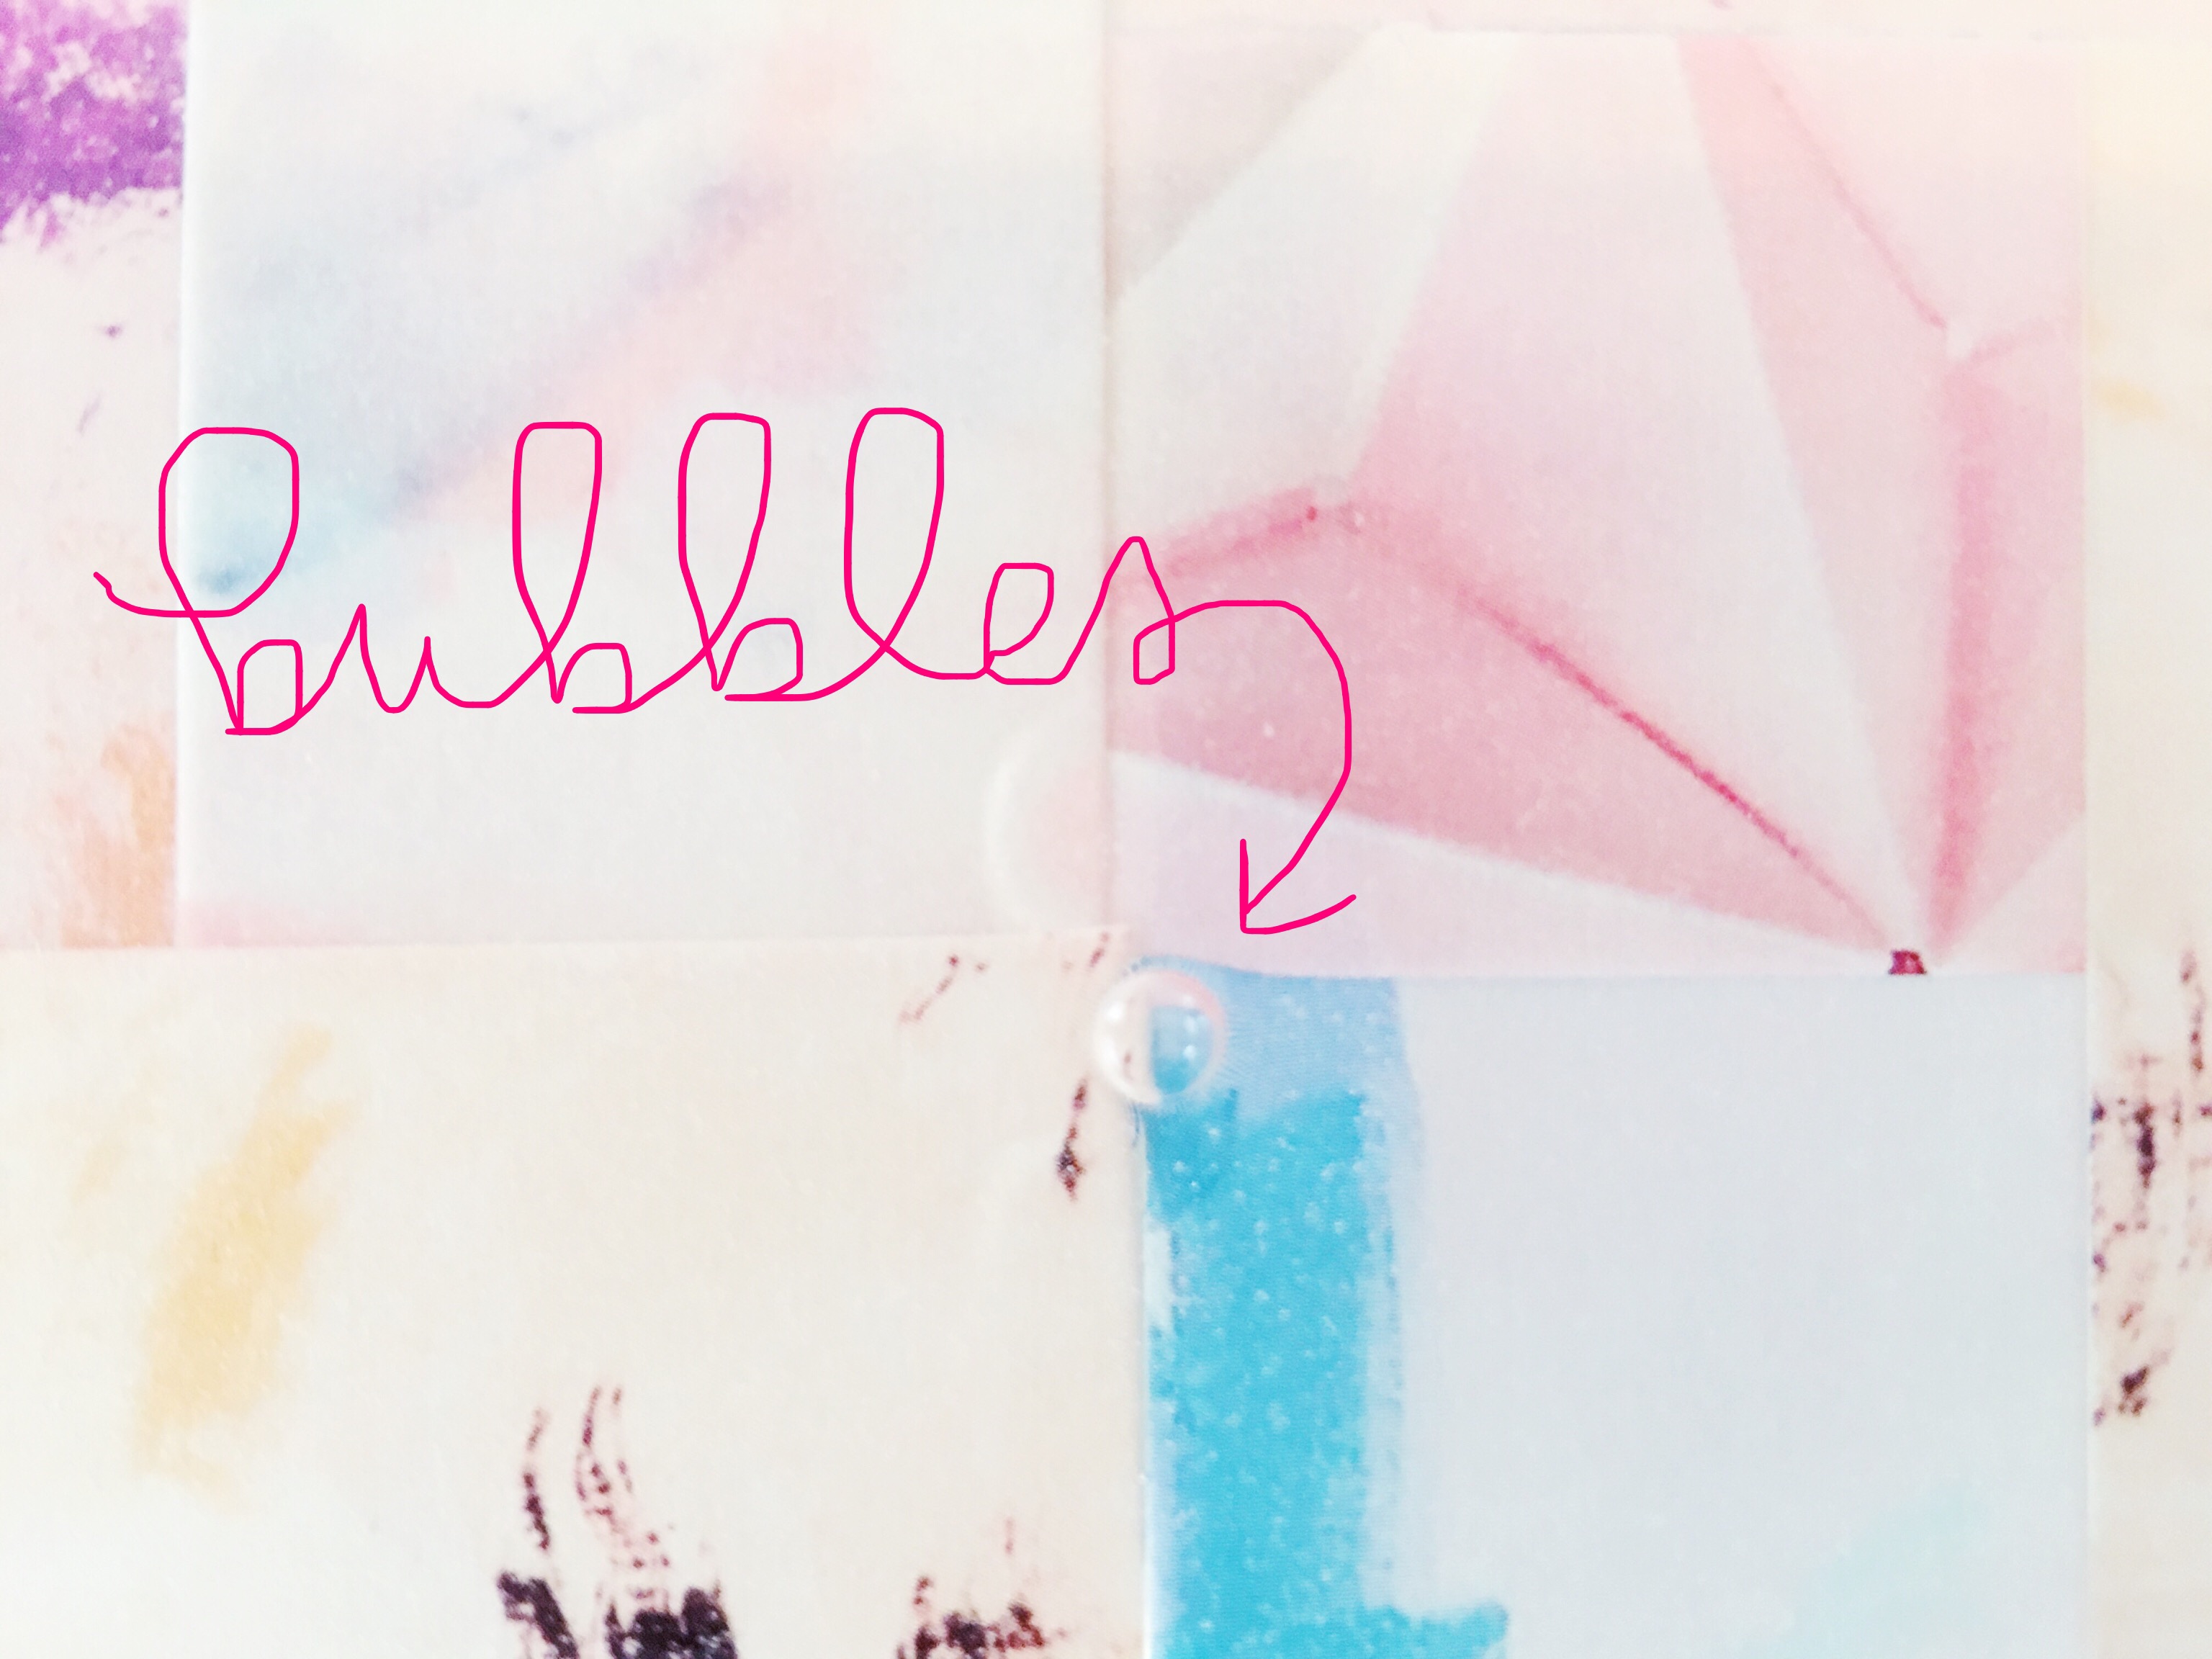 After about 10-15 minutes, the bubbles you created during mixing will begin to rise to the surface. Don’t worry if there are a lot of tiny bubbles throughout your resin! Gently exhale warm breath over the resin surface. The warmth will pop the bubbles and you will be left with the crystal-clear effect you’re going for. The bubbles will continue to rise to the surface over time, so it’s important to go back to it once every ten minutes or so for the first hour and exhale on those areas where the bubbles are. If you have a kitchen torch, you can put the flame on low and, keeping the flame about 6 inches away from the resin surface, go back and forth over the top to apply heat to the bubbles. Don’t keep the flame in one spot for too long though. This could damage the resin and cause it to not set properly.
Step 10:
Allow the resin to cure completely. The time will vary, so look to your instructions for specifics, but it will be at least 24 hours.
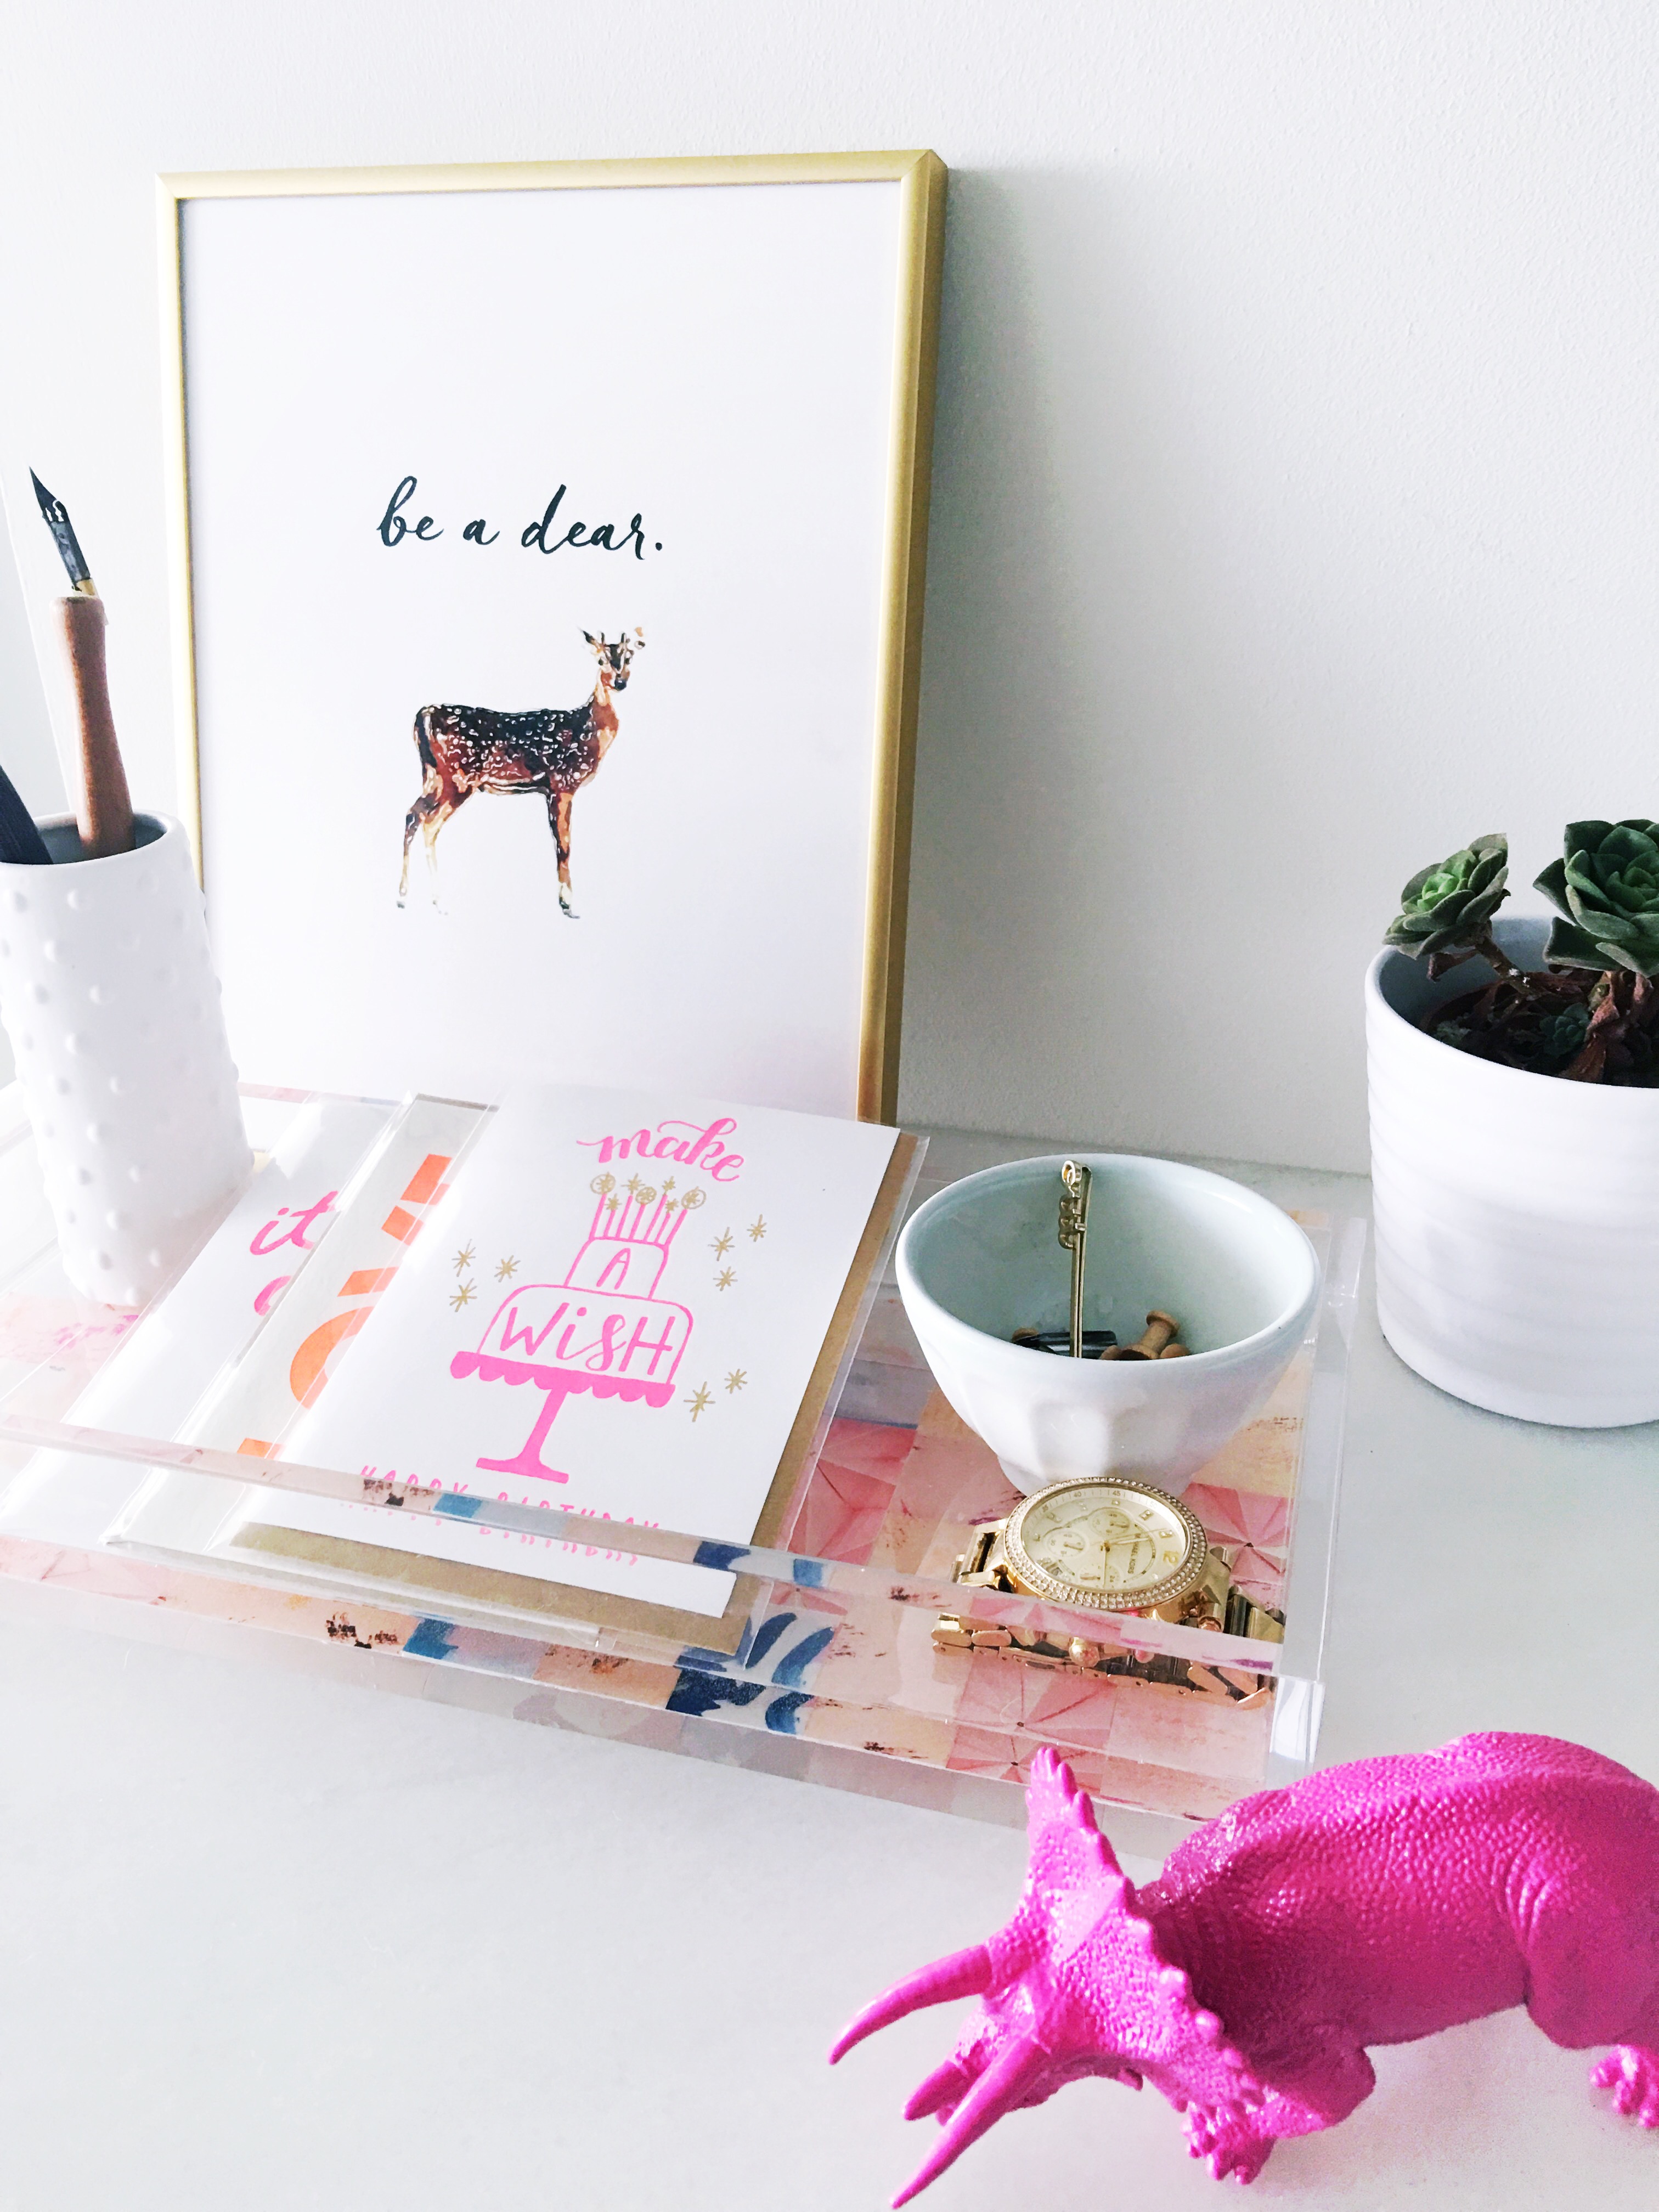 And that is that! It’s such a simple process once you get the materials you need. I actually found cutting and arranging the prints very therapeutic. I was hesitant at first to cut up my beautiful prints, but I’m so glad I went through with it. The tray looks really professional and also super unique. Plus, the pink and blue color scheme I went with, very Pantone-y now that I think about it, looks beautiful with gold jewelry and neutral-colored accessories sitting atop it. Although I plan to use the tray for beauty/jewelry items, you could also use it to hold your sunglasses collection, a collection of small succulents, your pens and writing supplies, or pretty much anything else! I was actually thinking about doing this to my flatware tray in the kitchen. Wouldn’t that be fun? I’d love to see a beautiful pattern every time I picked up a fork! Or you could have family photos printed and create a perfect Father’s Day gift for the man with a copious watch or tie collection. As you can see, the permutations of this project are endless!
If anyone gives this a try, please, please, please send a pic! I’d love to see what you guys come up with!
xo – Cassie
