

I’ve expressed before my love for air-dry clay. So easy to work with, dries hard and is endlessly customizable to your needs. So when I made the DIY spoon rest a while back, and had a good chunk of clay left in my stash, I started thinking about what I wanted to do with it. While walking my dog the other day, I figured it out. On the course of our walk, we happened upon a plant sale at a Greek church close to my apartment. I’m desperate for more plant life in general and was specifically hoping to find some really sweet little cacti. Although they didn’t have exactly what I wanted, they did have a very small selection of really unique succulents. I picked up a Sedum sieboldii (or October Daphne) and headed home with my tiny little treasure in tow. Upon arrival I realized that, although I had scoured the Internet and even posted my favorite planter finds, I didn’t actually have one yet. Oops. The October Daphne came in a 1 quart plastic liner; kind of an odd, in-between size, and too big for the only vacant pot I had available. So I searched for something I could use, and came upon an old dog treat tin that was the perfect size, just not very attractive. So I quickly pulled together my clay and a couple of tools and got to work.
I knew I would have to leave the tin inside the final clay creation, because you can’t place moisture directly against air-dry clay that hasn’t been glazed. It will melt. Not a good look. So, it followed that the shape of the original tin would be the shape of the final planter. Since that would mean a very straight, up and down silhouette, I wanted to add a little interest in some aspect other than the overall shape. Hence the faux-sew aspect of this project. I wanted the clay to have the appearance of being sewn together, which, honestly, ended up being even easier than making it completely plain would have been. Bonus! Here’s what I did.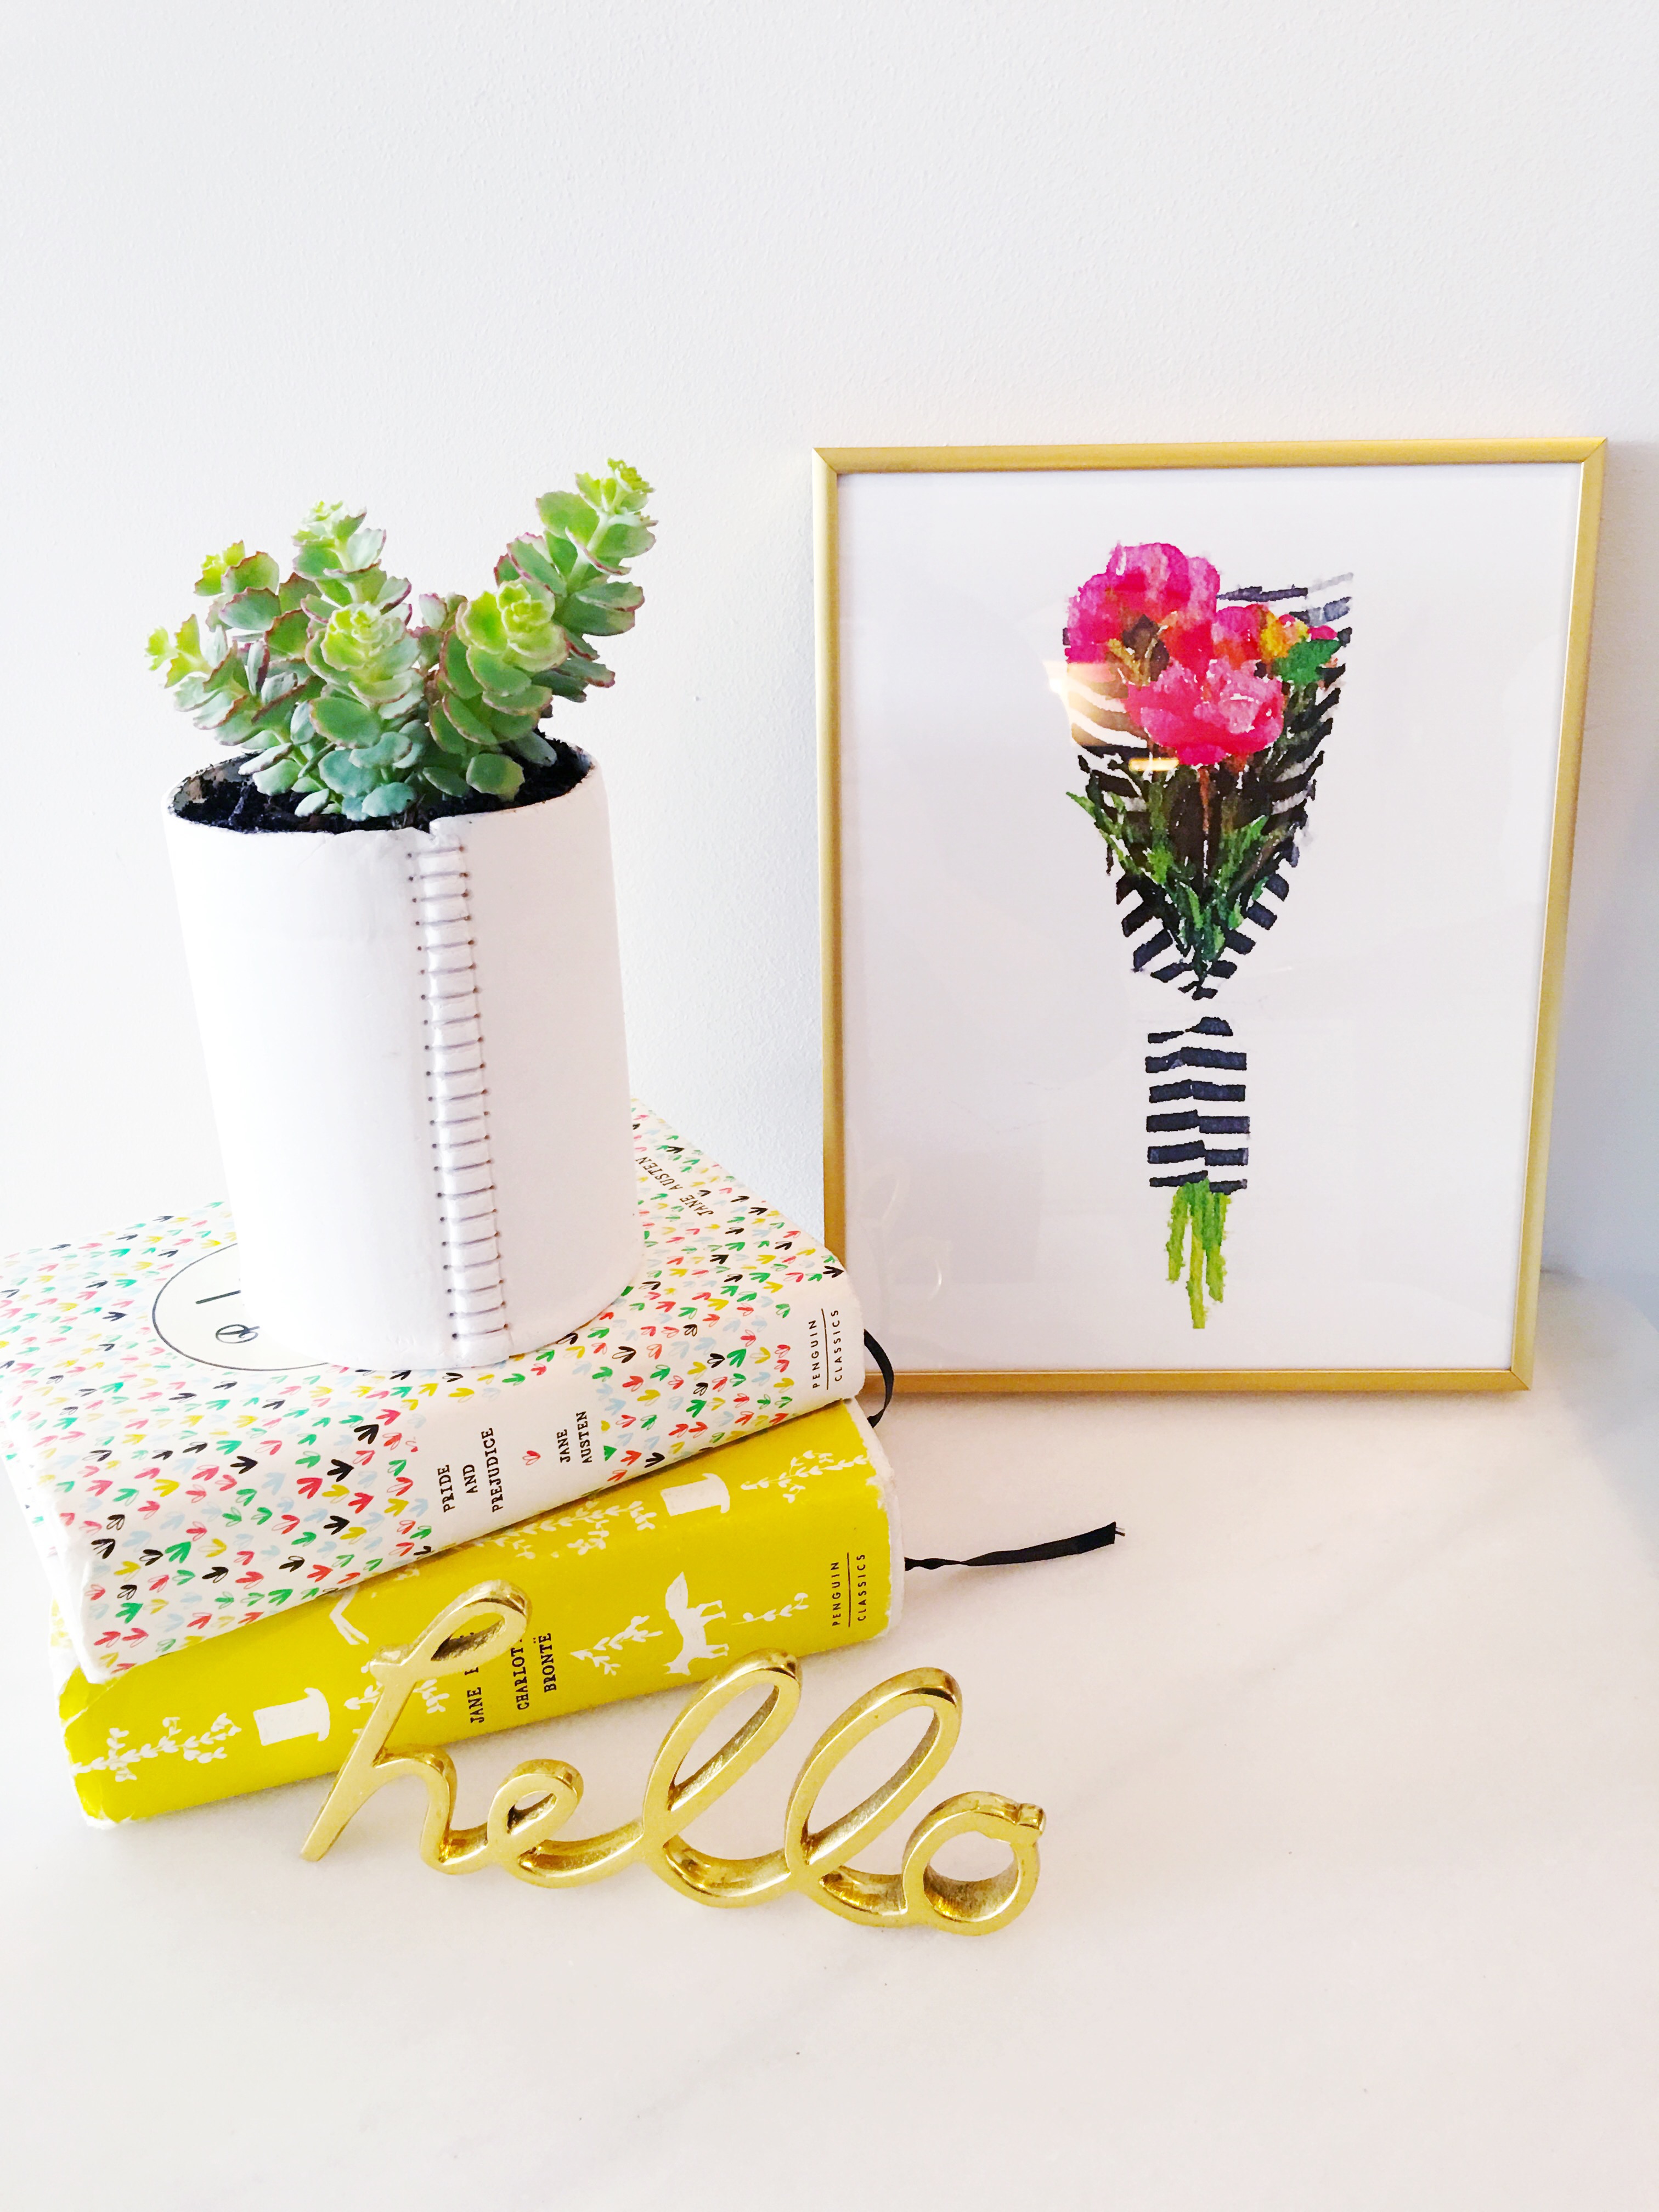 Materials:
Coffee can or some other receptacle large enough for your plant
Air-dry clay
X-acto knife
Rolling pin
Flexible tape measure (alternatively you can use a piece of string and measure it with a standard ruler)
Ruler
Clay tools/fondant tools/toothpick
Tall, narrow vase
220/180 grit sandpaper
Craft paint
Paintbrush
Planting soil
Step 1: Knead your clay until it warms up a little and is more pliable. Roll out a small piece to about 1/8″ thick. 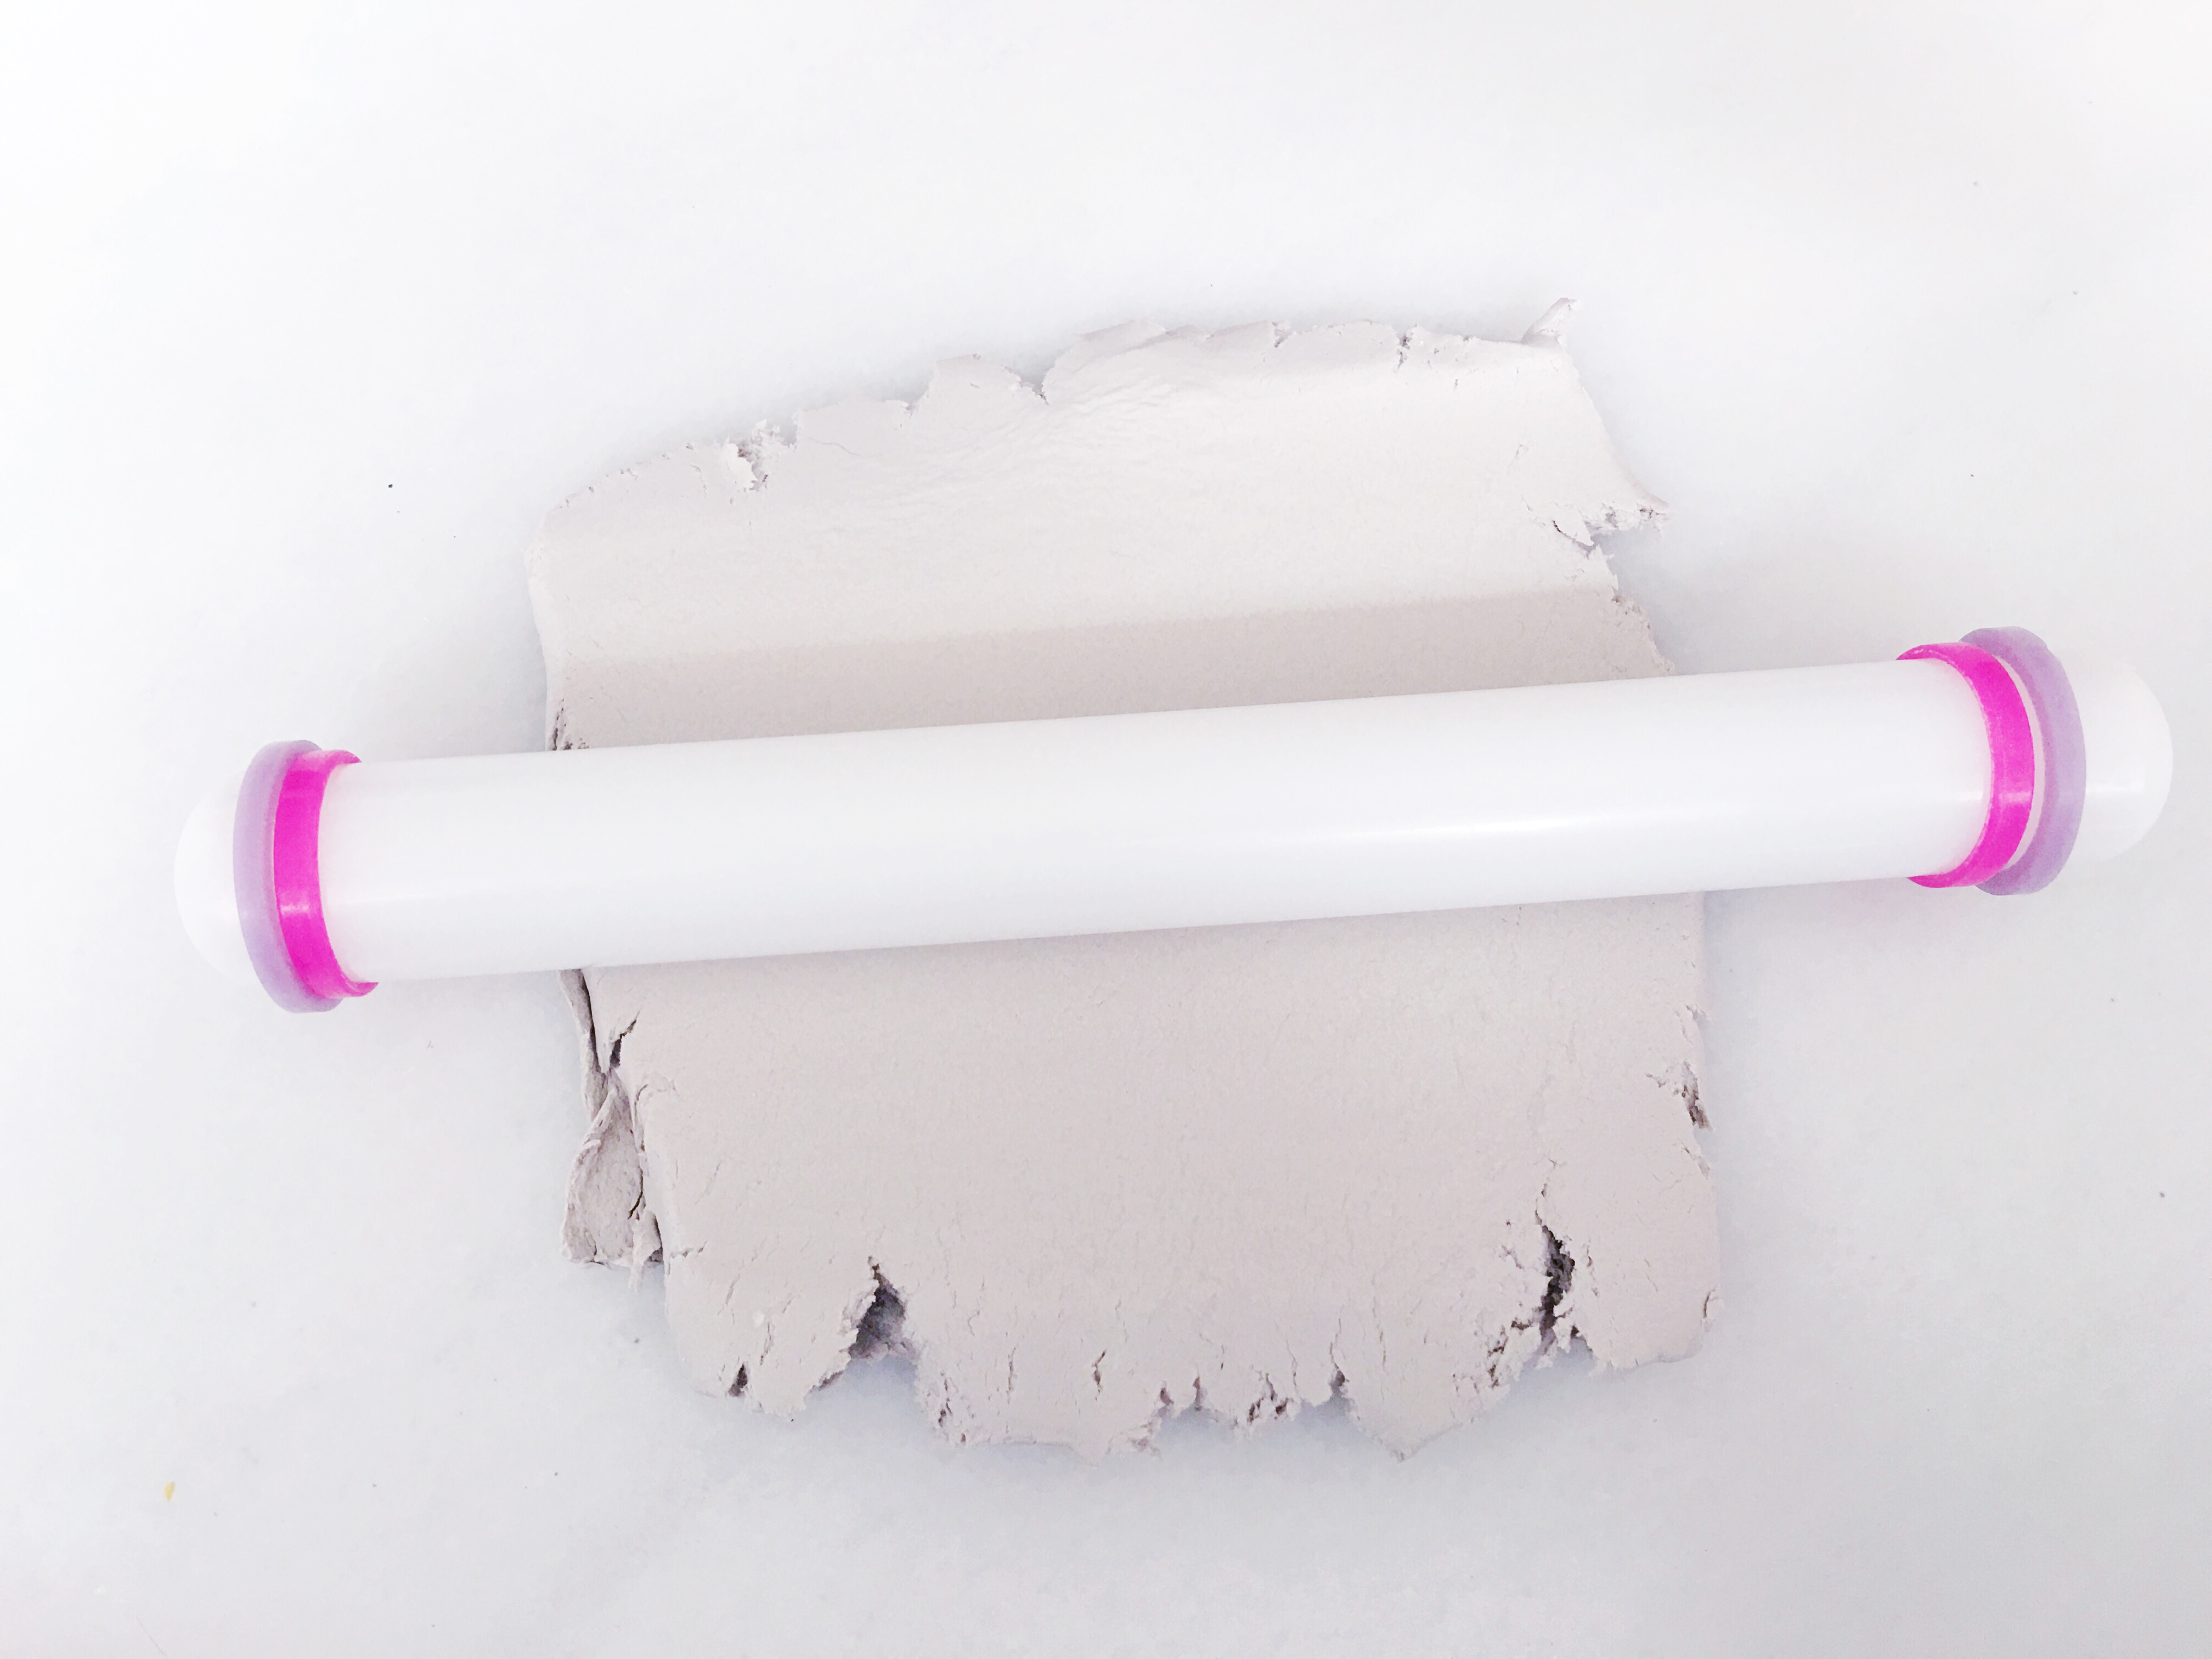 Step 2: Trace the bottom of your container onto the clay and cut out with the x-acto knife. Cover the round with a piece of plastic or towel and set aside.
 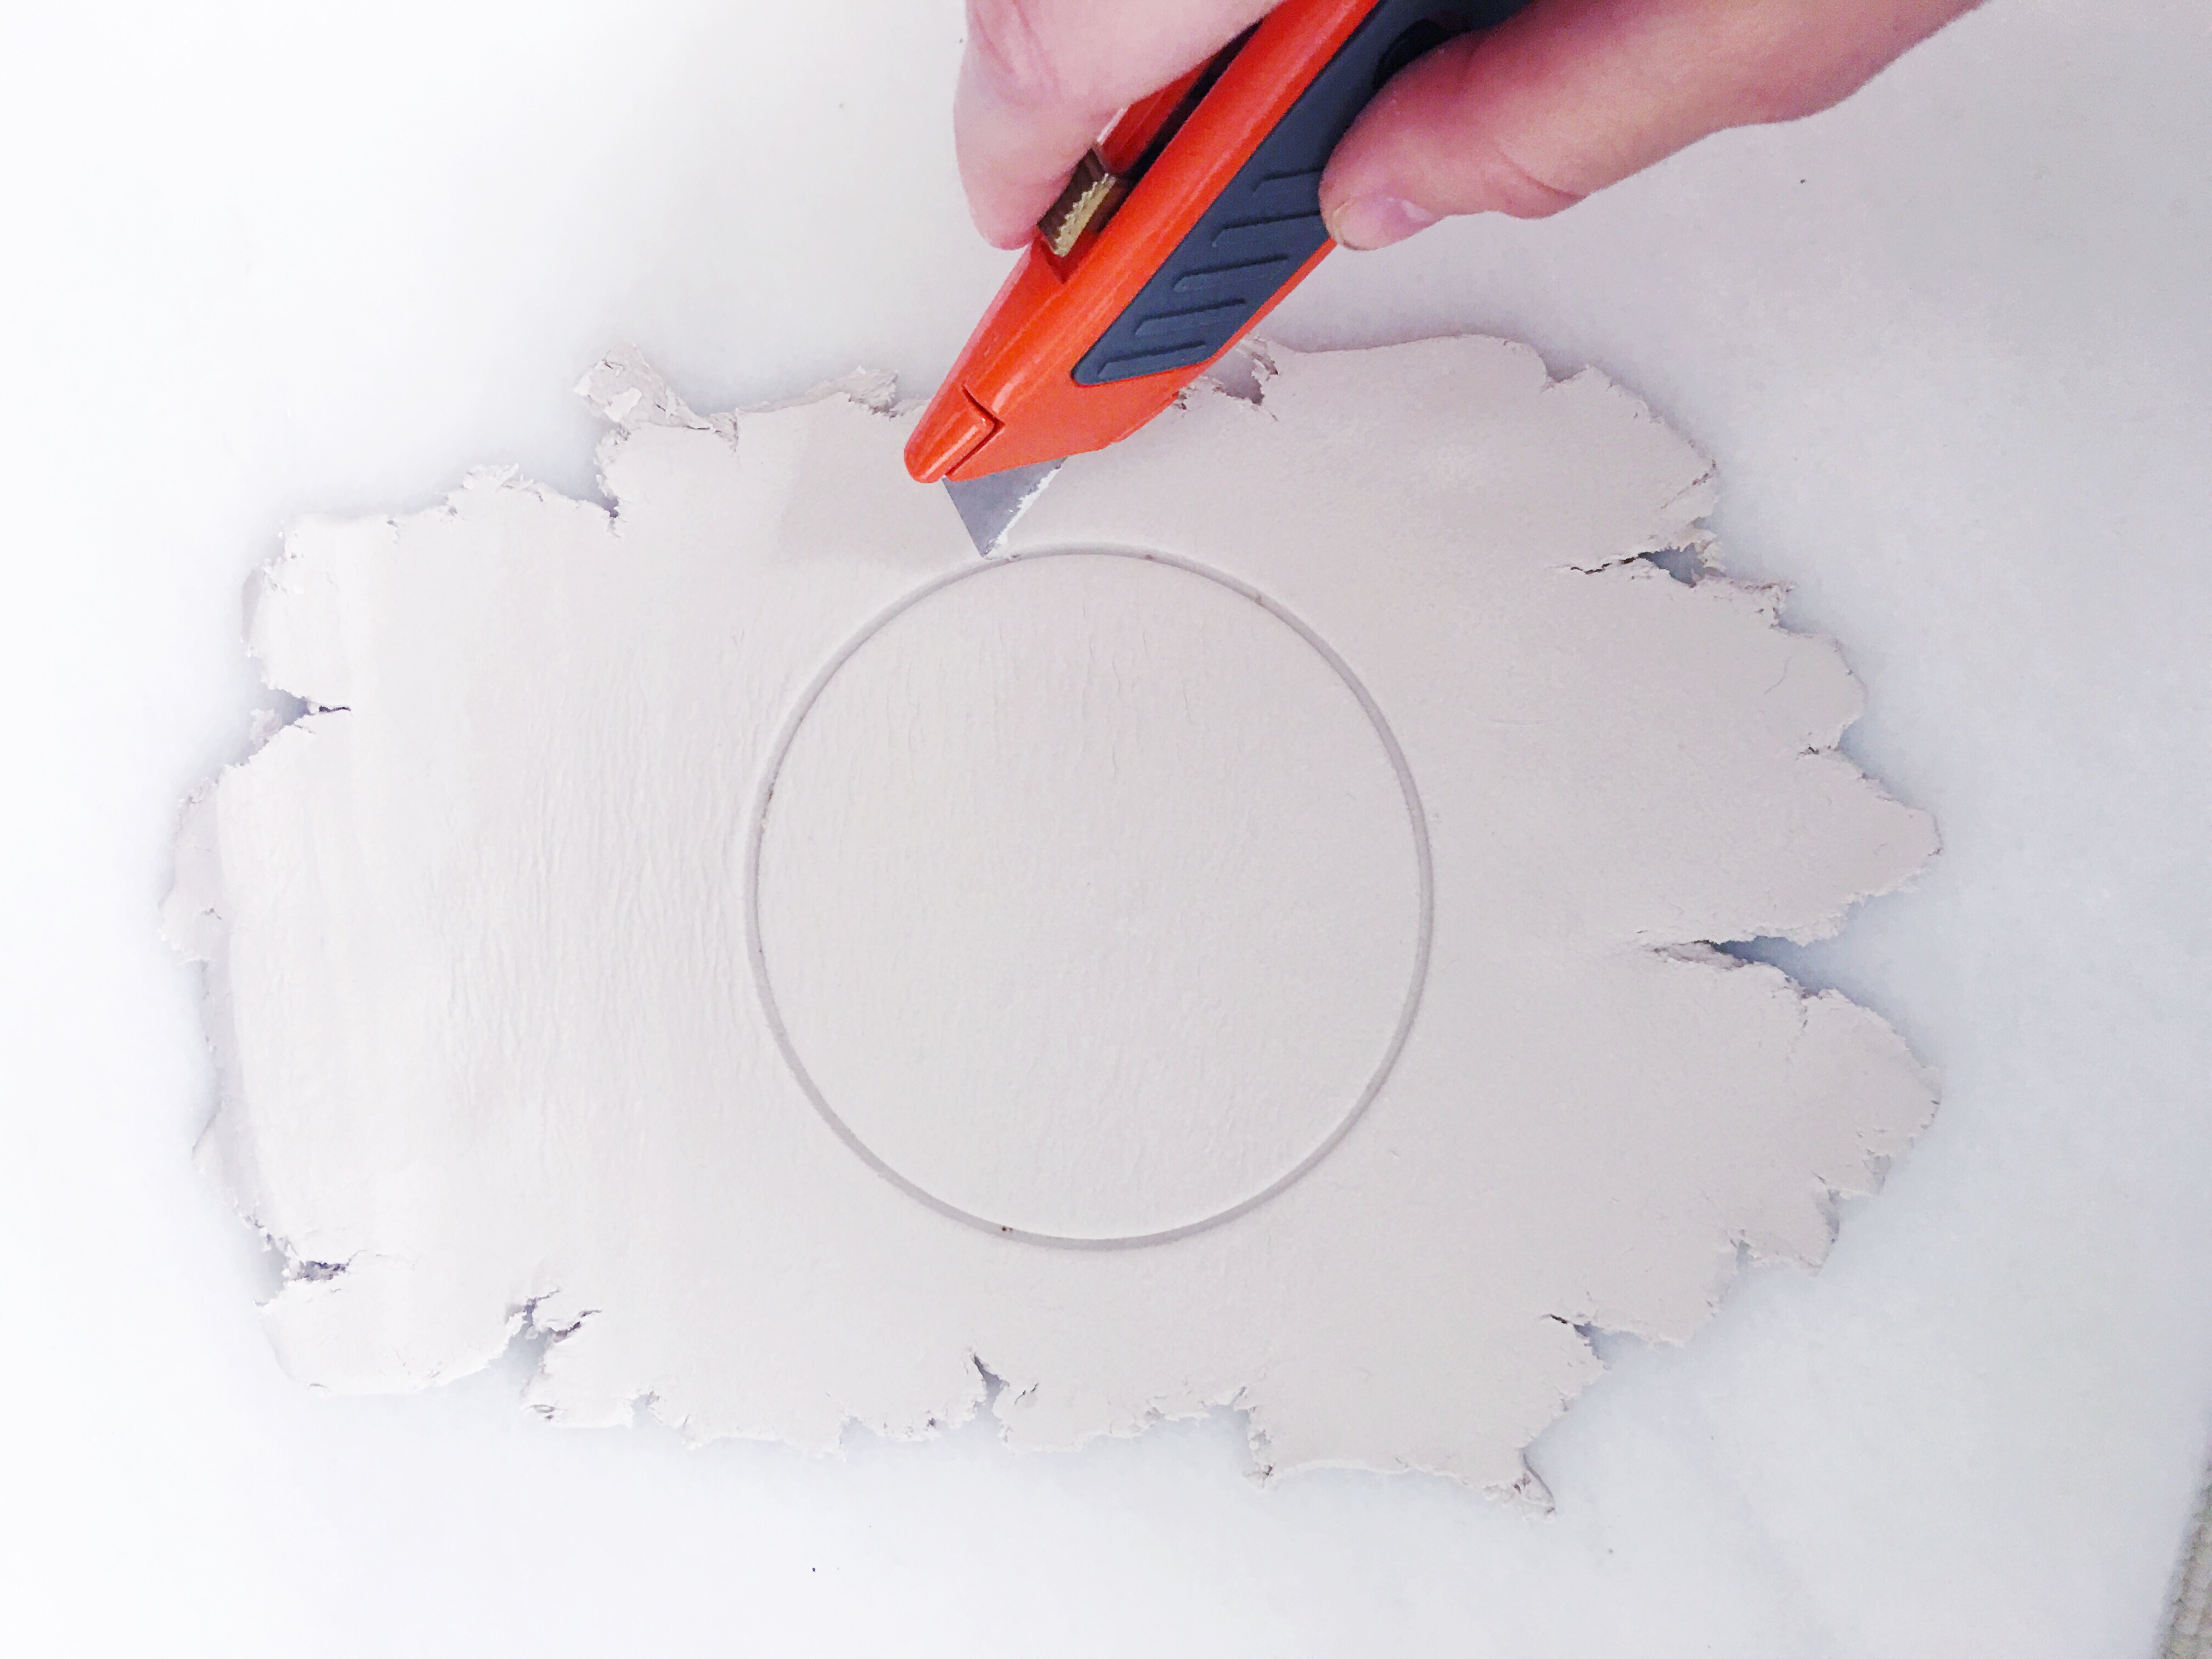 Step 3: Measure the height and circumference of your container using the flexible tape measure. Add 1/2″ to each of the two measurements. These will be the dimensions of your second piece of clay.
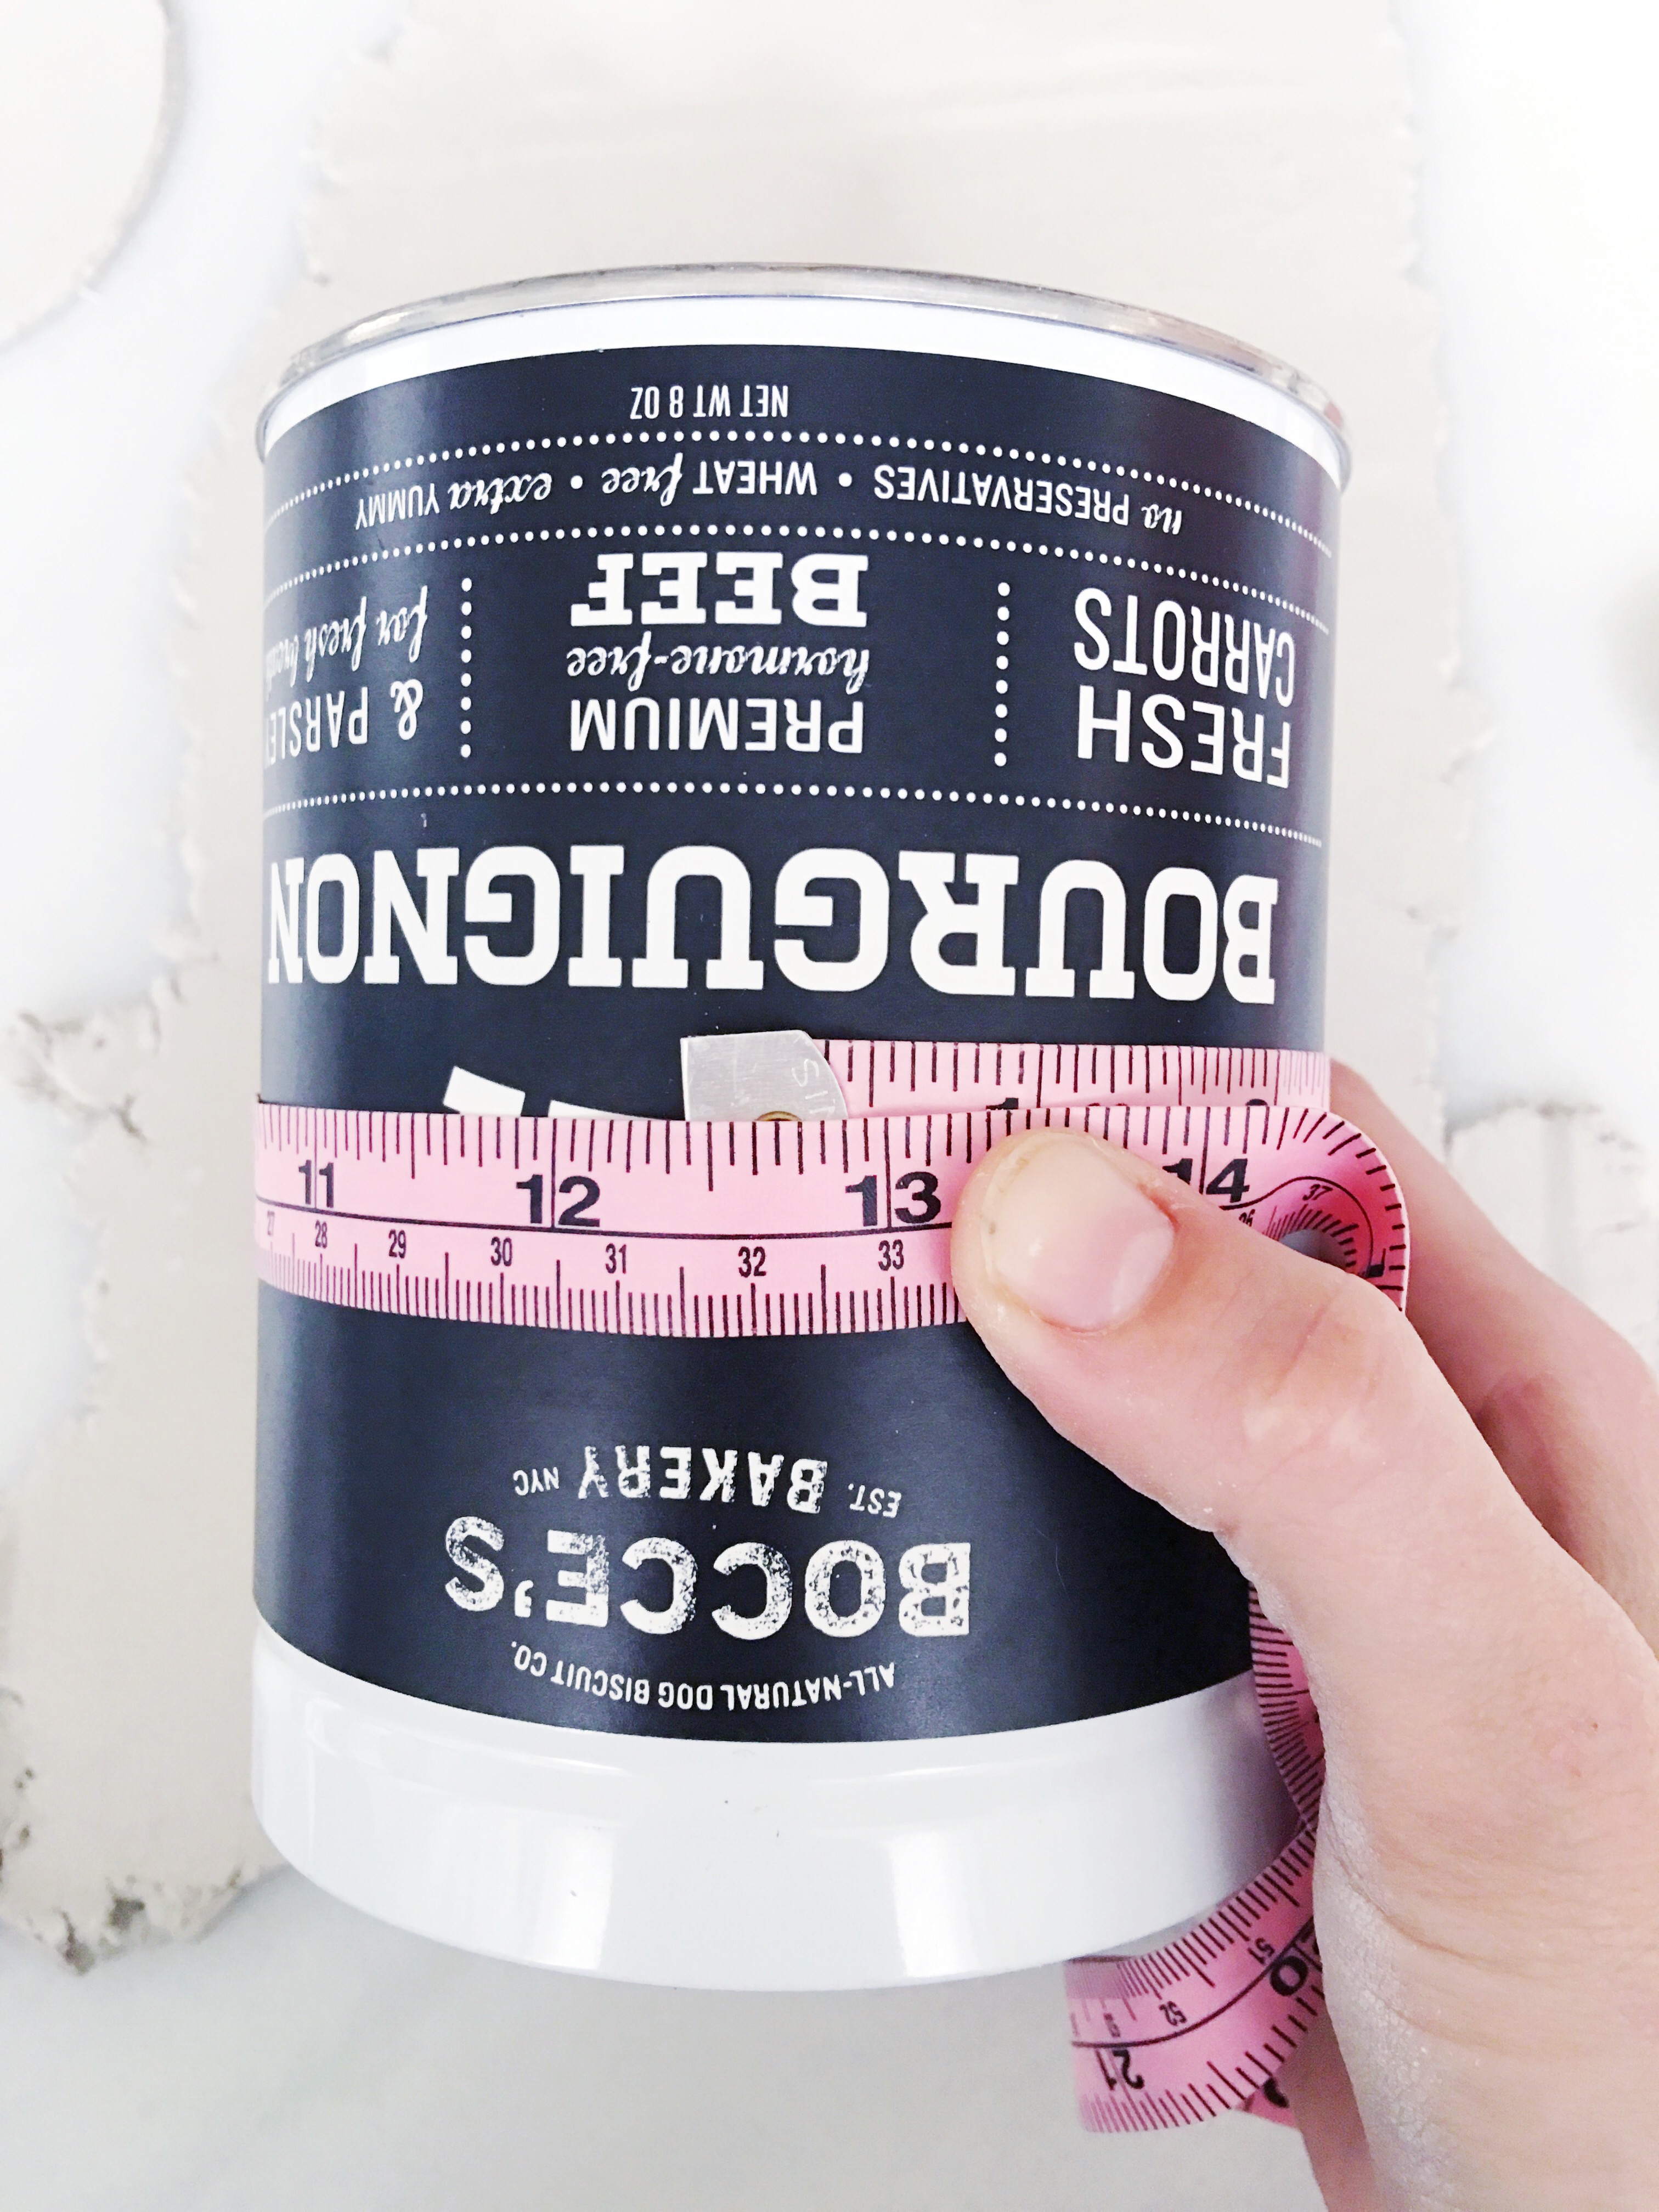 Step 4: Knead a larger piece of clay and roll until it is about 1/8″ thick and large enough to fit the measurements you just took. Measure out your rectangle and cut the shape out of the clay.
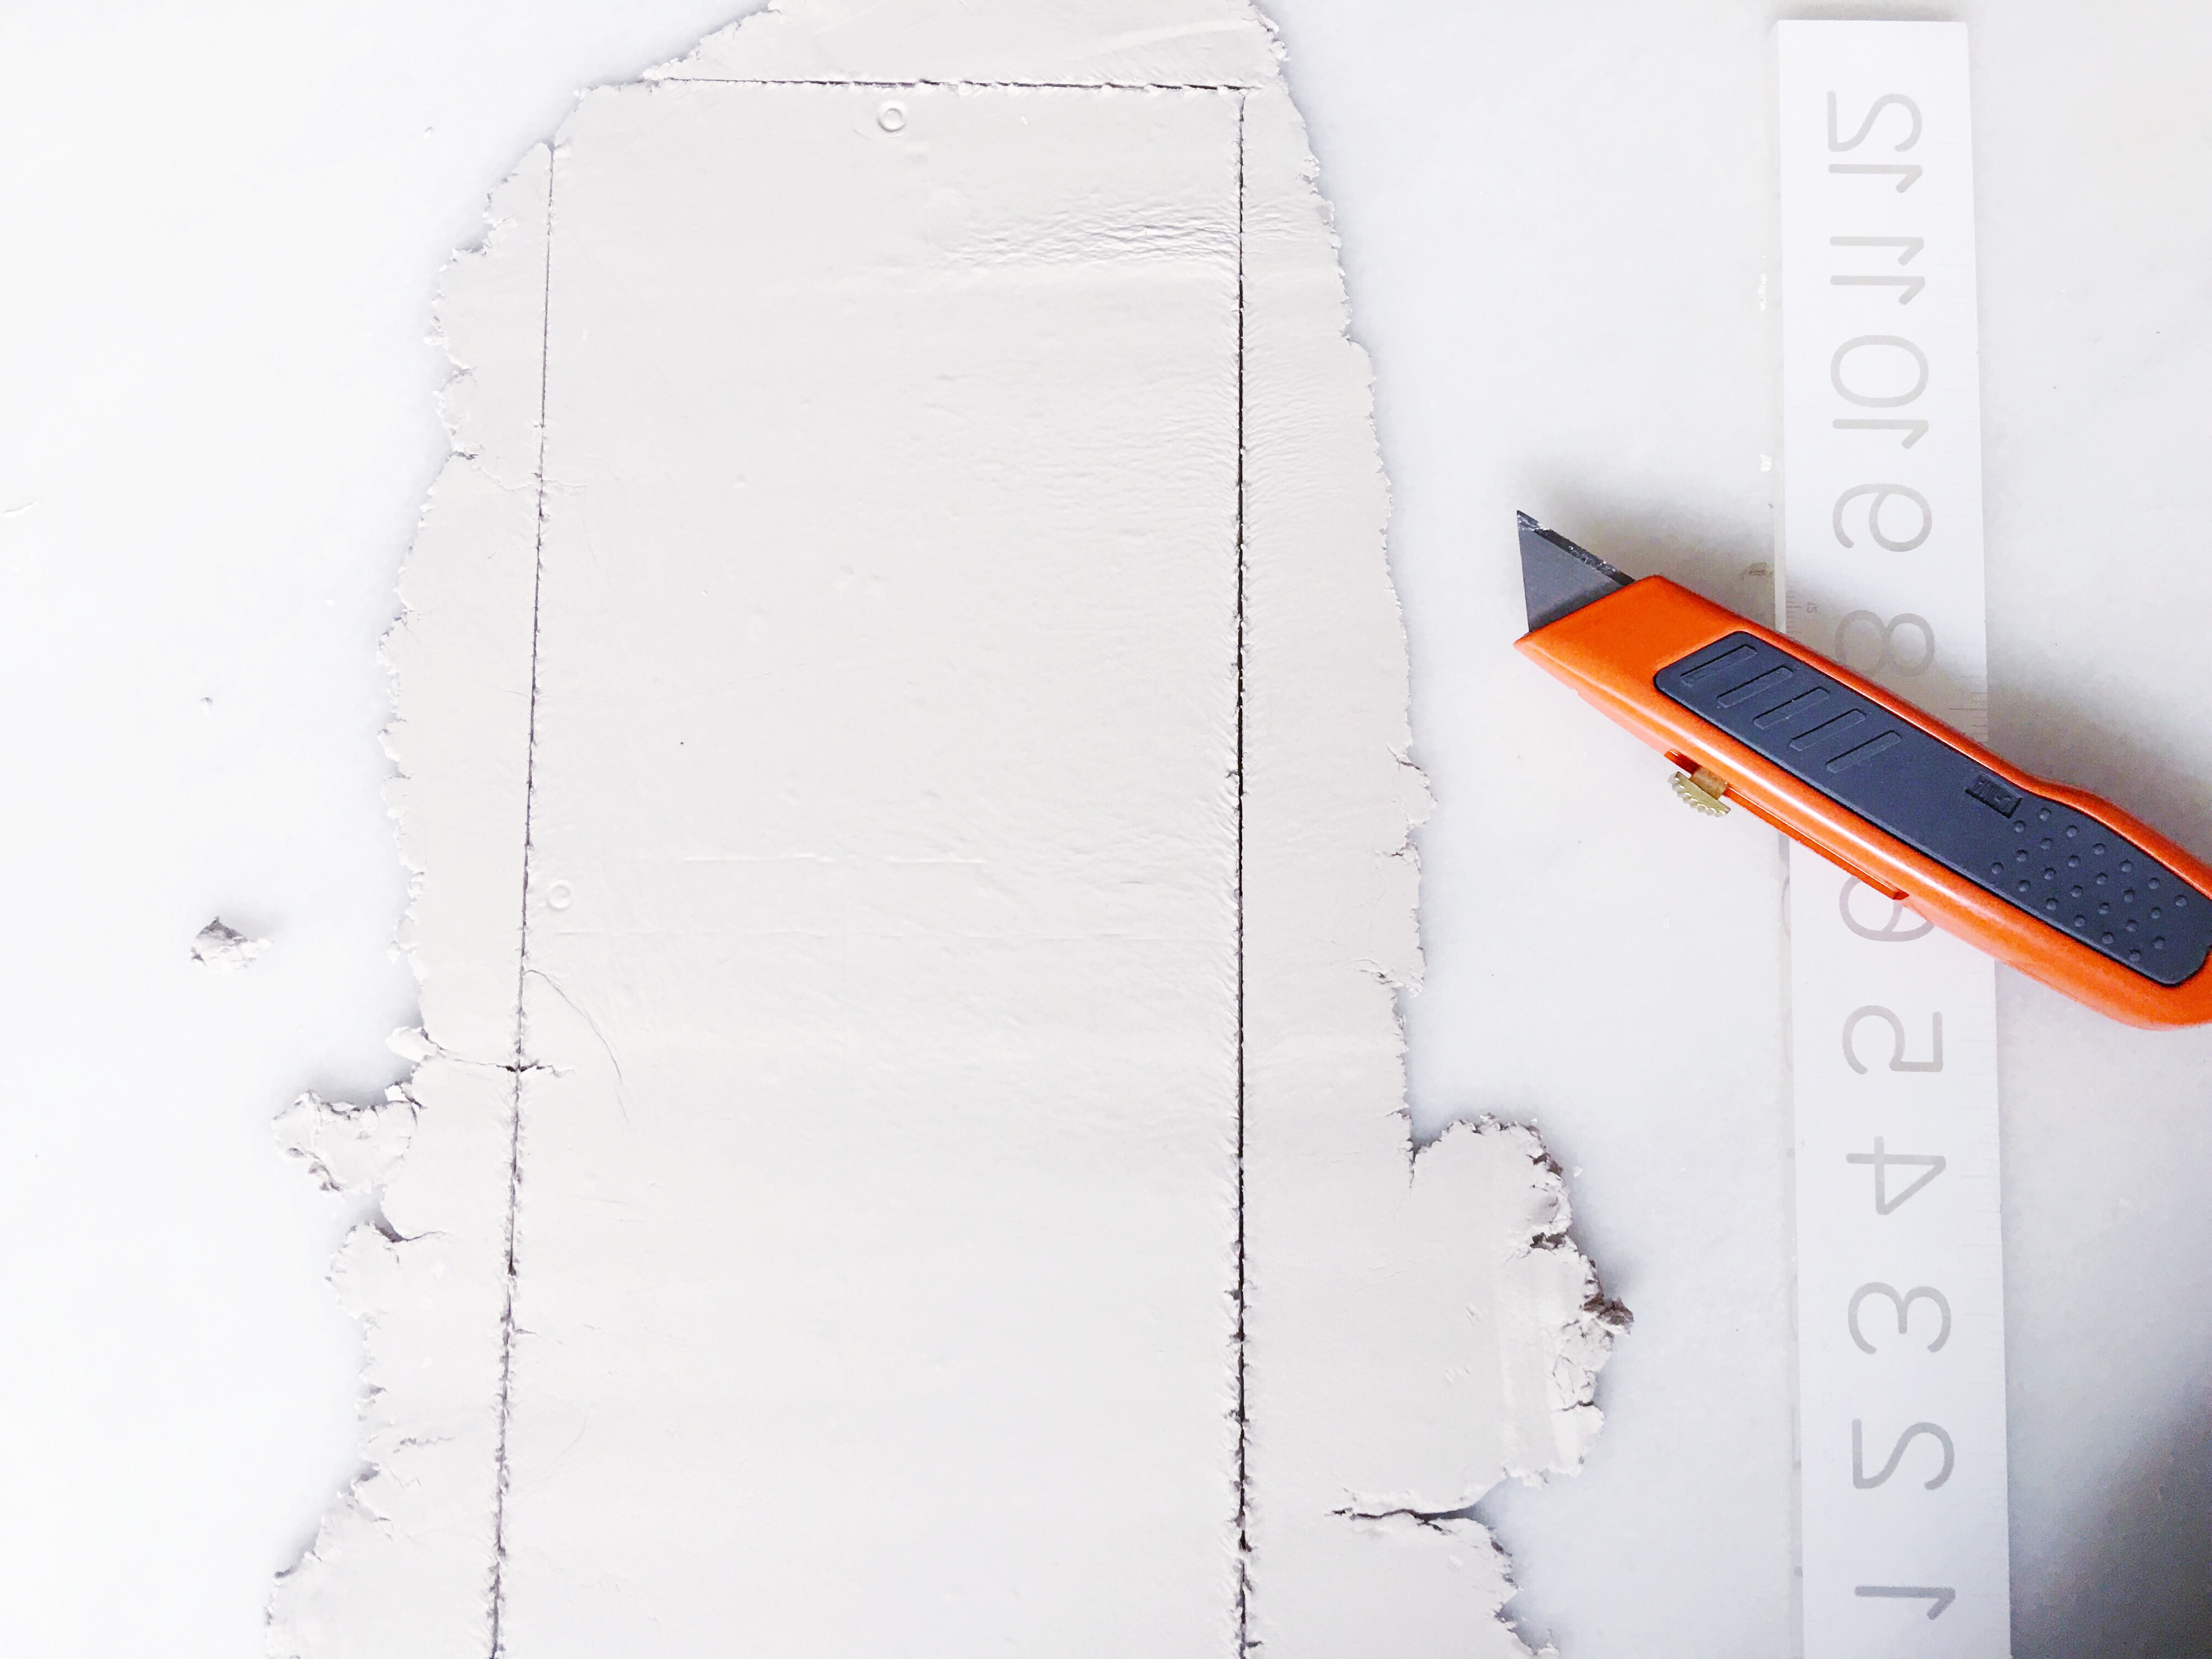 Step 5: Roll the piece of clay around your tin, centering it so there is approximately 1/4″ allowance at the top and the bottom.
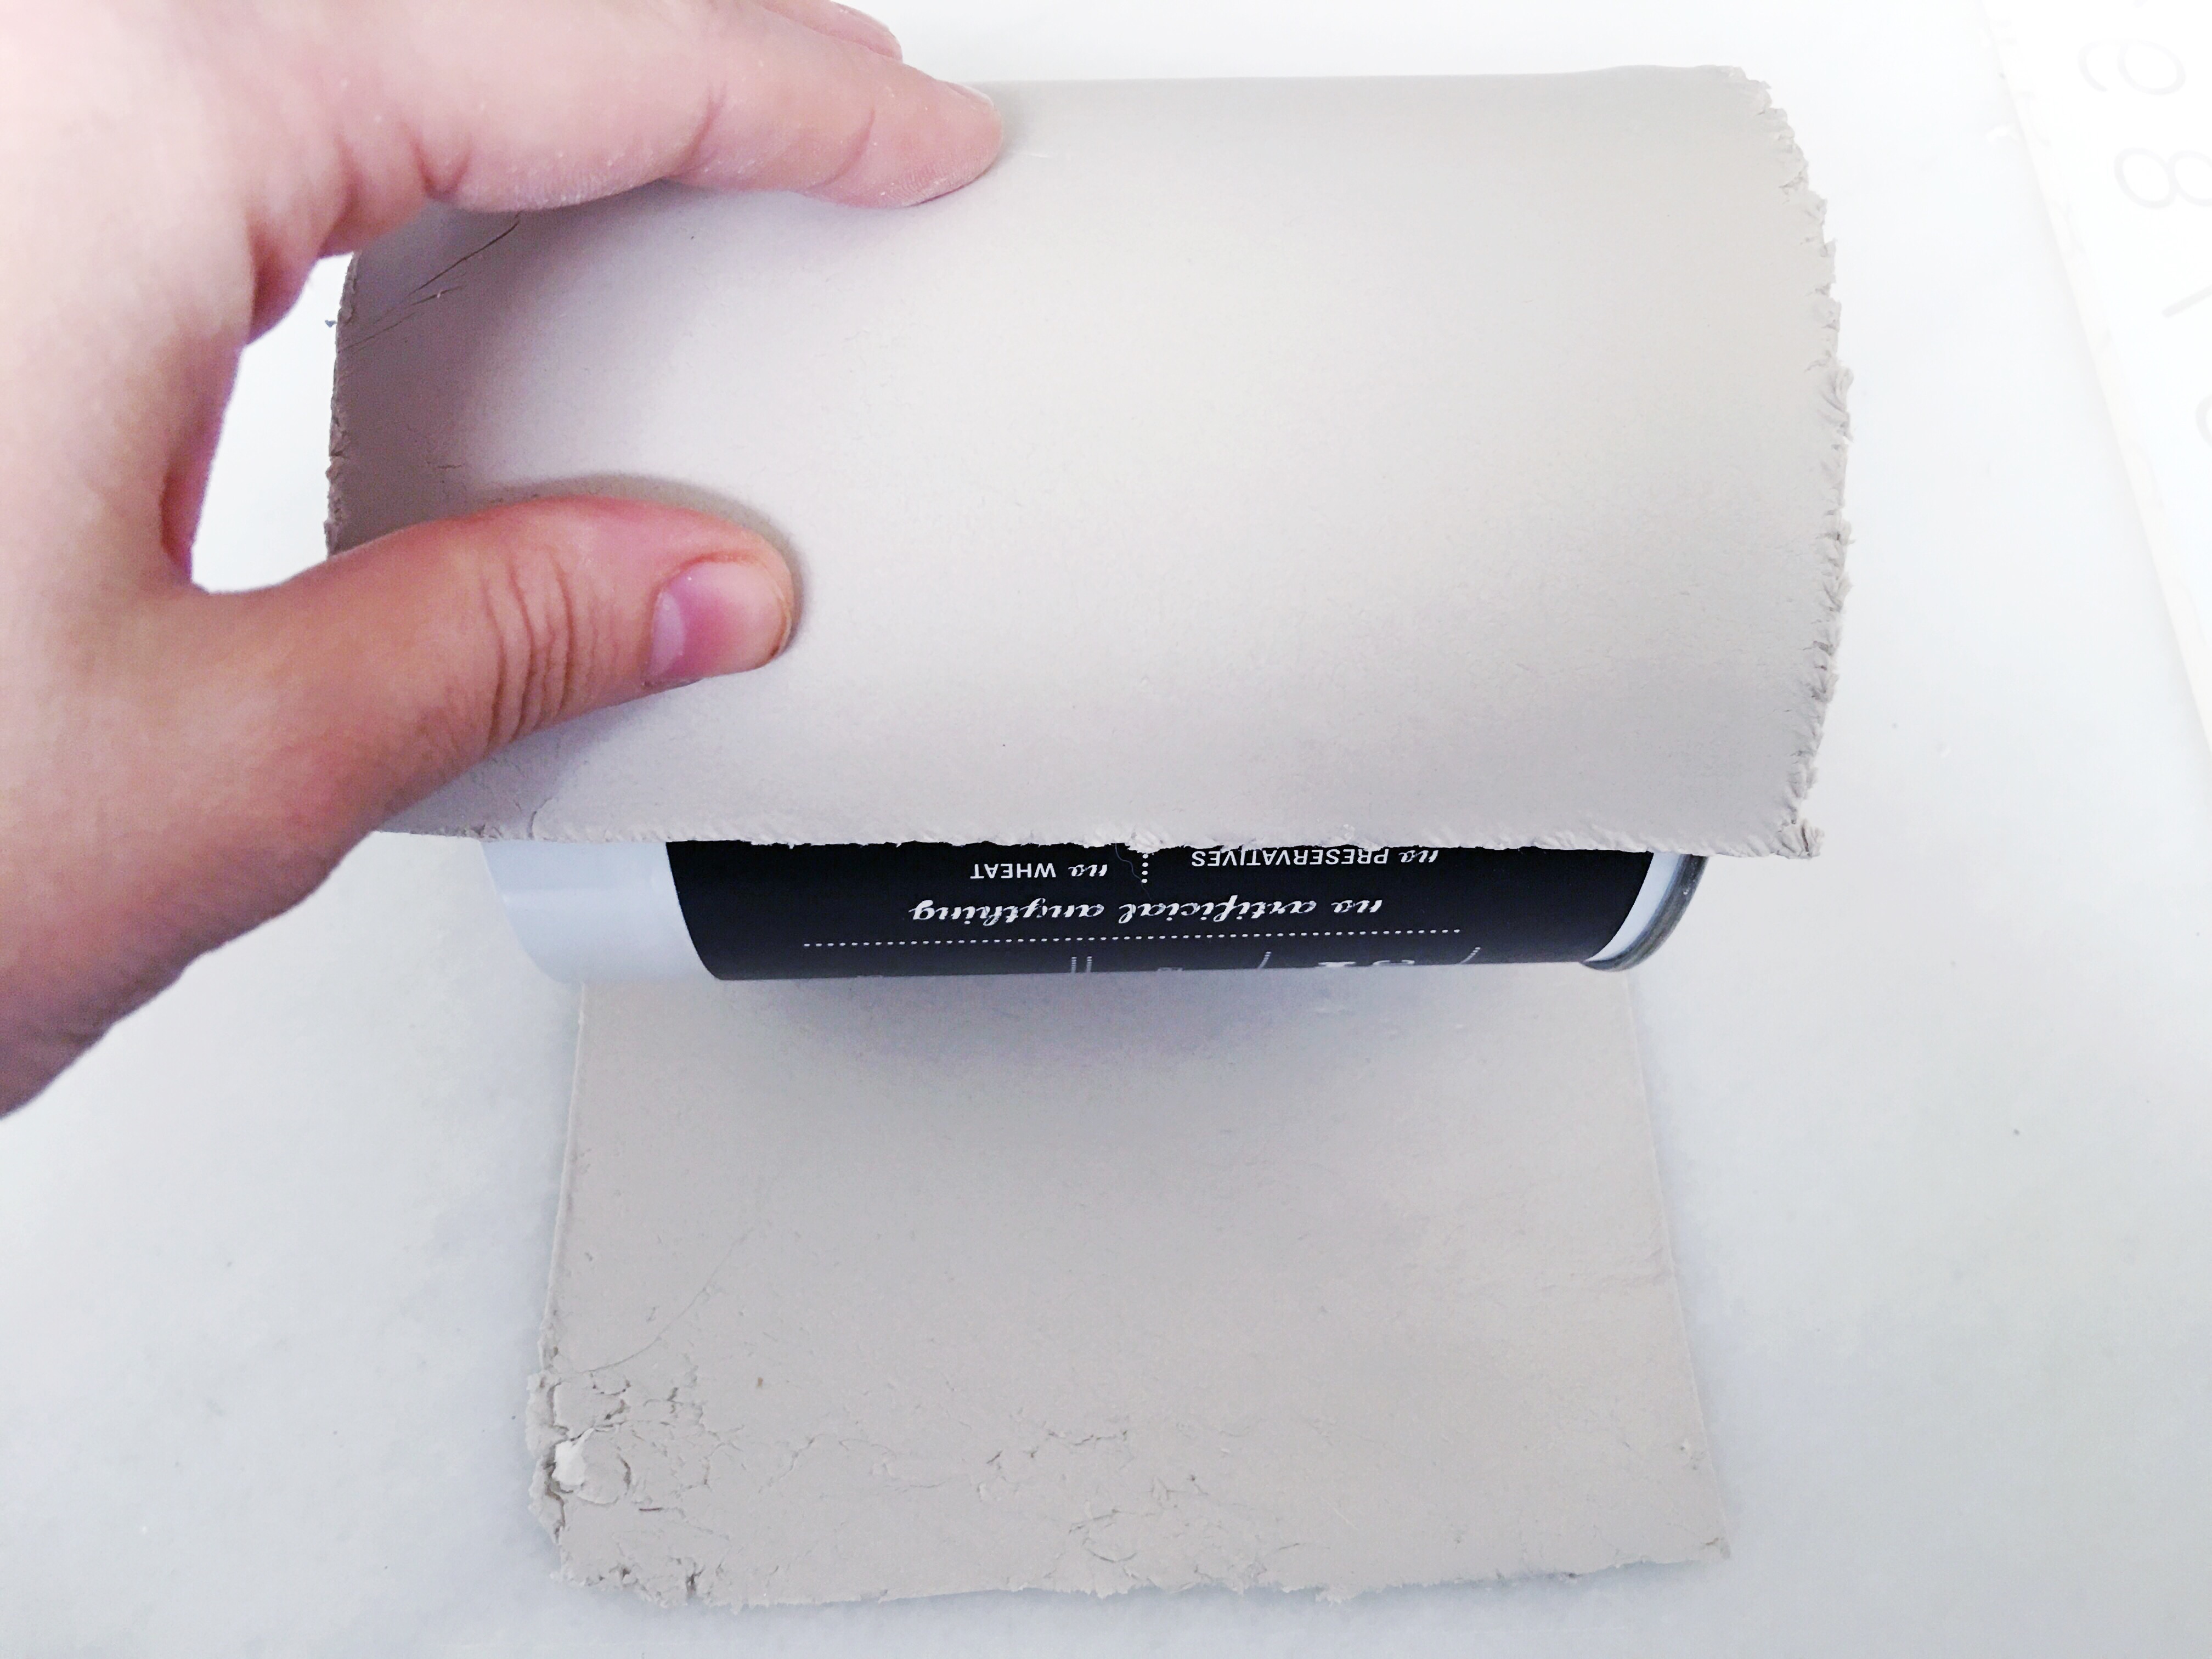 Step 6: Using a little water or some light pressure, attach the clay to itself to complete the circle. The clay will overlap.
 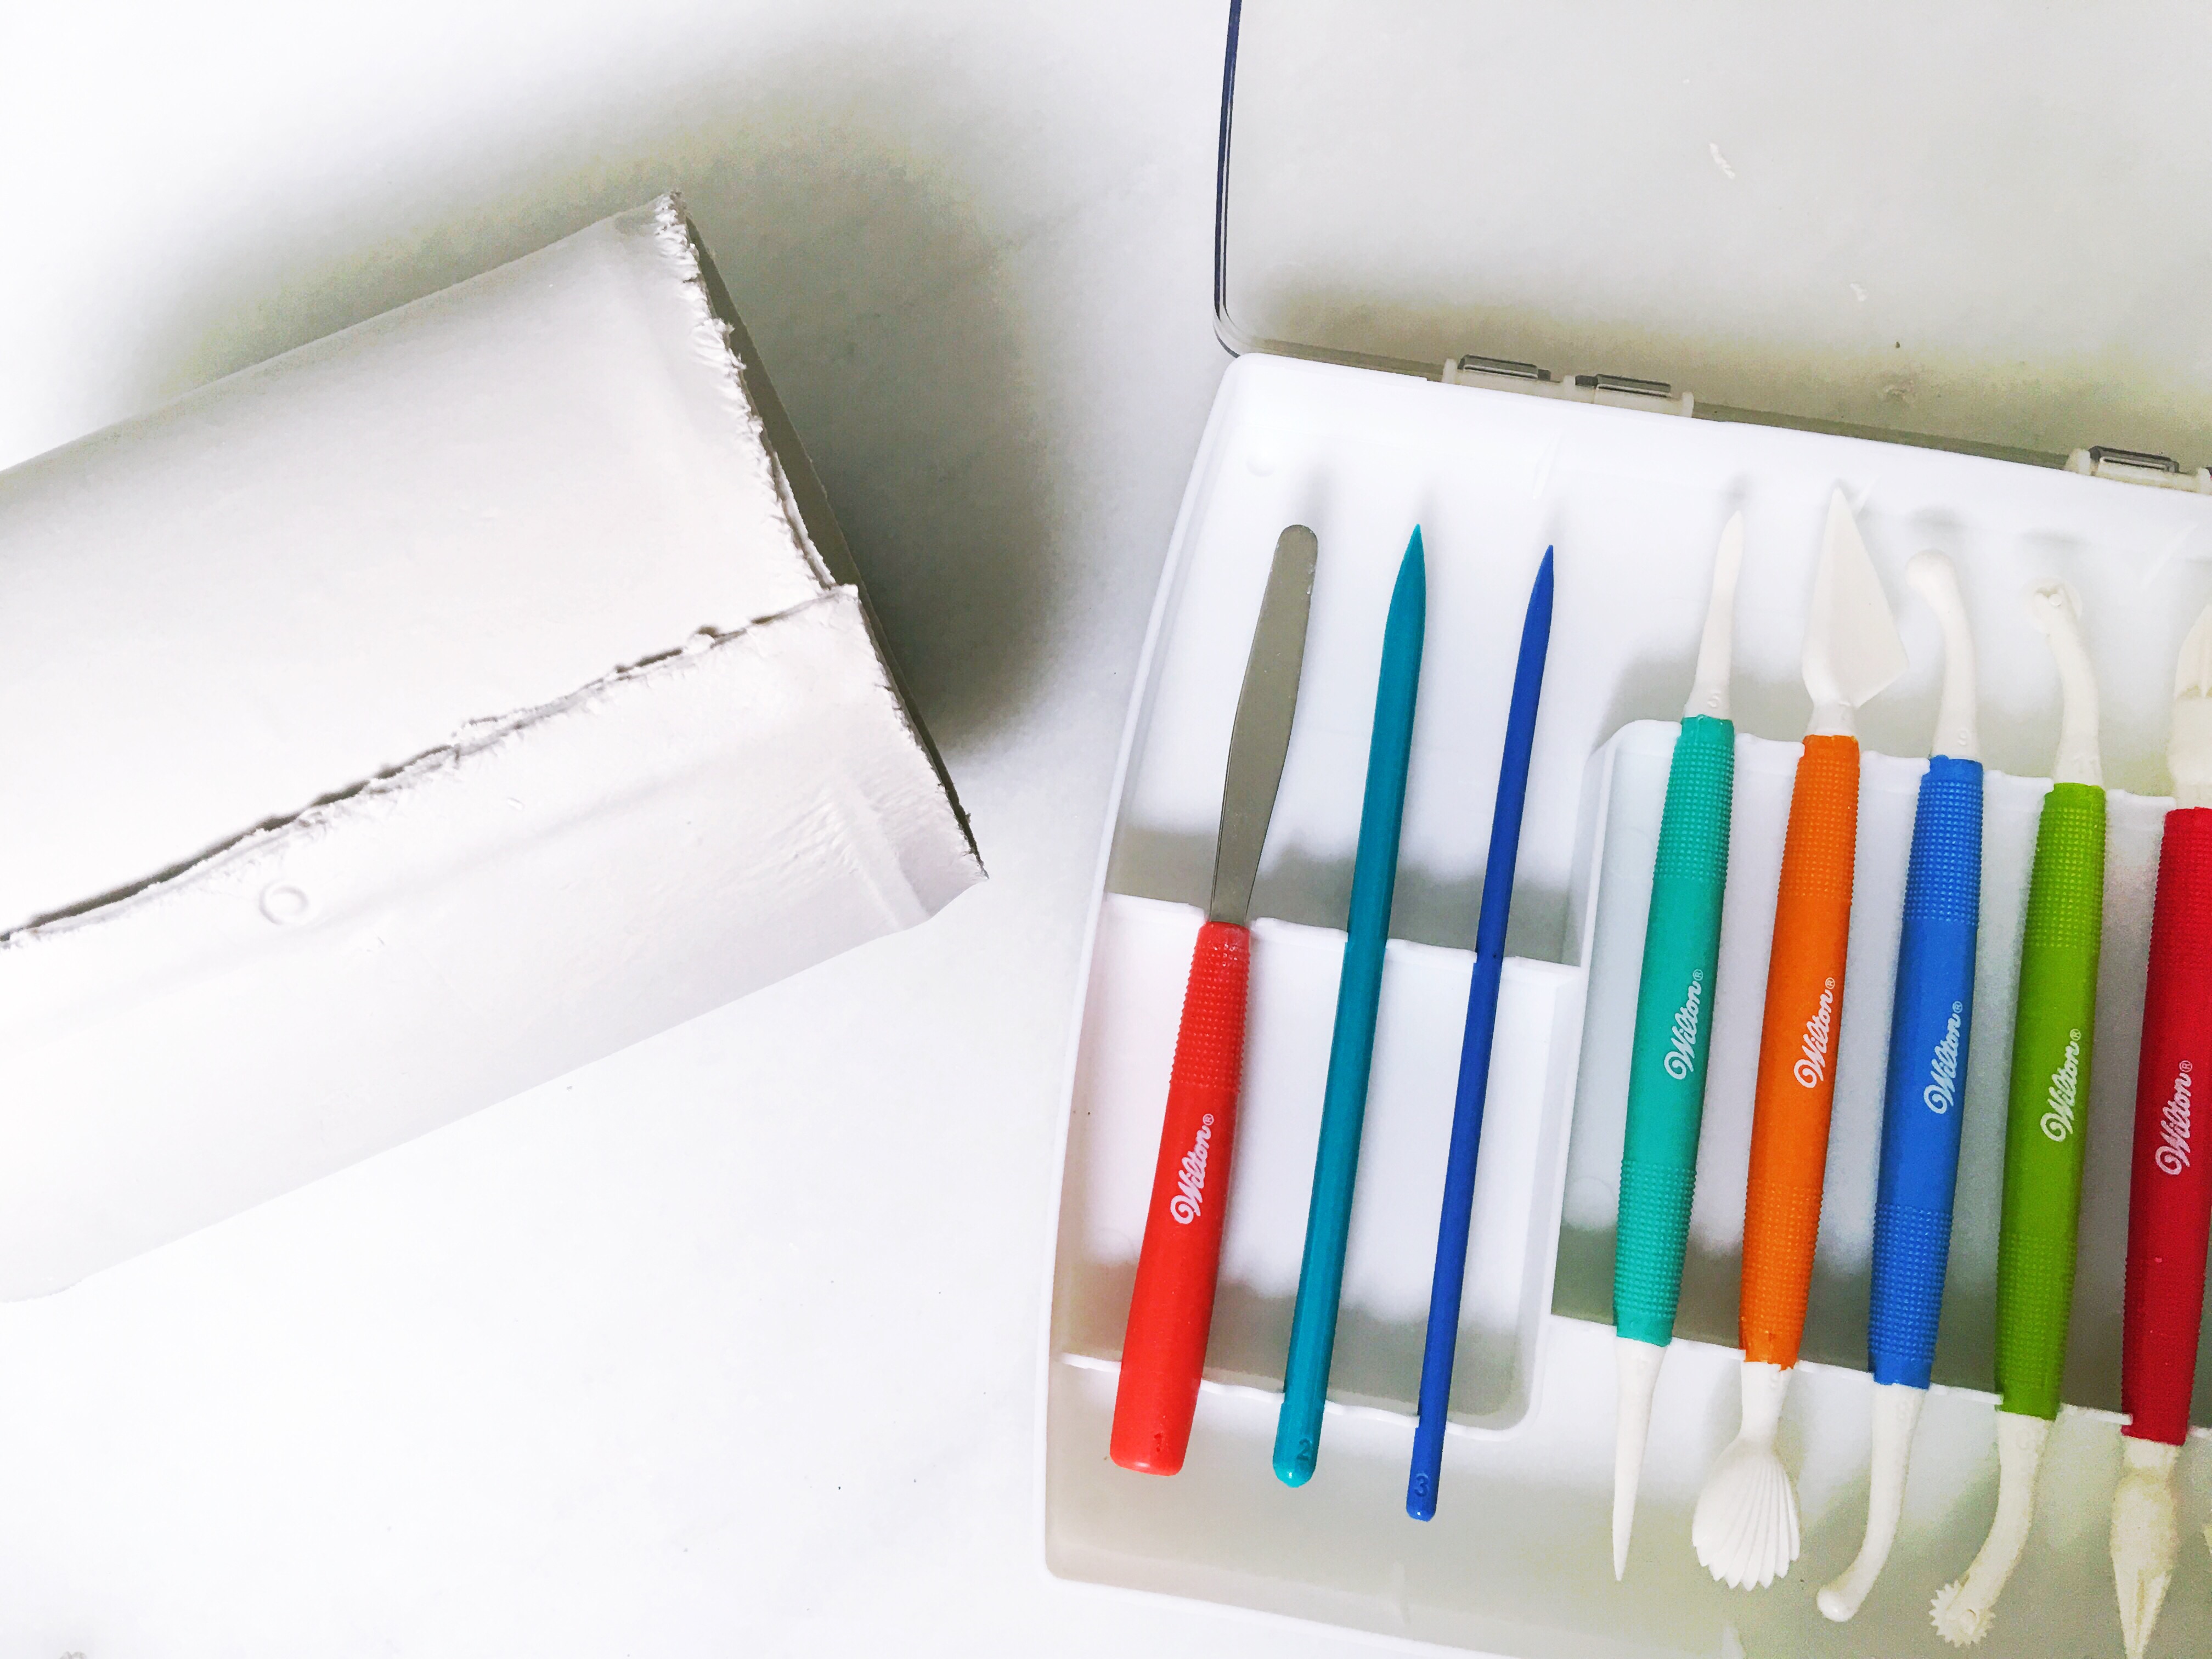 Step 7: Using whatever tools you have, exagerrate the area where the clay overlaps and even it up a little if needed.
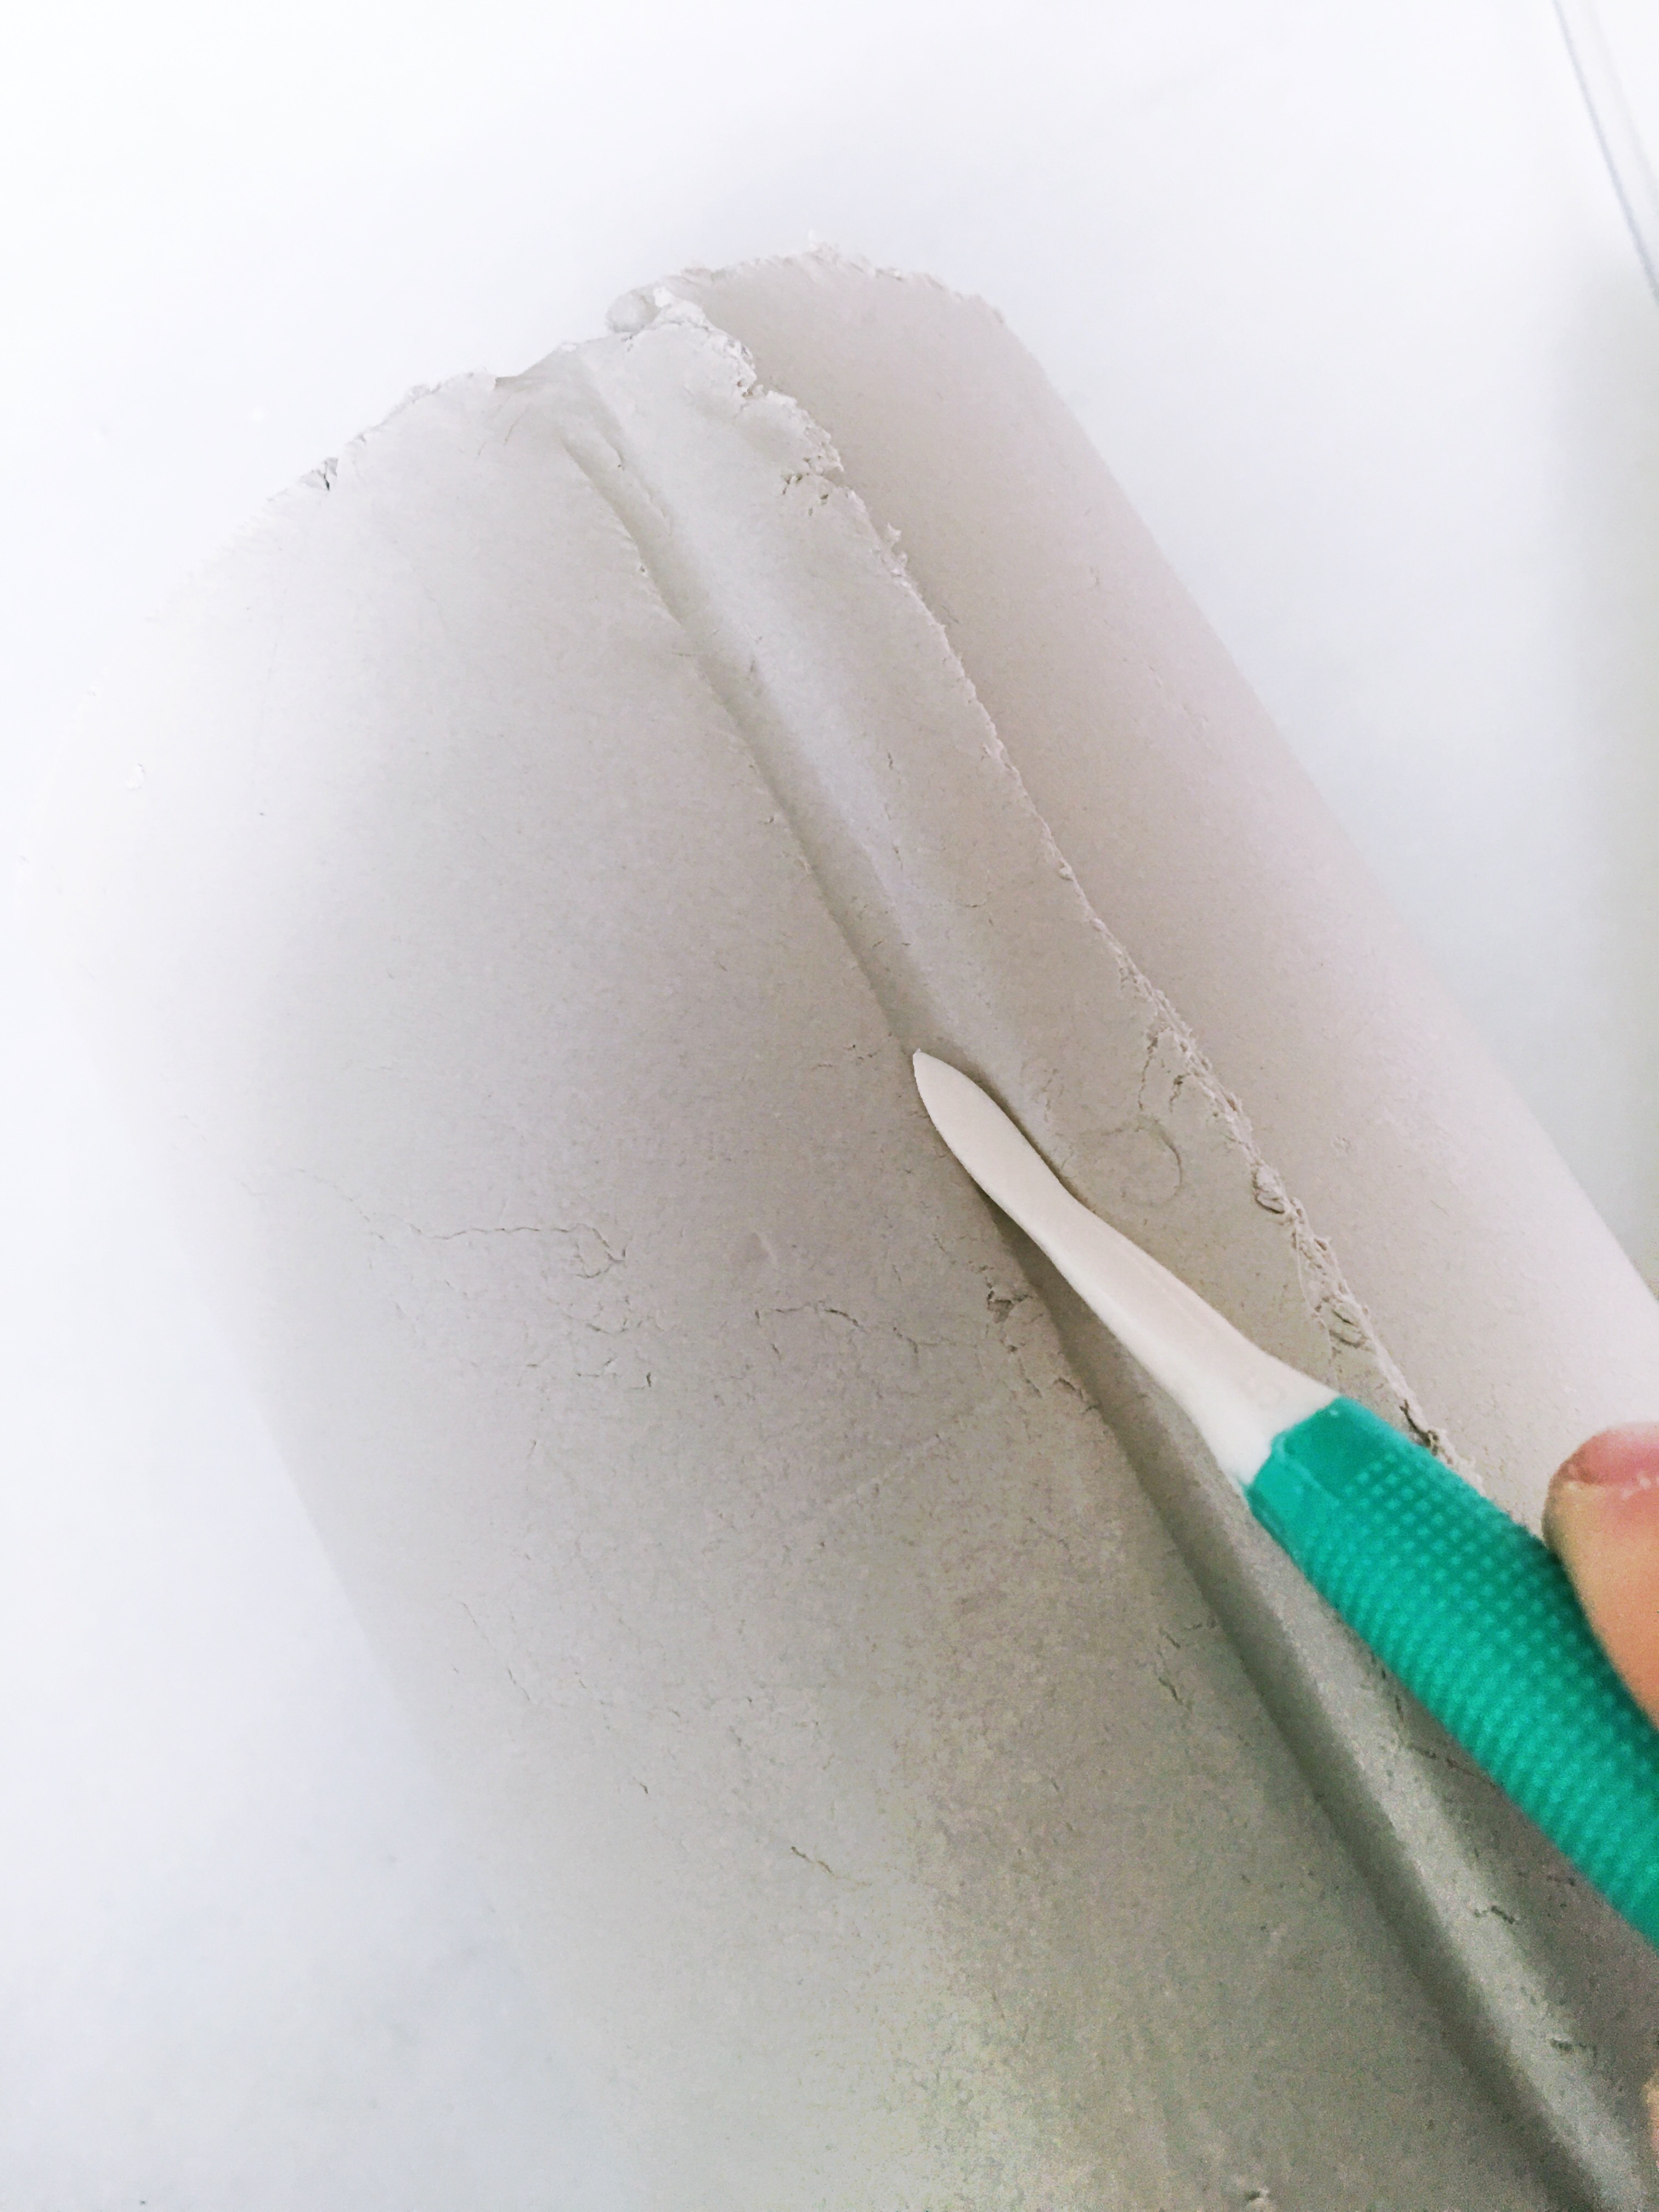 Step 8: Create lines running perpendicularly down the small piece of overlap clay.
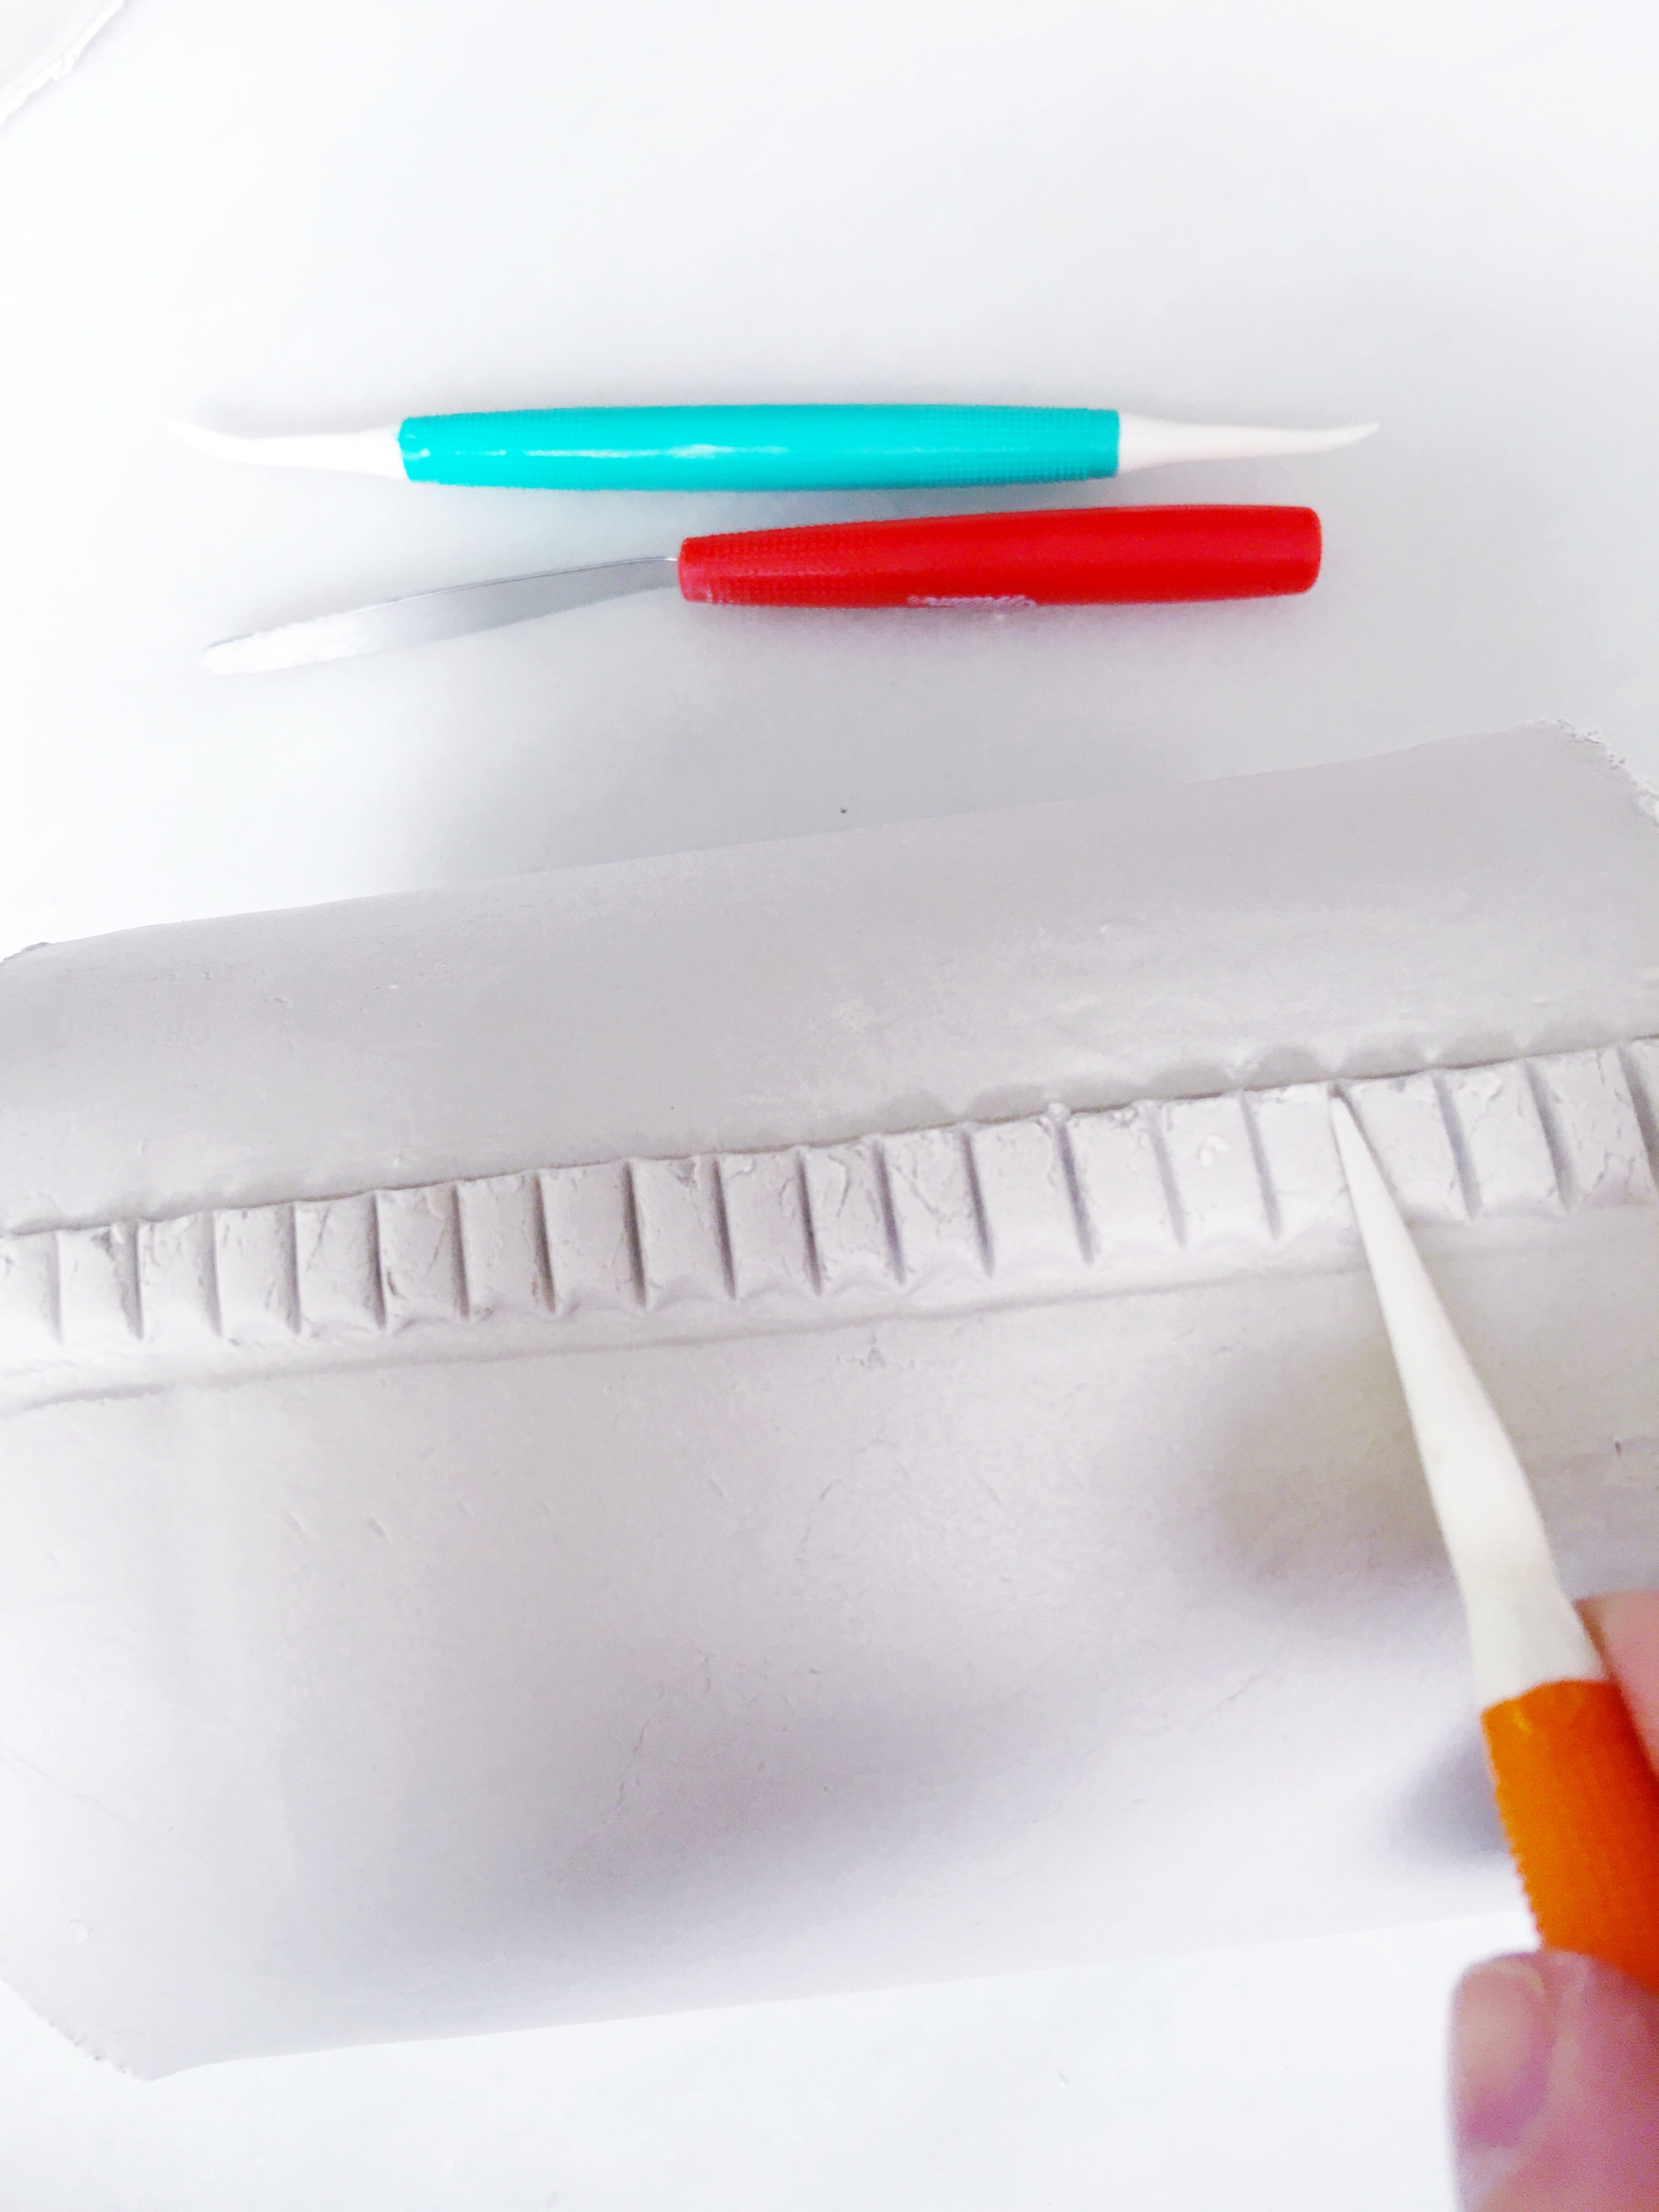 Step 9: Poke a coordinating hole on either side of each line with a toothpick. The holes do not need to go all the way through the clay.
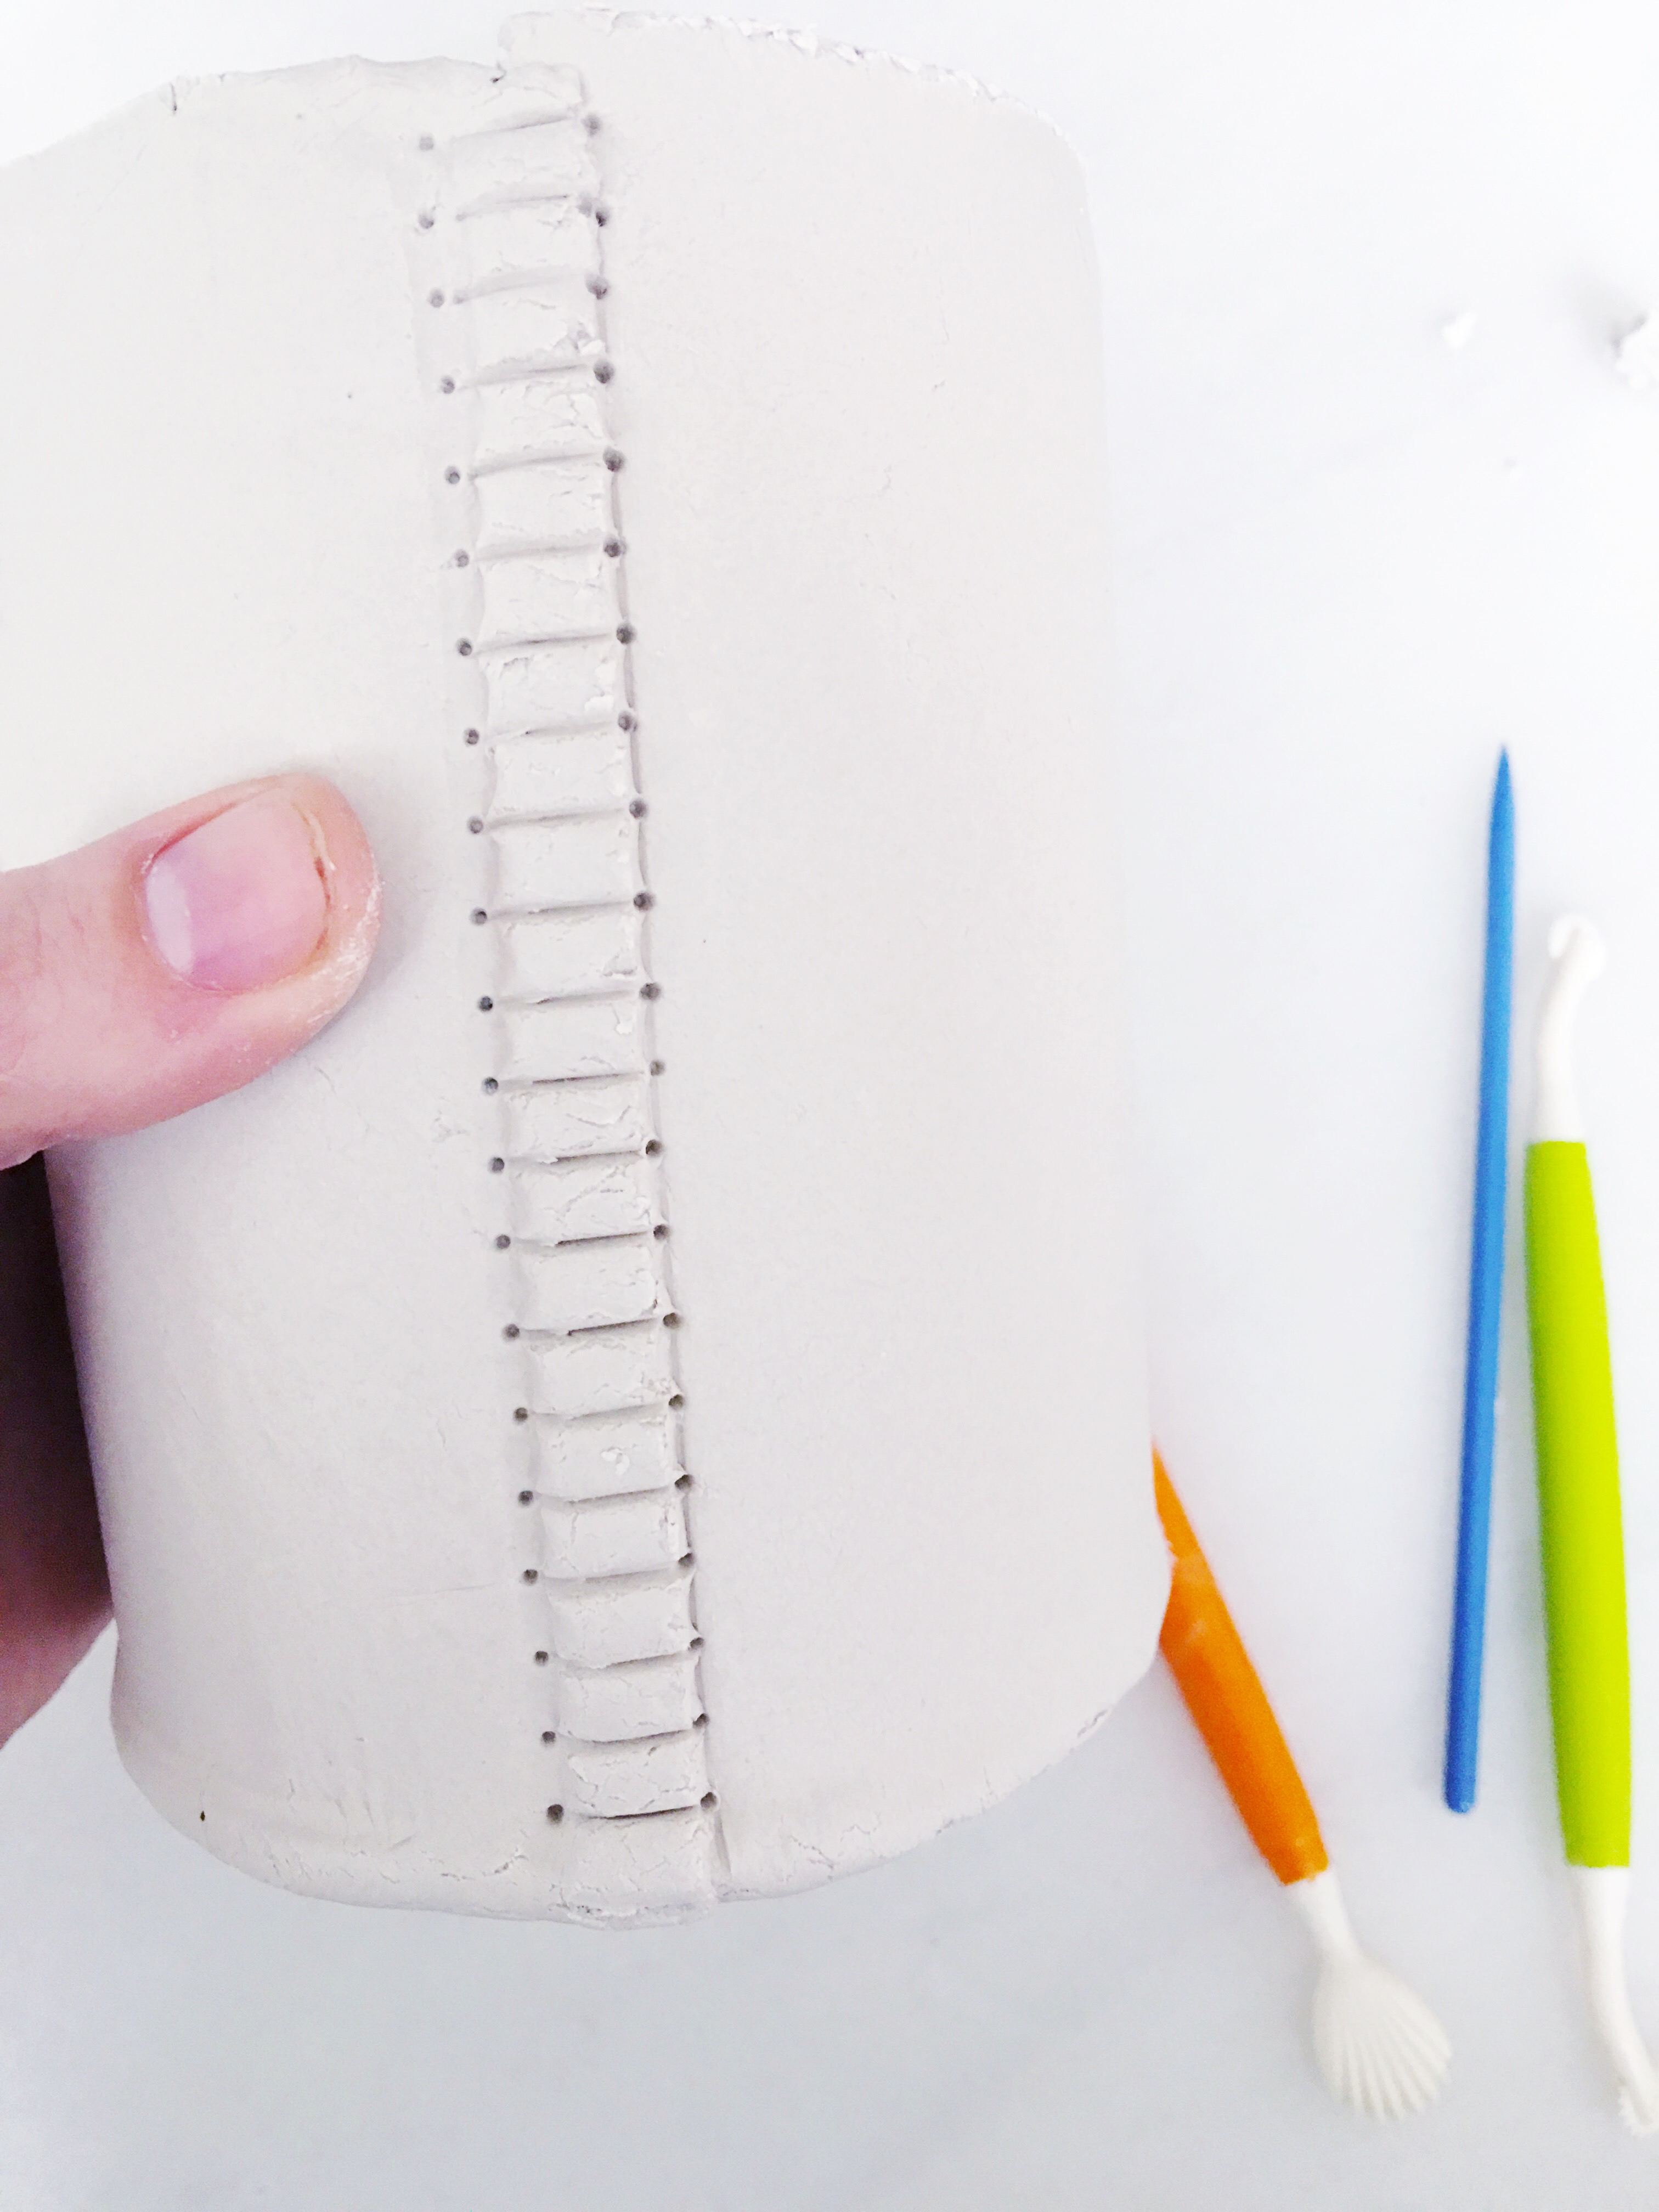 Step 10: Place the can upside-down over your vase so you can work on the bottom. Place the circle of clay you cut out earlier inside the rim of overhanging clay at the bottom of your can. You may need to bend back the edges a bit to fit it flu shot inside.
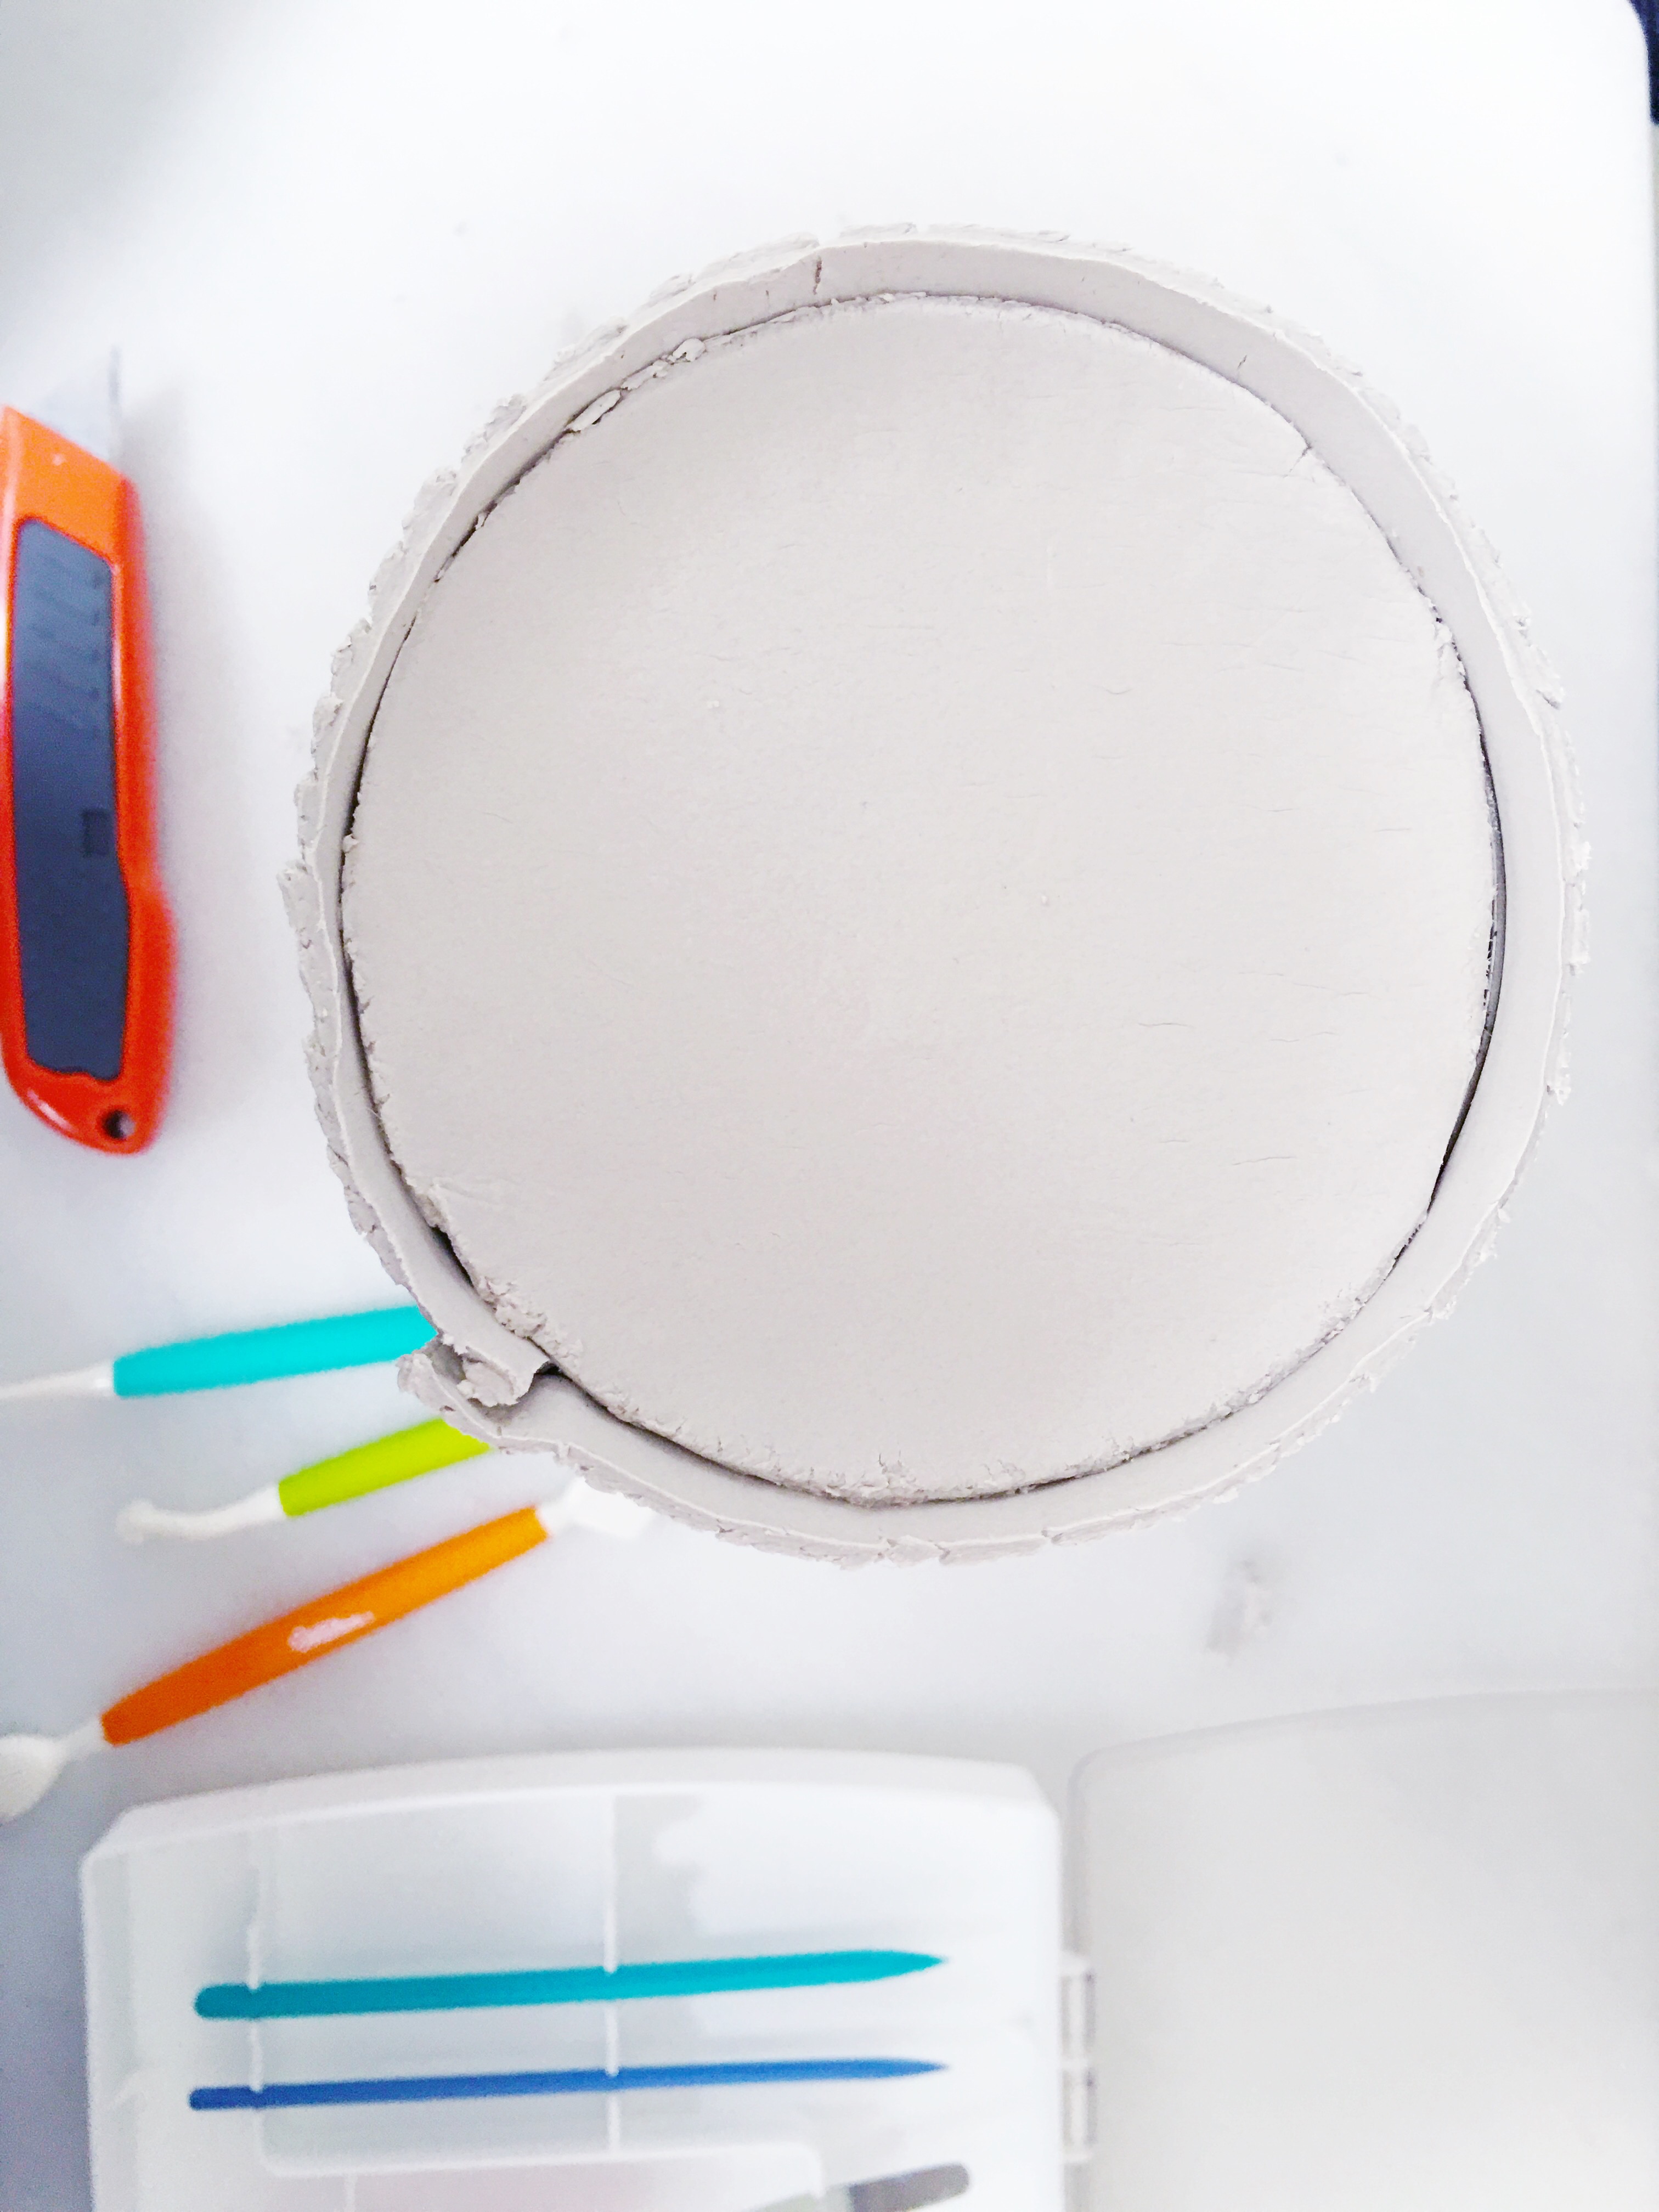 Step 11: Using a flat tool, press the edges of the overlapping clay onto the base. You can use water to make this easier, but don’t worry if it doesn’t look smooth. You will fix that in the next step.
 Step 12: Wet your fingertip and smooth out any roughness. At this point you can also smooth out any tears or other ugliness on the rest of the planter.
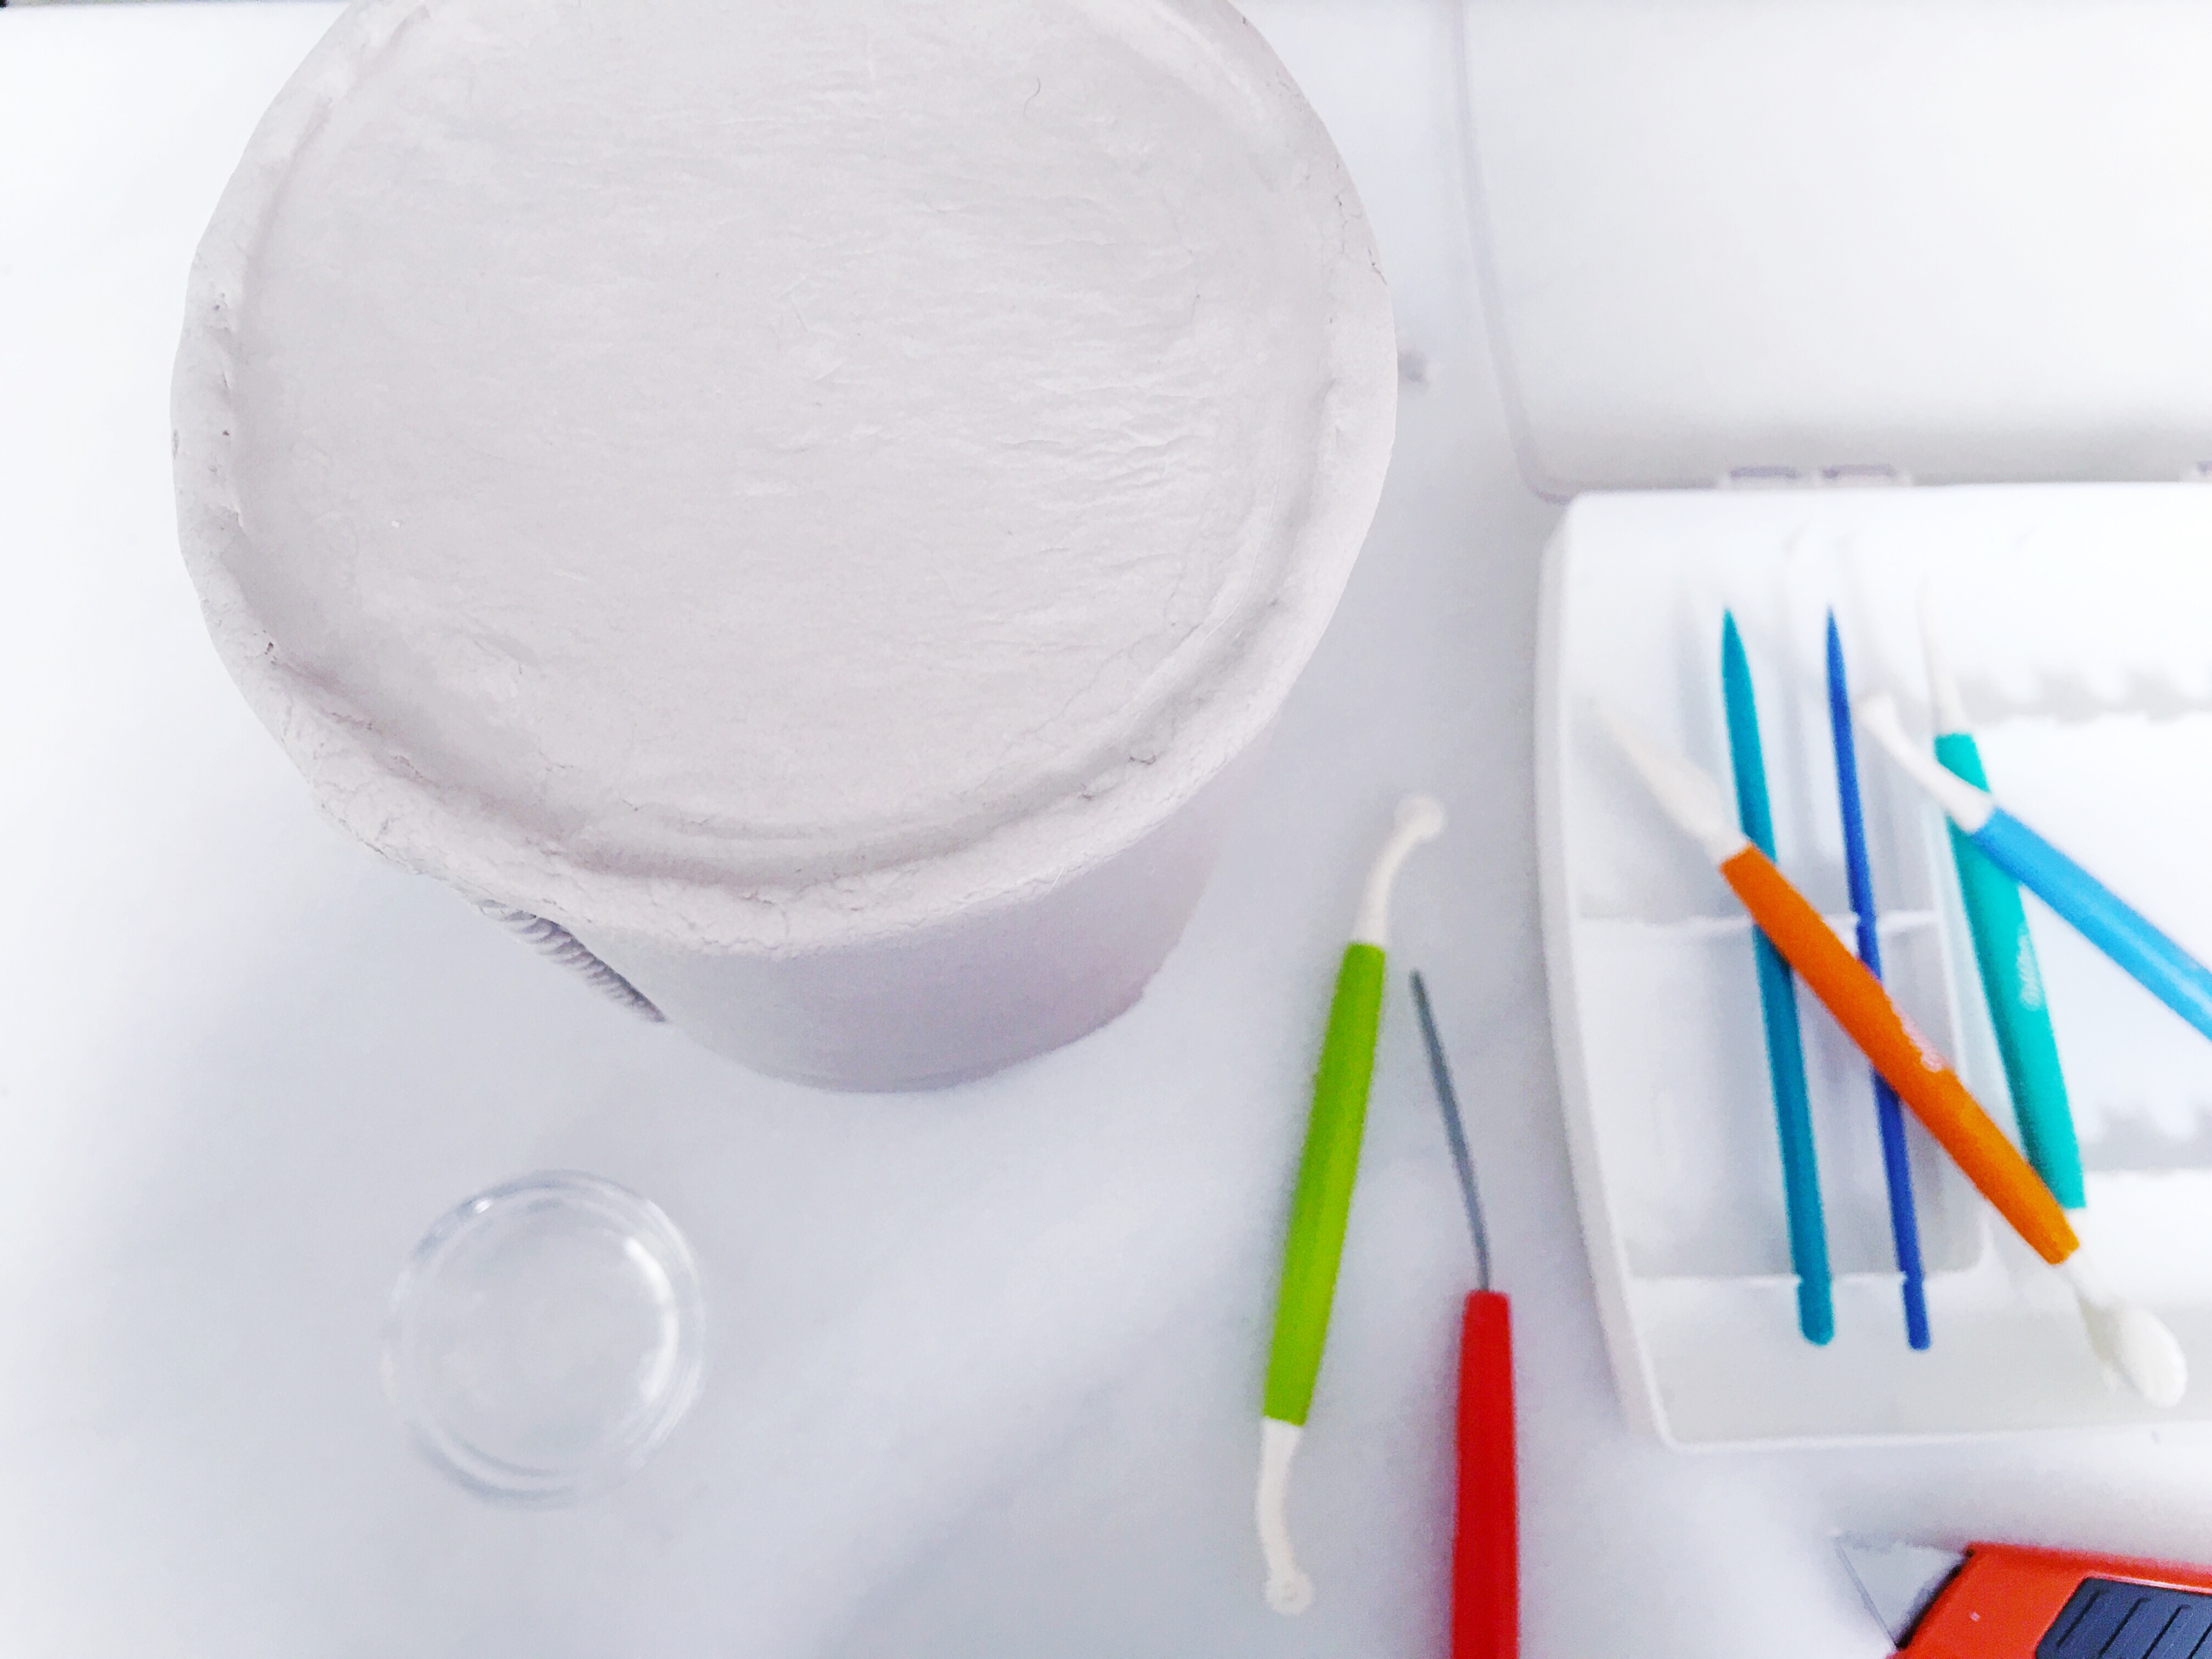 Step 13: Turn over the can and gently press to make a flat surface on the bottom. You don’t want your planter to wobble when it’s finished!
Step 14: Allow to dry at least 24 hours.
Step 15: Starting with a rougher grit sandpaper and finishing with a smoother one, sand the surface smooth and wipe away any dust with a dry cloth.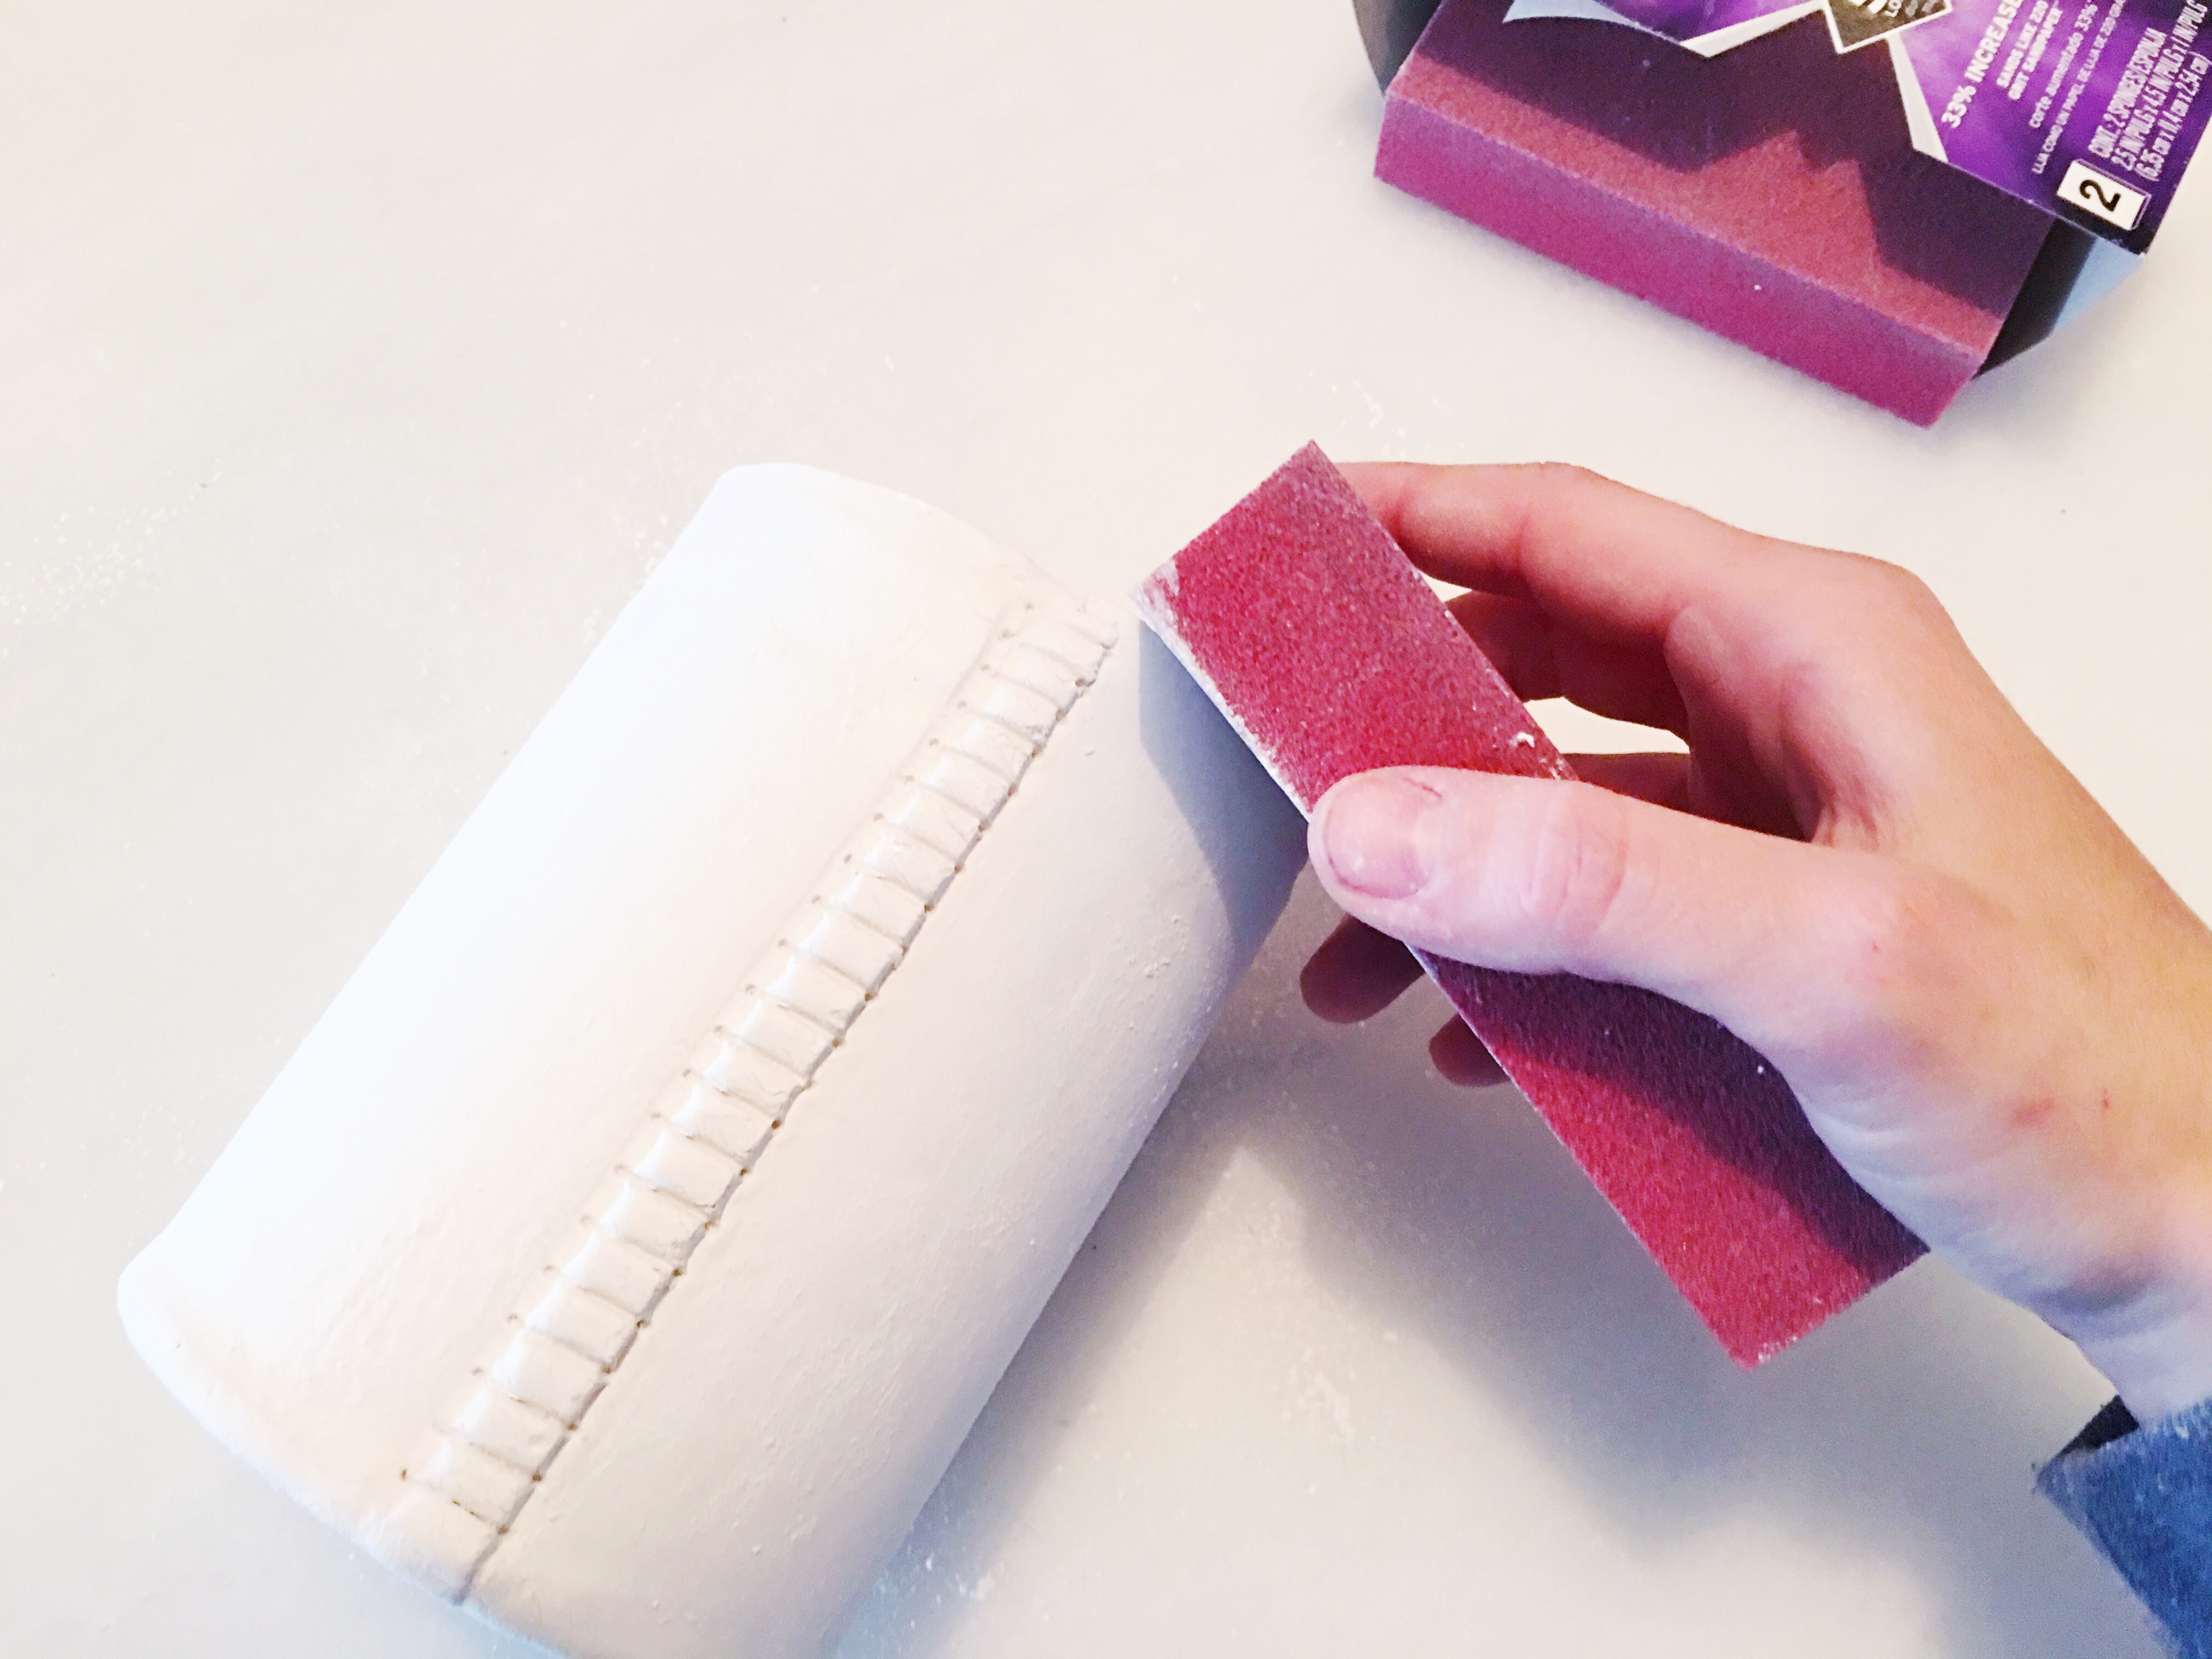 Step 16: Using a very small paintbrush and a light colored paint (I used Farrow & Ball Peignoir), trace over the lines you created and fill in the dots. You could also paint the whole planter at this point, but I just wanted to emphasize the detailing and create a shadow effect.
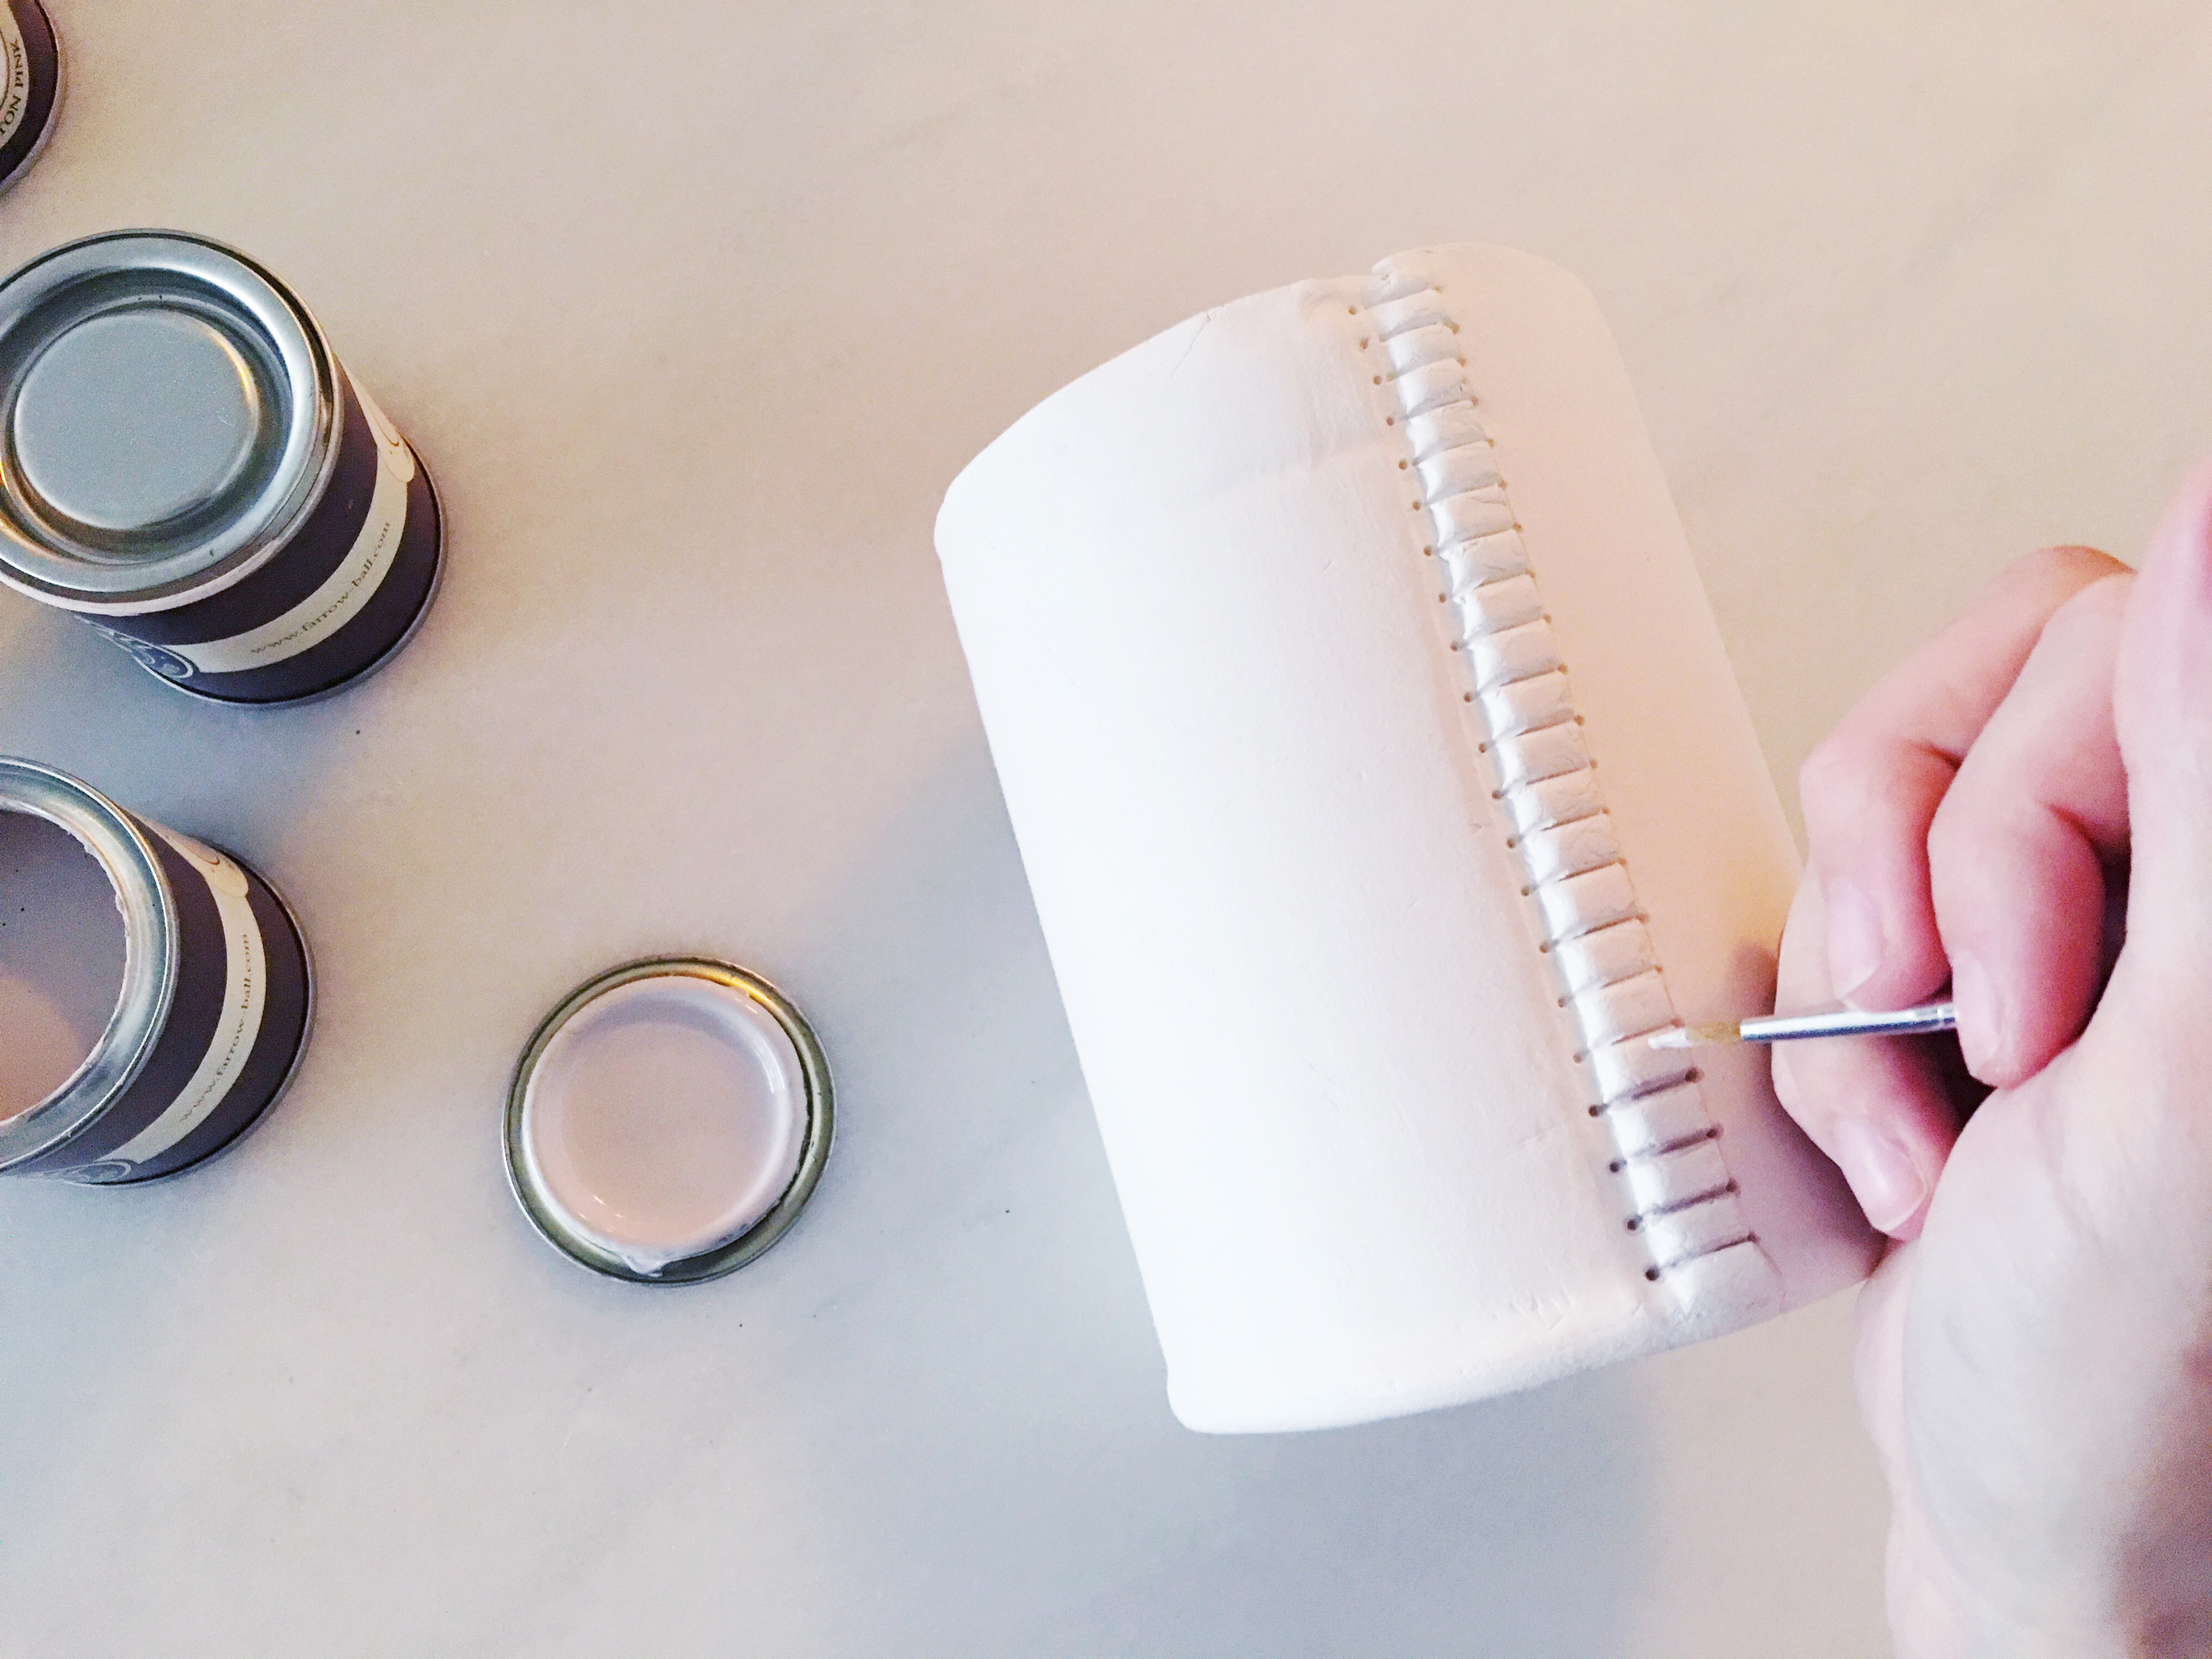 Step 17: Allow the paint to dry completely.
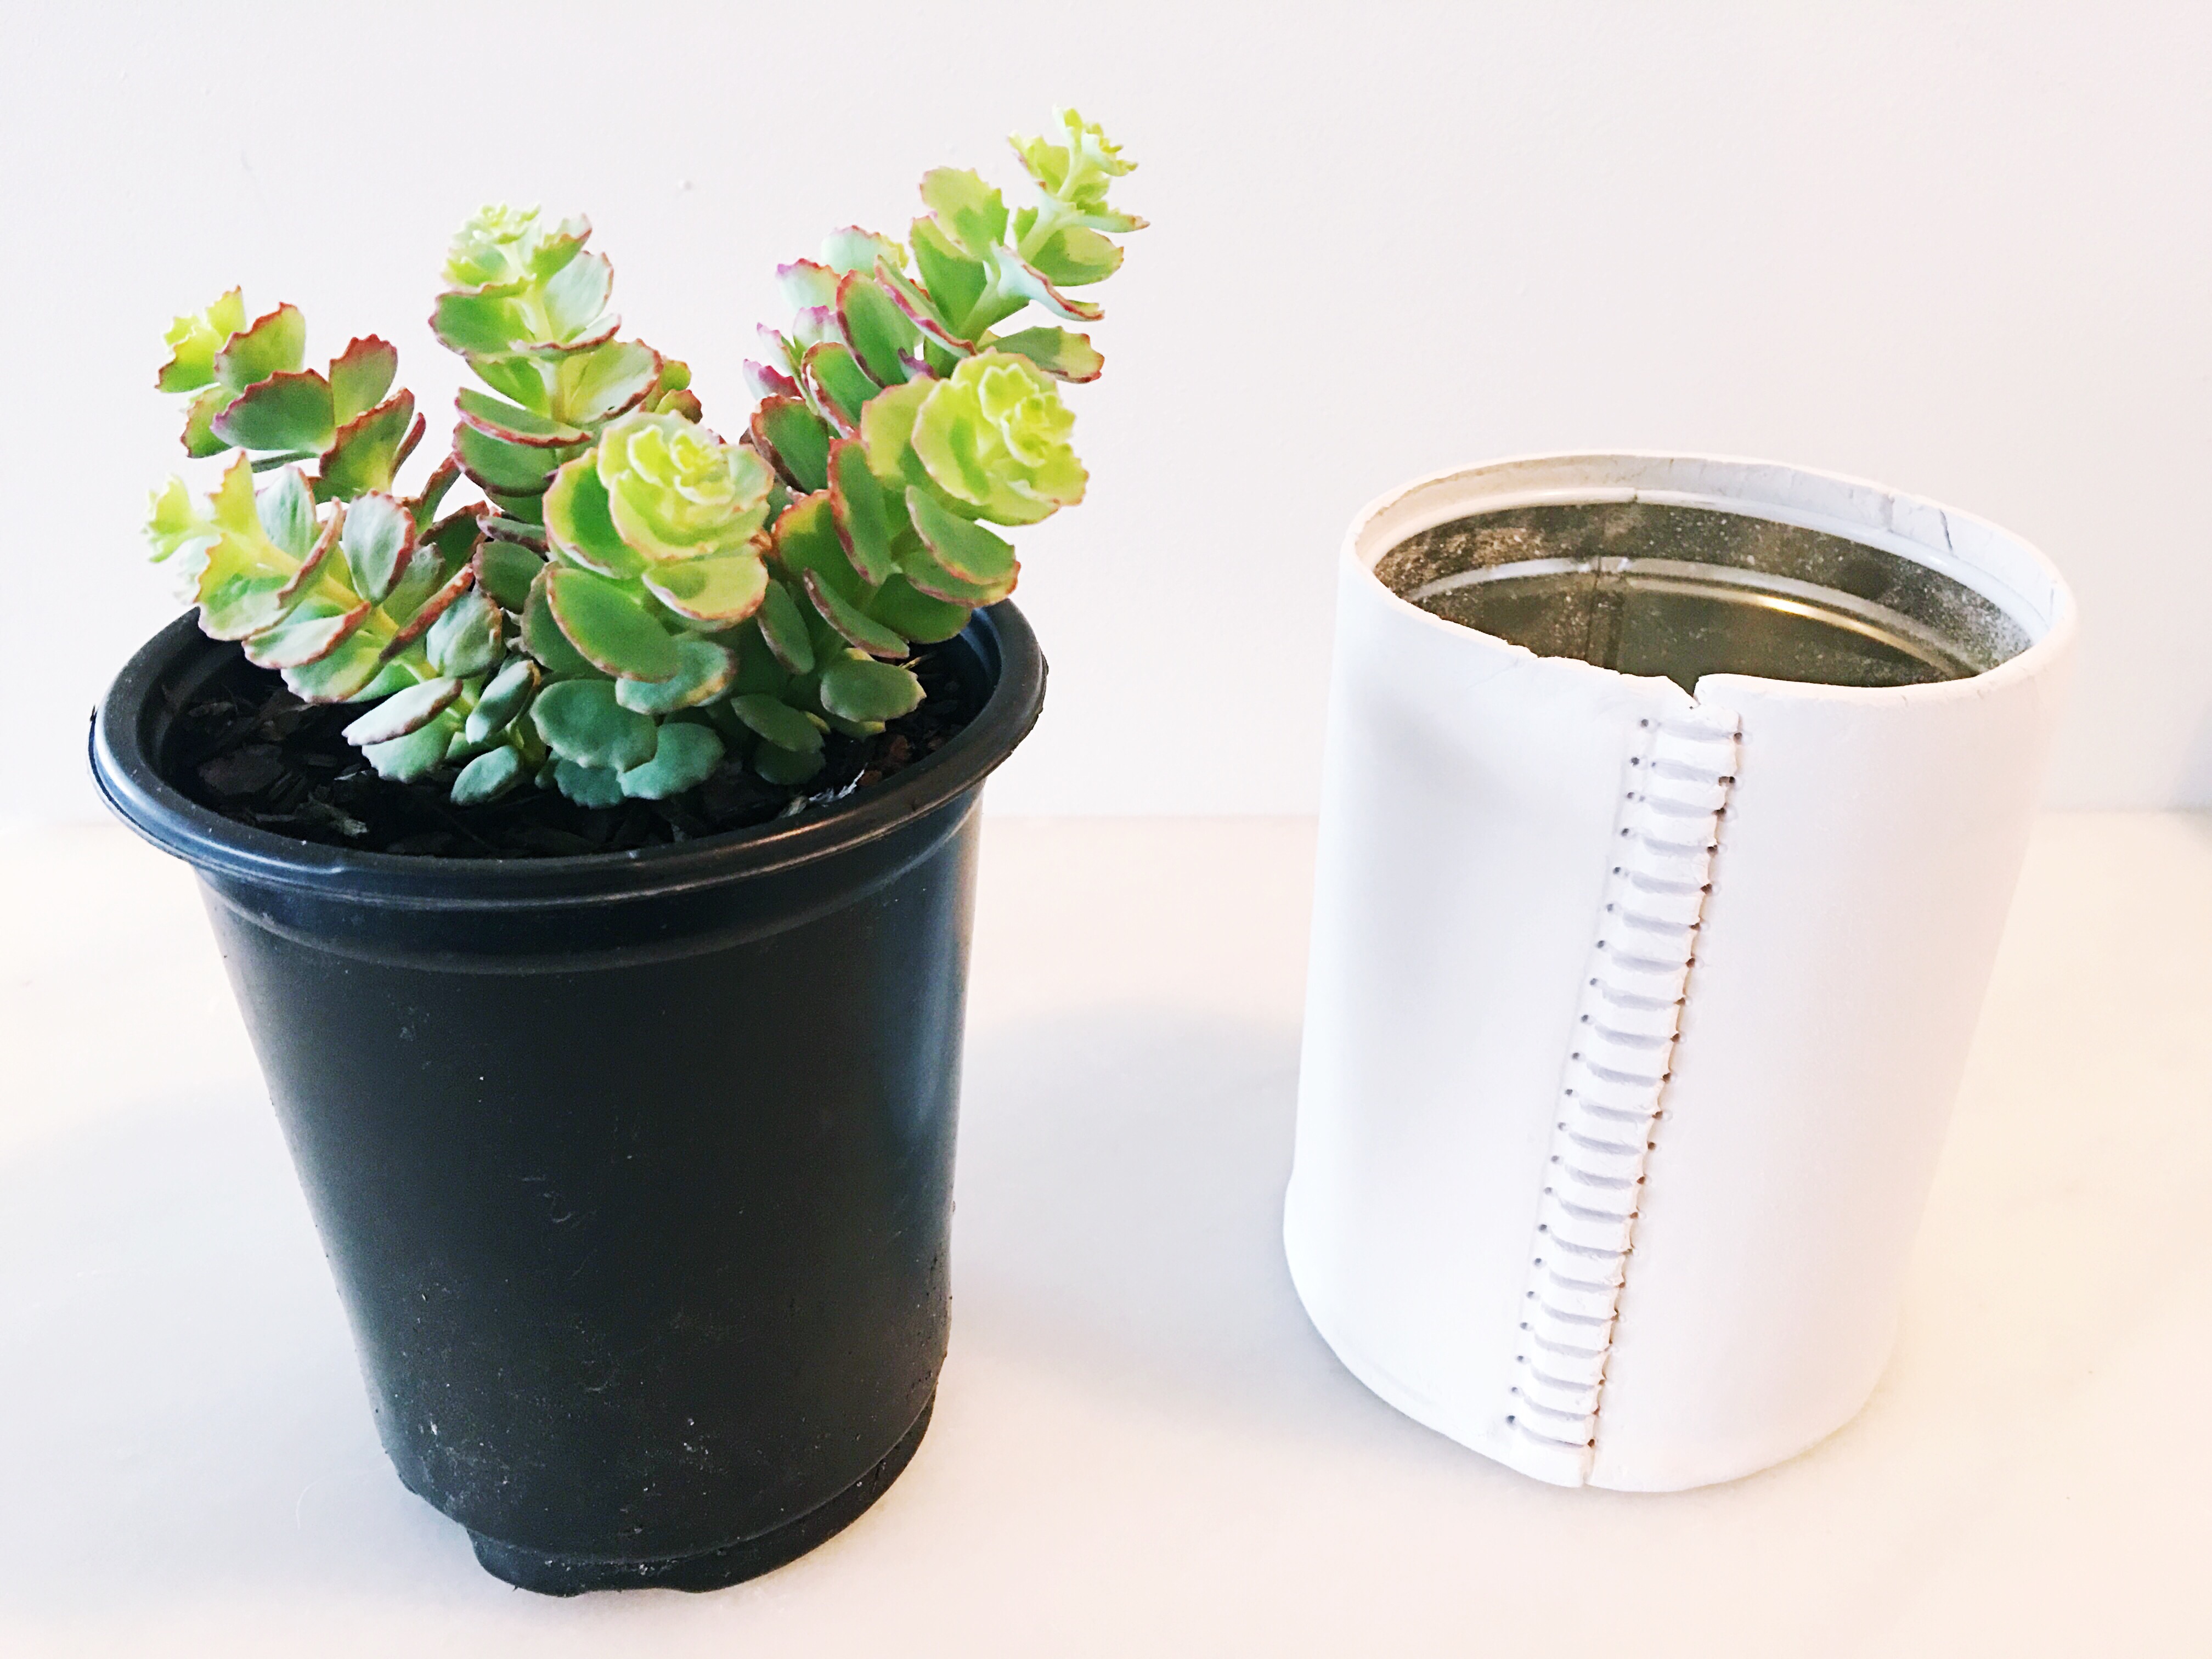 Step 18: Add a small amount of soil to the bottom of your planter.
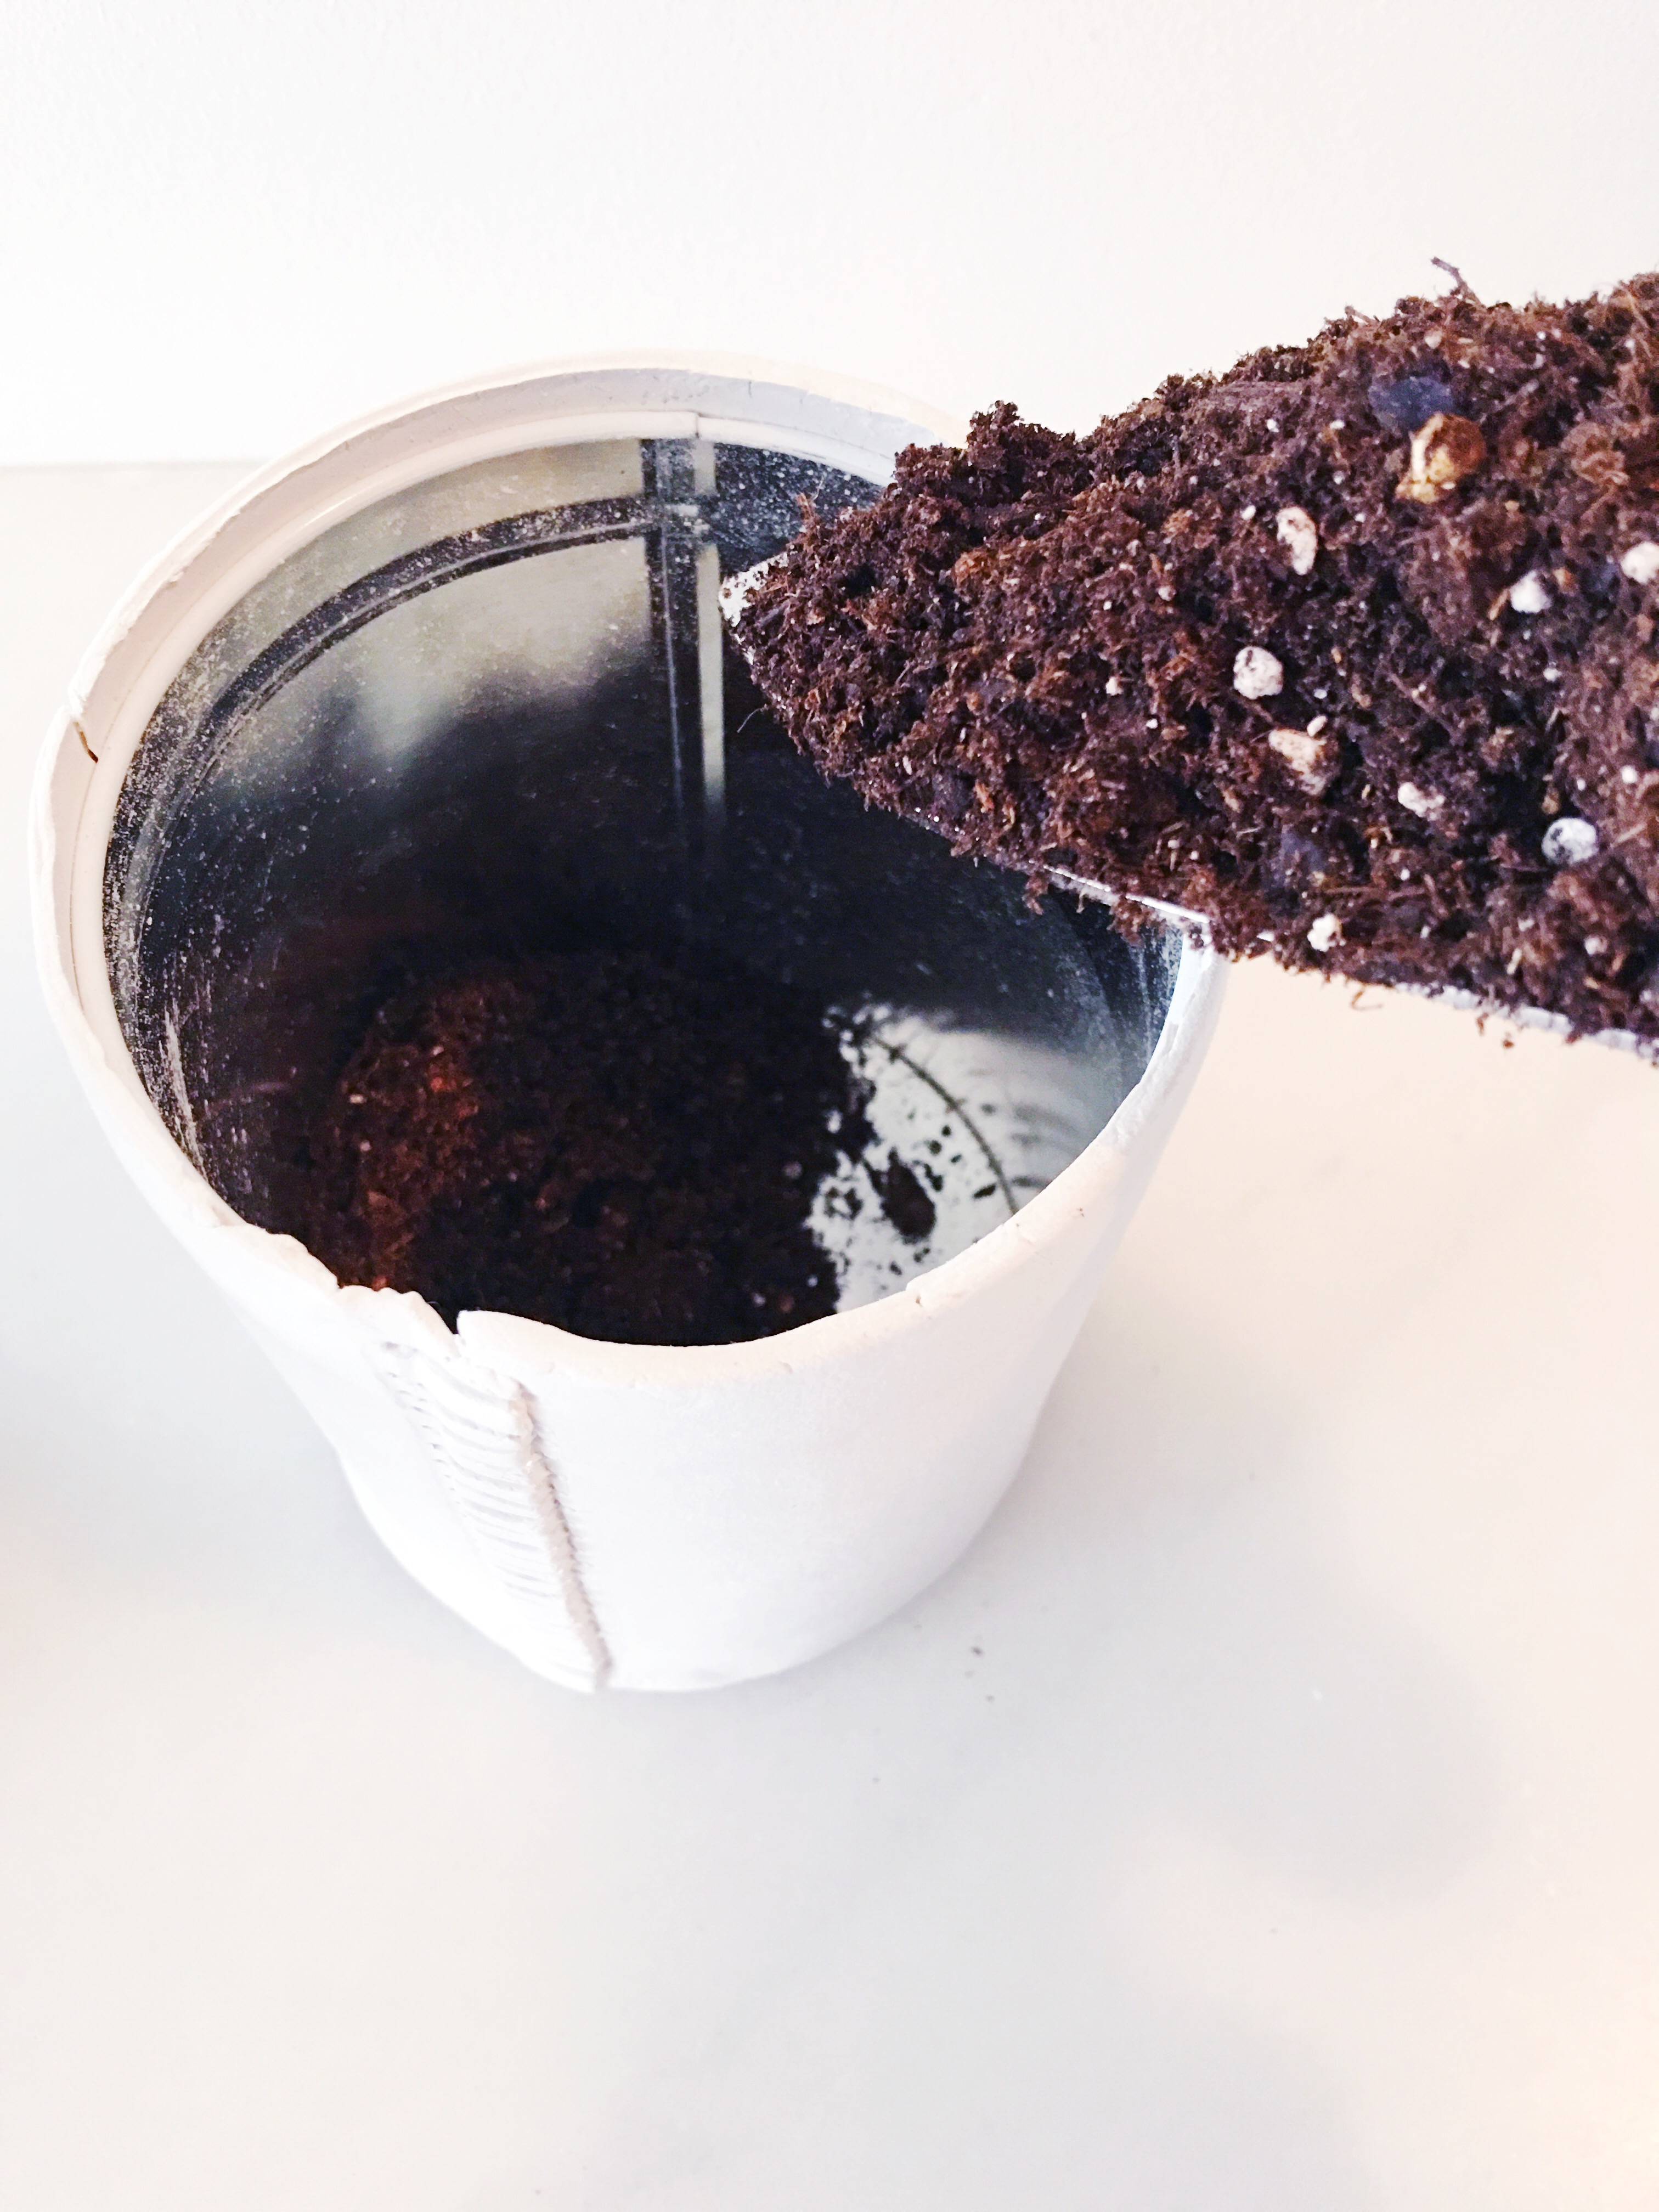 Step 19: Remove your plant from its liner and break up the roots and remove some of the dirt from the bottom, if necessary, to make it the correct height to just fill the interior tin.
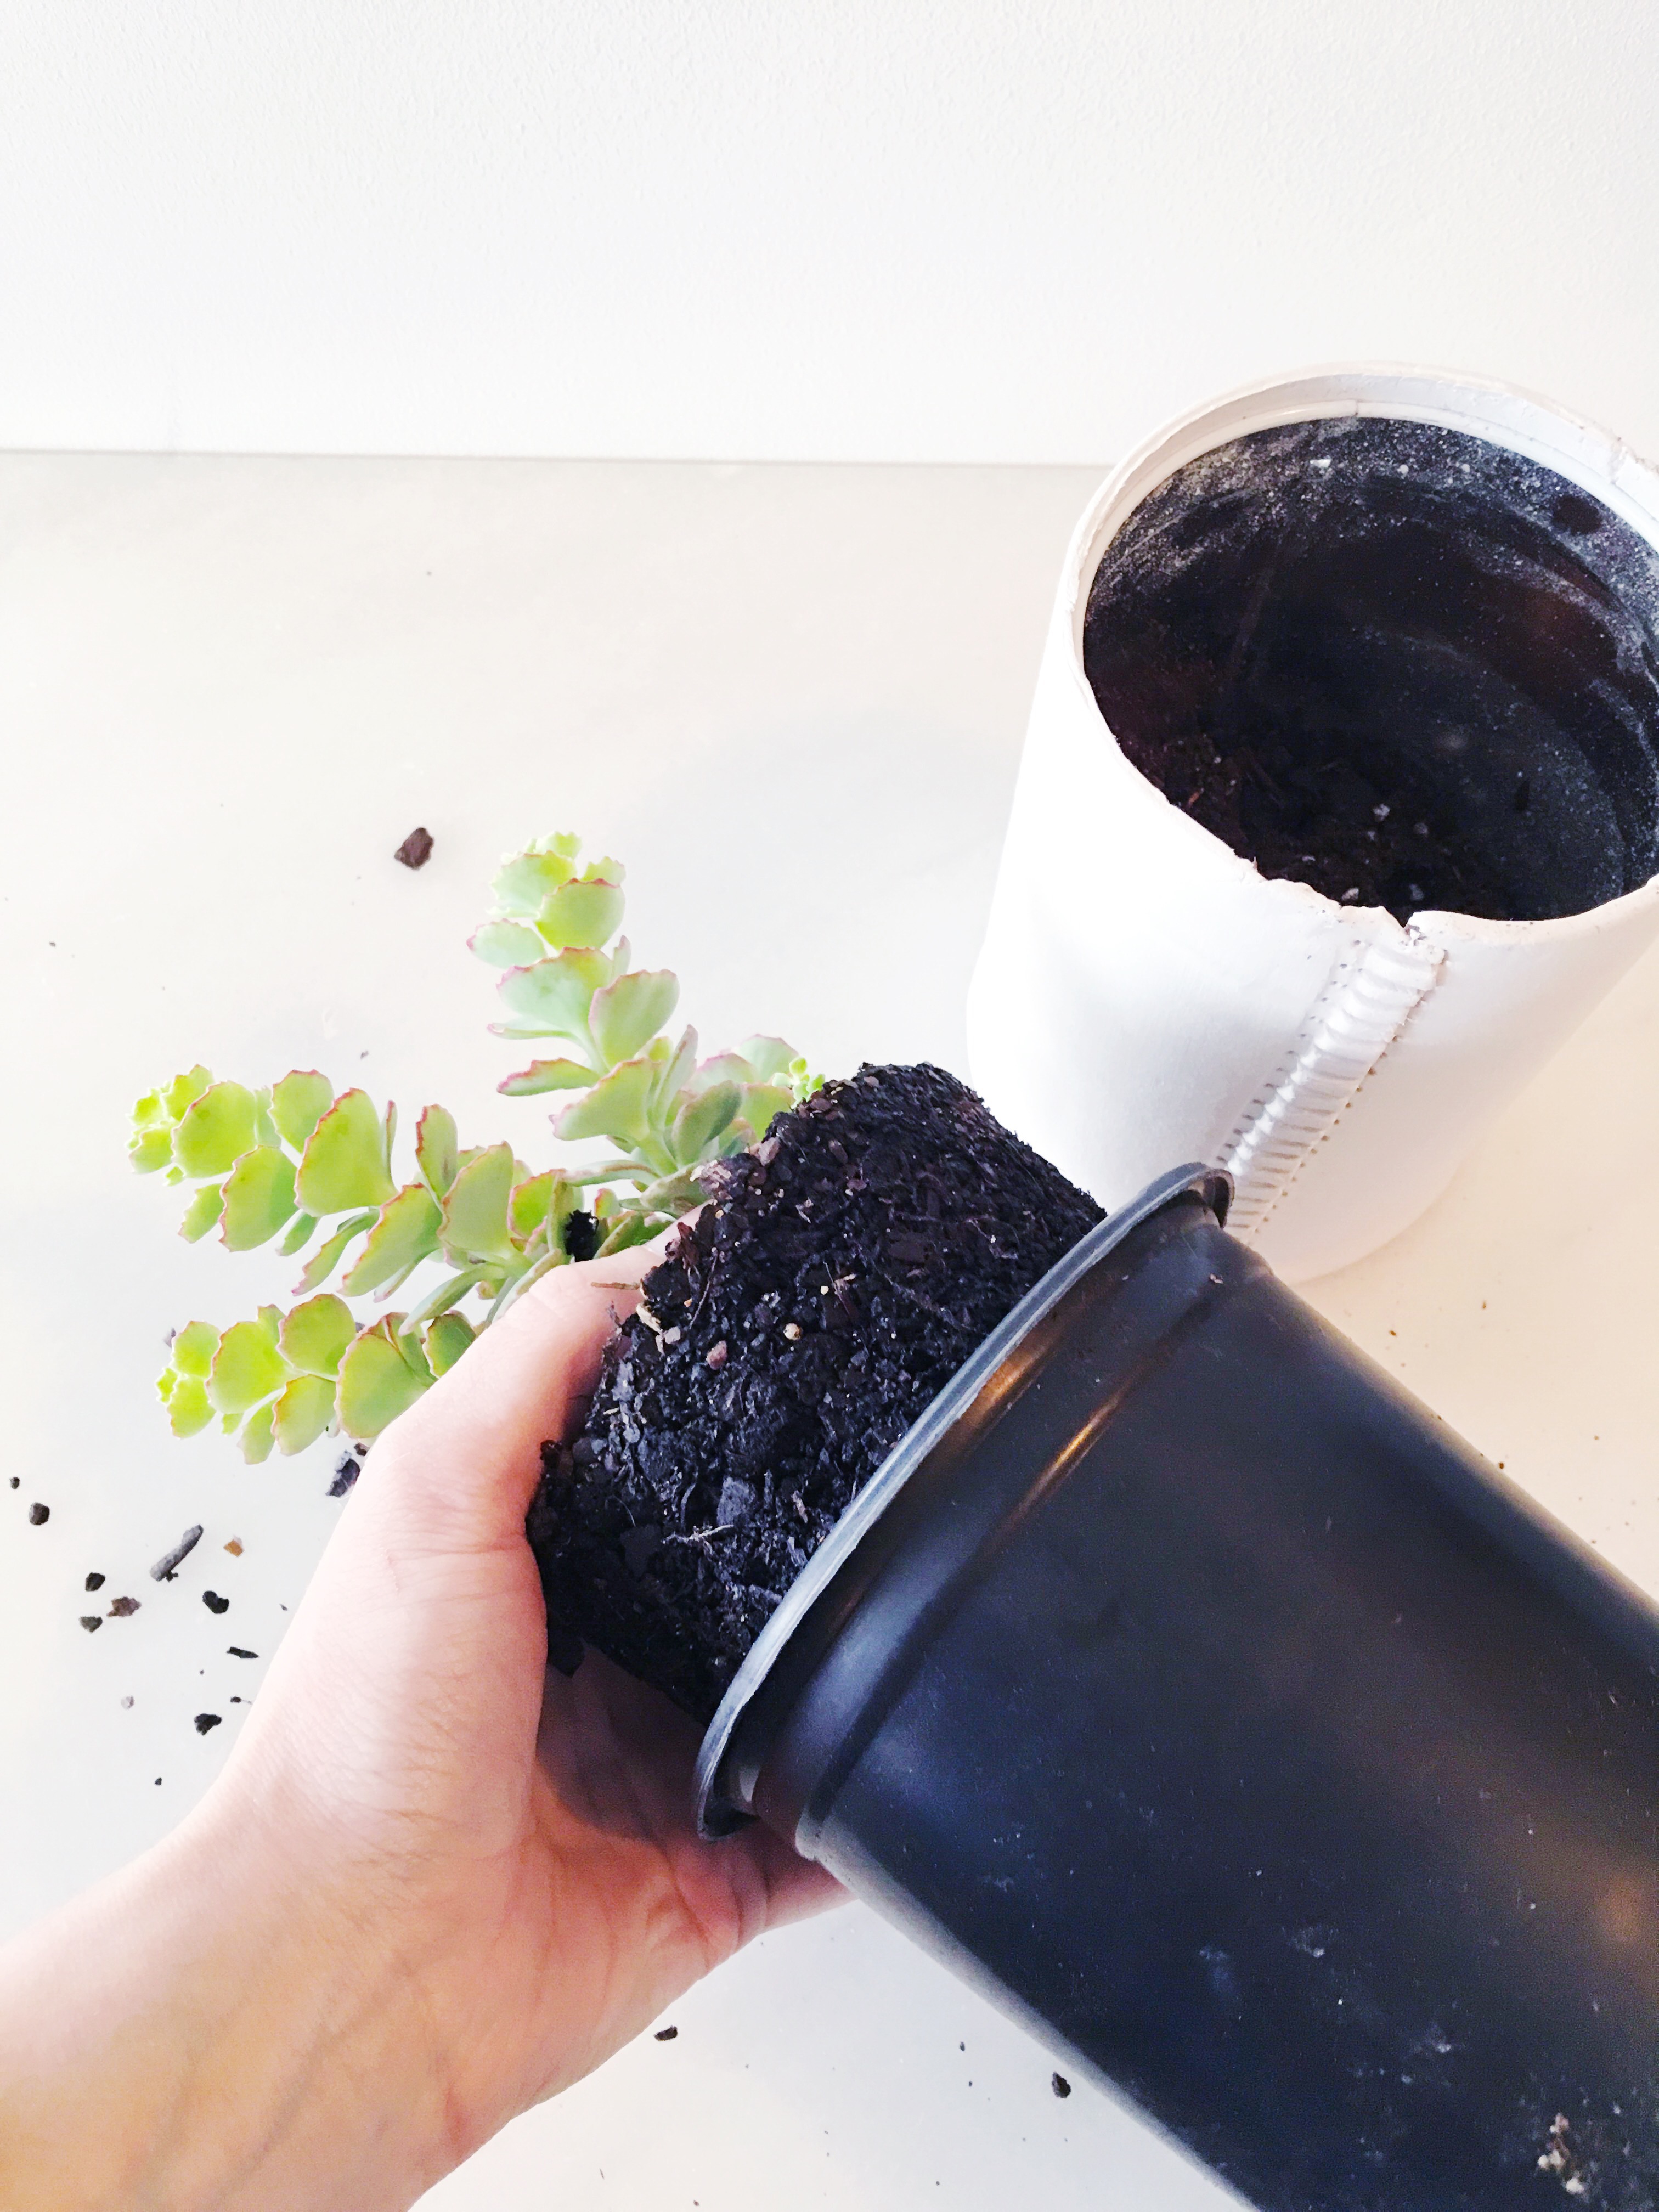 Step 20: Place your plant inside your new planter and press gently to compact everything inside. Water if dry.
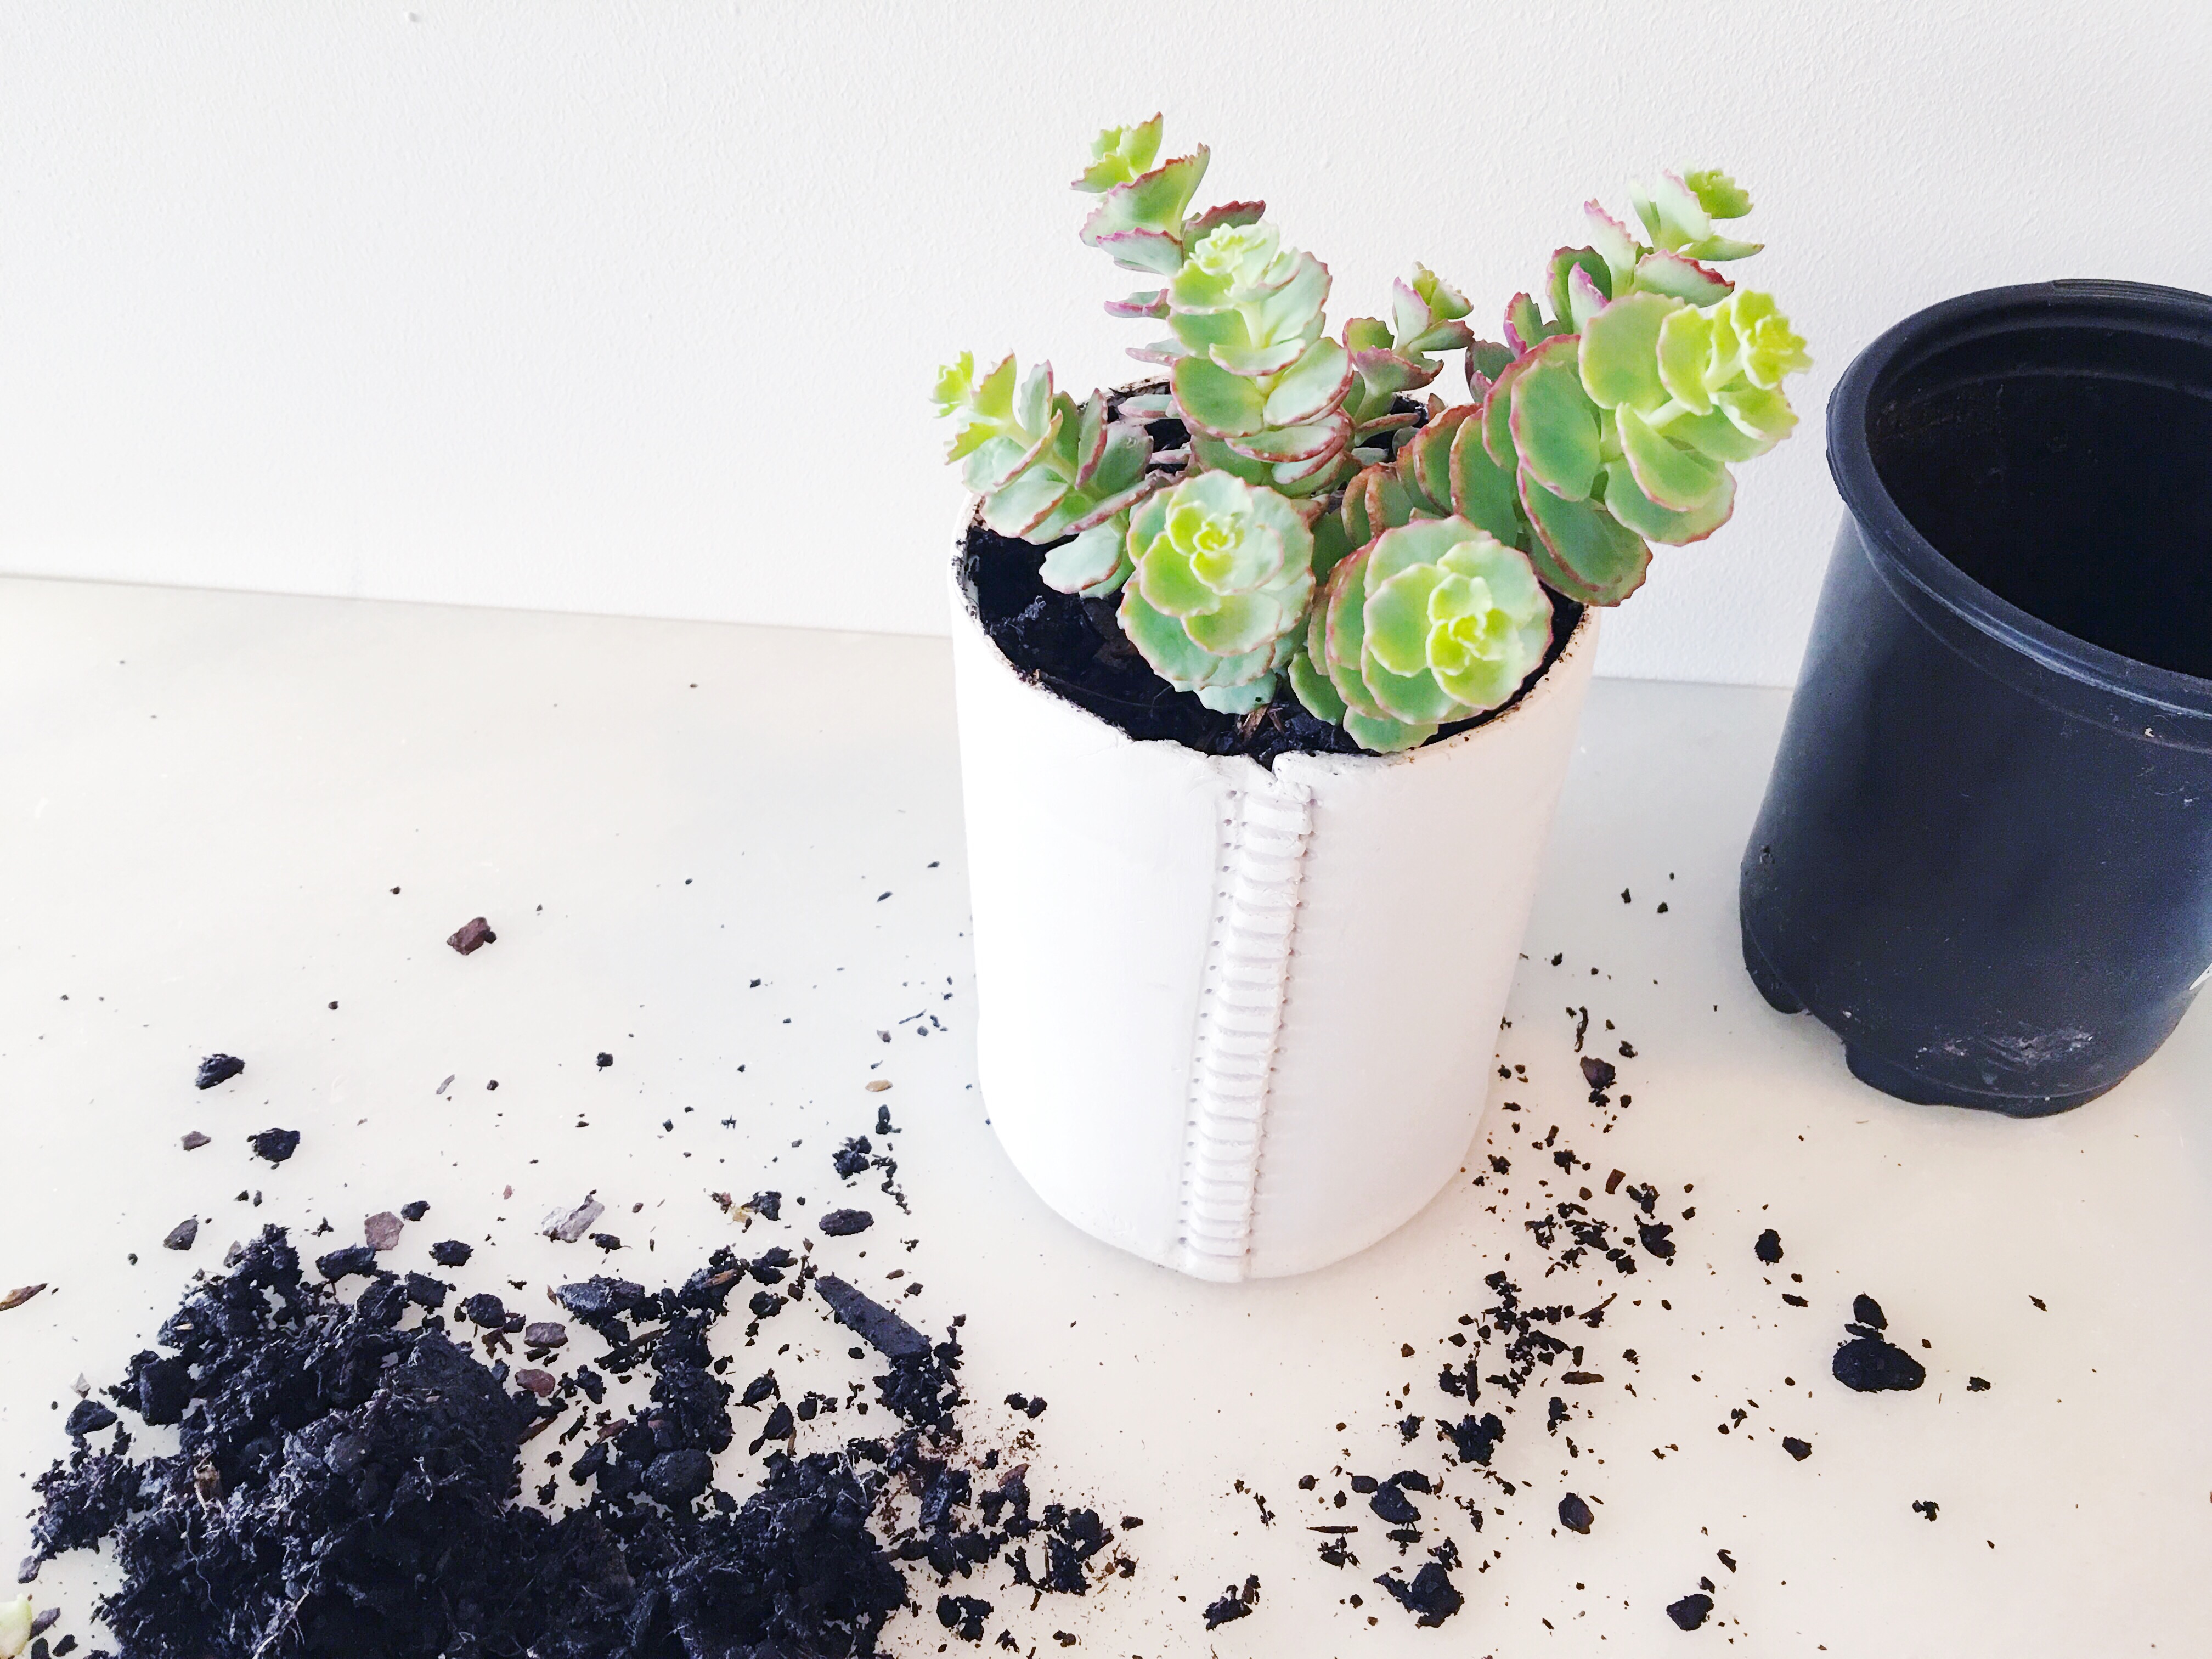 That’s it! I know it seems like a lot of steps, but I’m just being thorough. This took me a total of an hour and a half of active time. Now you have a brand new, unique planter to add a little life to any corner of your home!
 I really love how this turned out. It looks ever so much more interesting than the average planter, and it’s nice to know how easy it is to do it yourself! A word of caution though, be super careful when watering your plant. You don’t want to get any part of the clay wet. As long as your plant is only coming up to the interior rim though, you should be fine. Or, better yet, get a succulent that barely requires any watering at all and save yourself the headache! What do you think of the faux-sew effect? Are you as into it as I am? I’d love to see pics if anyone tries this out!
Sew pleased – Cassie
